> ## Documentation Index
> Fetch the complete documentation index at: https://docs.dentolize.com/llms.txt
> Use this file to discover all available pages before exploring further.
# Income
> Record money the clinic receives outside patient invoices, like course fees, rent or sales.
Patient payments are recorded on invoices. Use **Income** for other money the clinic receives, for example course fees, renting out a room, or selling materials.
## 📋 The income list
Go to **Finances → Income**:
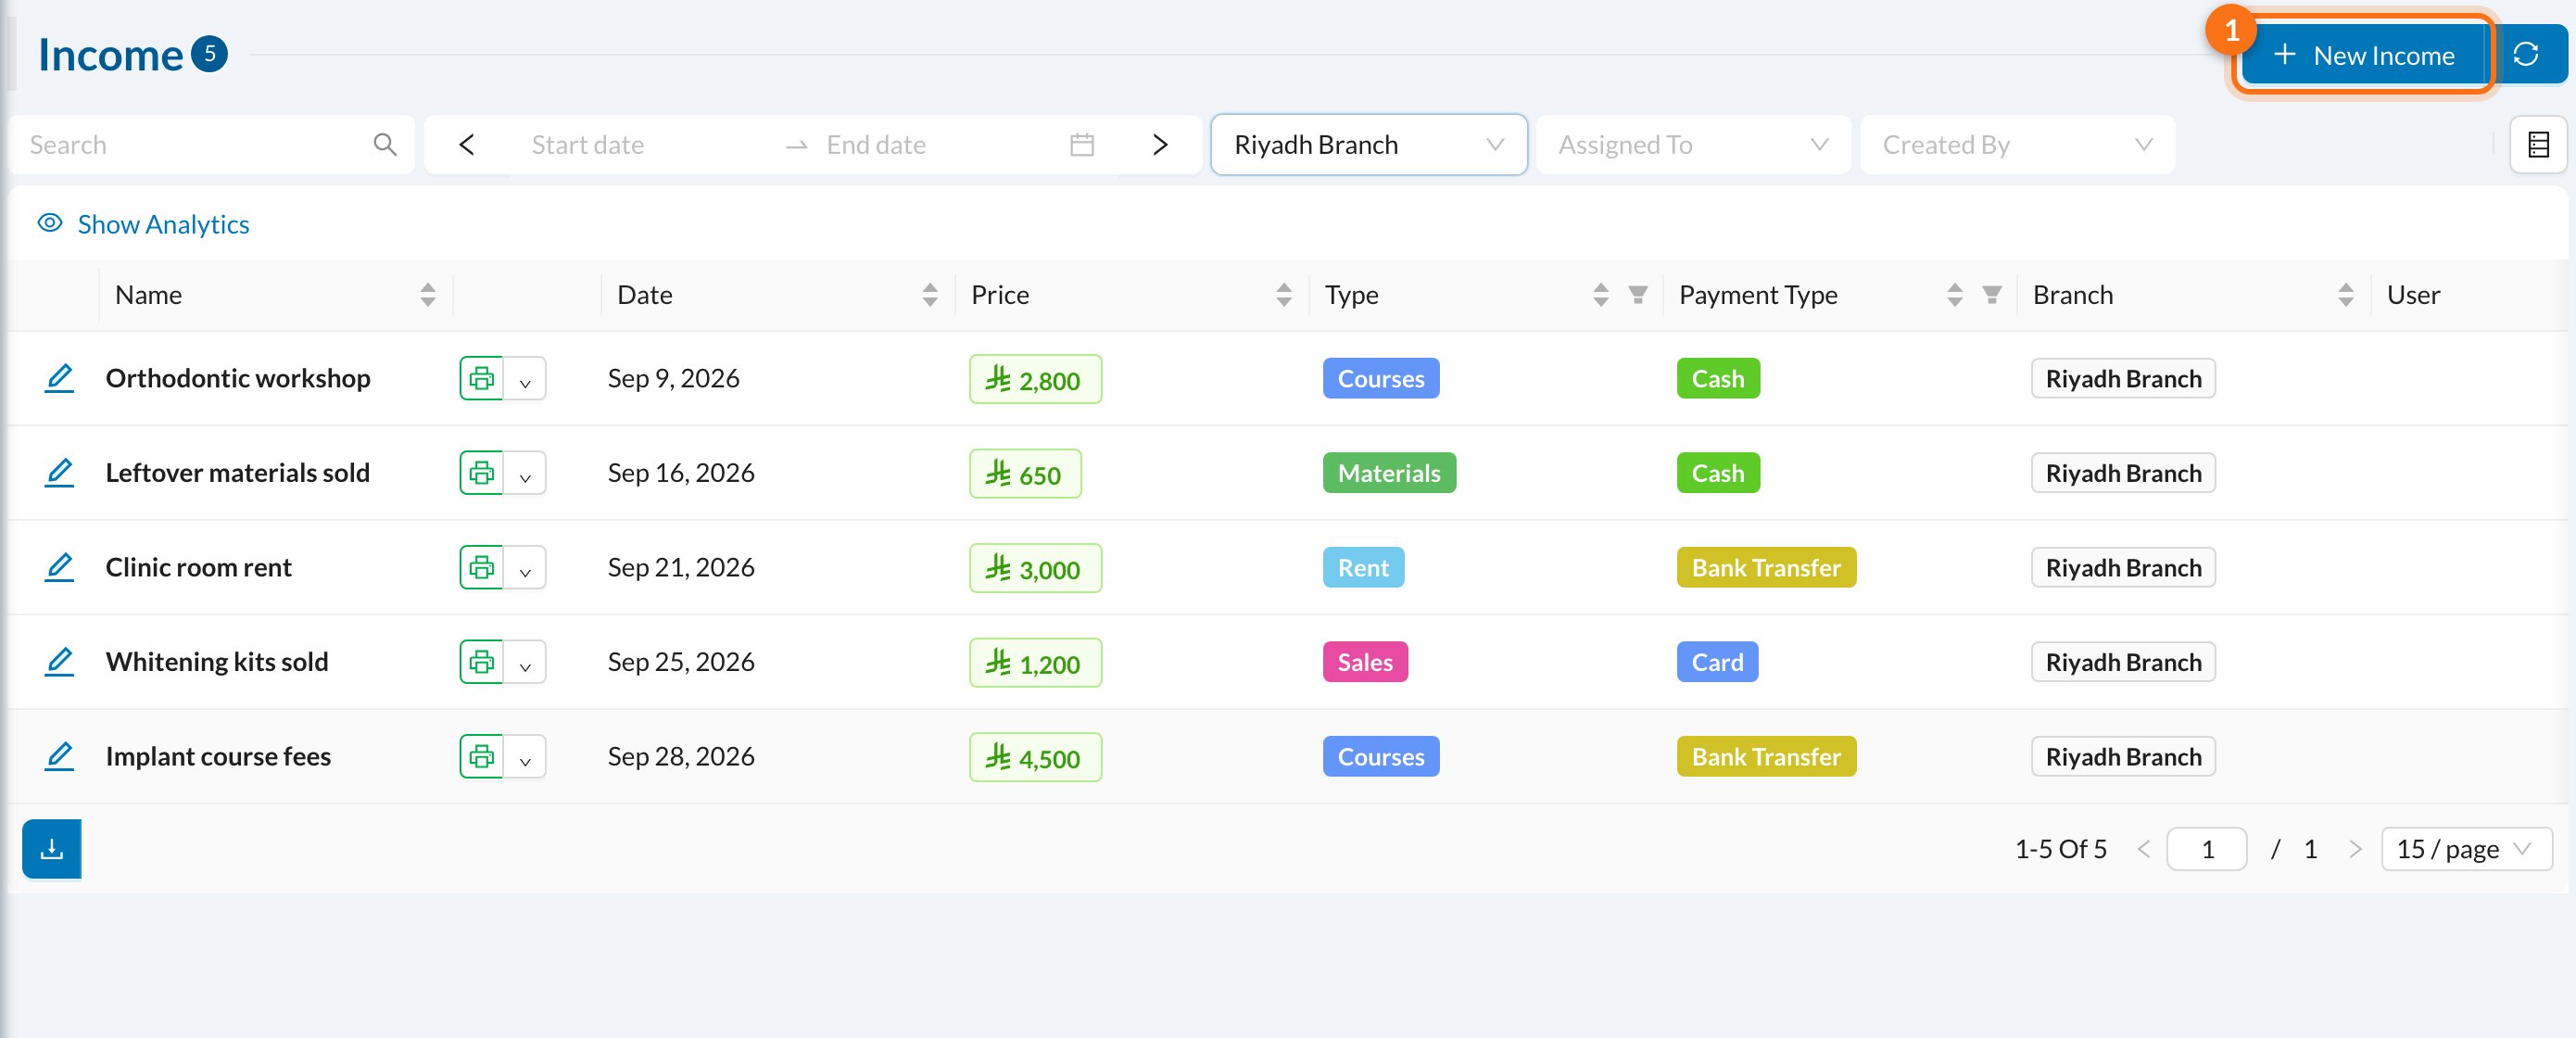 Filter by date, branch or user. **Show Analytics** shows the total for each income type.
## ➕ Add an income
Click **New Income** (1):
Filter by date, branch or user. **Show Analytics** shows the total for each income type.
## ➕ Add an income
Click **New Income** (1):
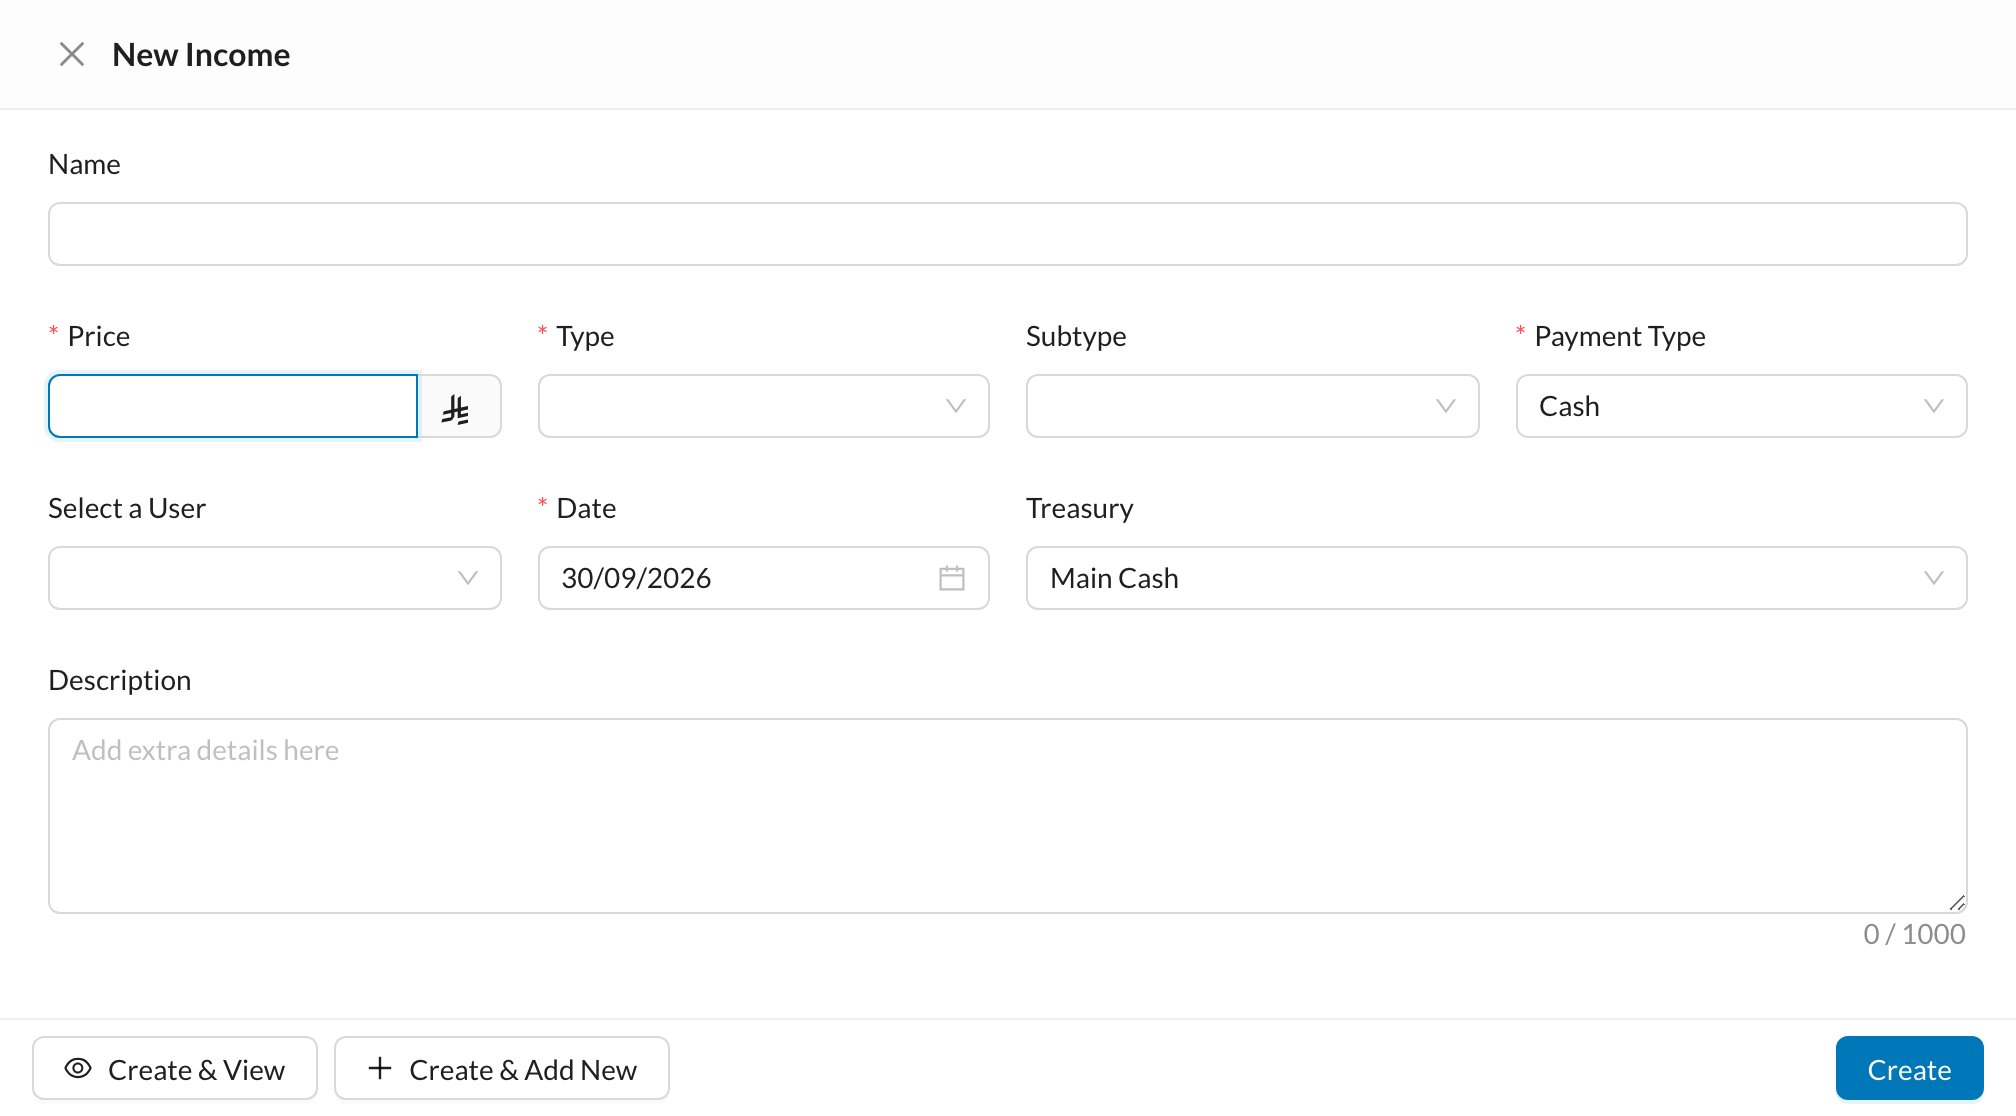 1. Enter a **Name** and the **Price** (the amount received).
2. Choose the **Type** and, if needed, the **Subtype**. Income types are set in [Clinic → Types](/en/setup-settings/basic-branch-settings).
3. Choose the **Payment Type** and check the **Date**.
4. Check the **Treasury** the money goes into.
5. Click **Create**.
Some incomes are created for you: selling items from inventory (a **Sell** order), and refunds of expense payments.
1. Enter a **Name** and the **Price** (the amount received).
2. Choose the **Type** and, if needed, the **Subtype**. Income types are set in [Clinic → Types](/en/setup-settings/basic-branch-settings).
3. Choose the **Payment Type** and check the **Date**.
4. Check the **Treasury** the money goes into.
5. Click **Create**.
Some incomes are created for you: selling items from inventory (a **Sell** order), and refunds of expense payments.