

Every user records their own attendance: Start when you arrive and End when you leave. Managers can then see everyone’s hours in the attendance log.
▶️ Start your shift
1
Click the clock icon
Click the clock (1) in the top bar. It’s red when you haven’t started yet.
2
Click Start
Click Start (2). To attach a photo of yourself, click the camera button next to it instead.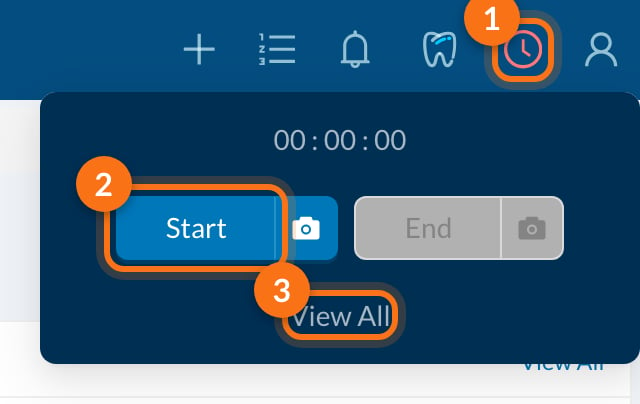
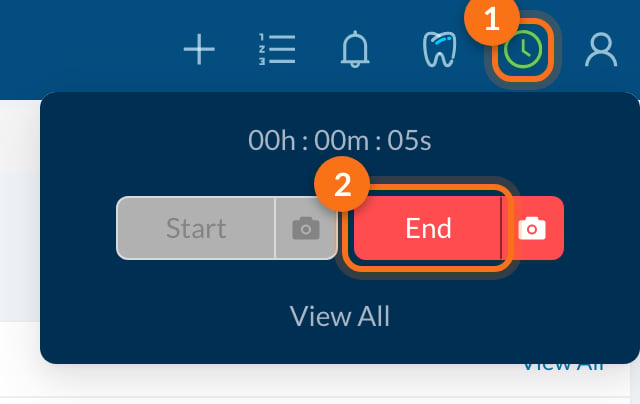
⏹️ End your shift
Click the green clock, then End (2). The timer stops and your attendance record is saved.From the mobile app
Tap the clock icon on the home screen, then Start or Start with Screenshot. The app also records your location, which is used to mark the record as Approved when you’re at the clinic (see below).📋 Attendance log
Click View All (3) in the clock menu, or go to Logs → Attendance, to see the records.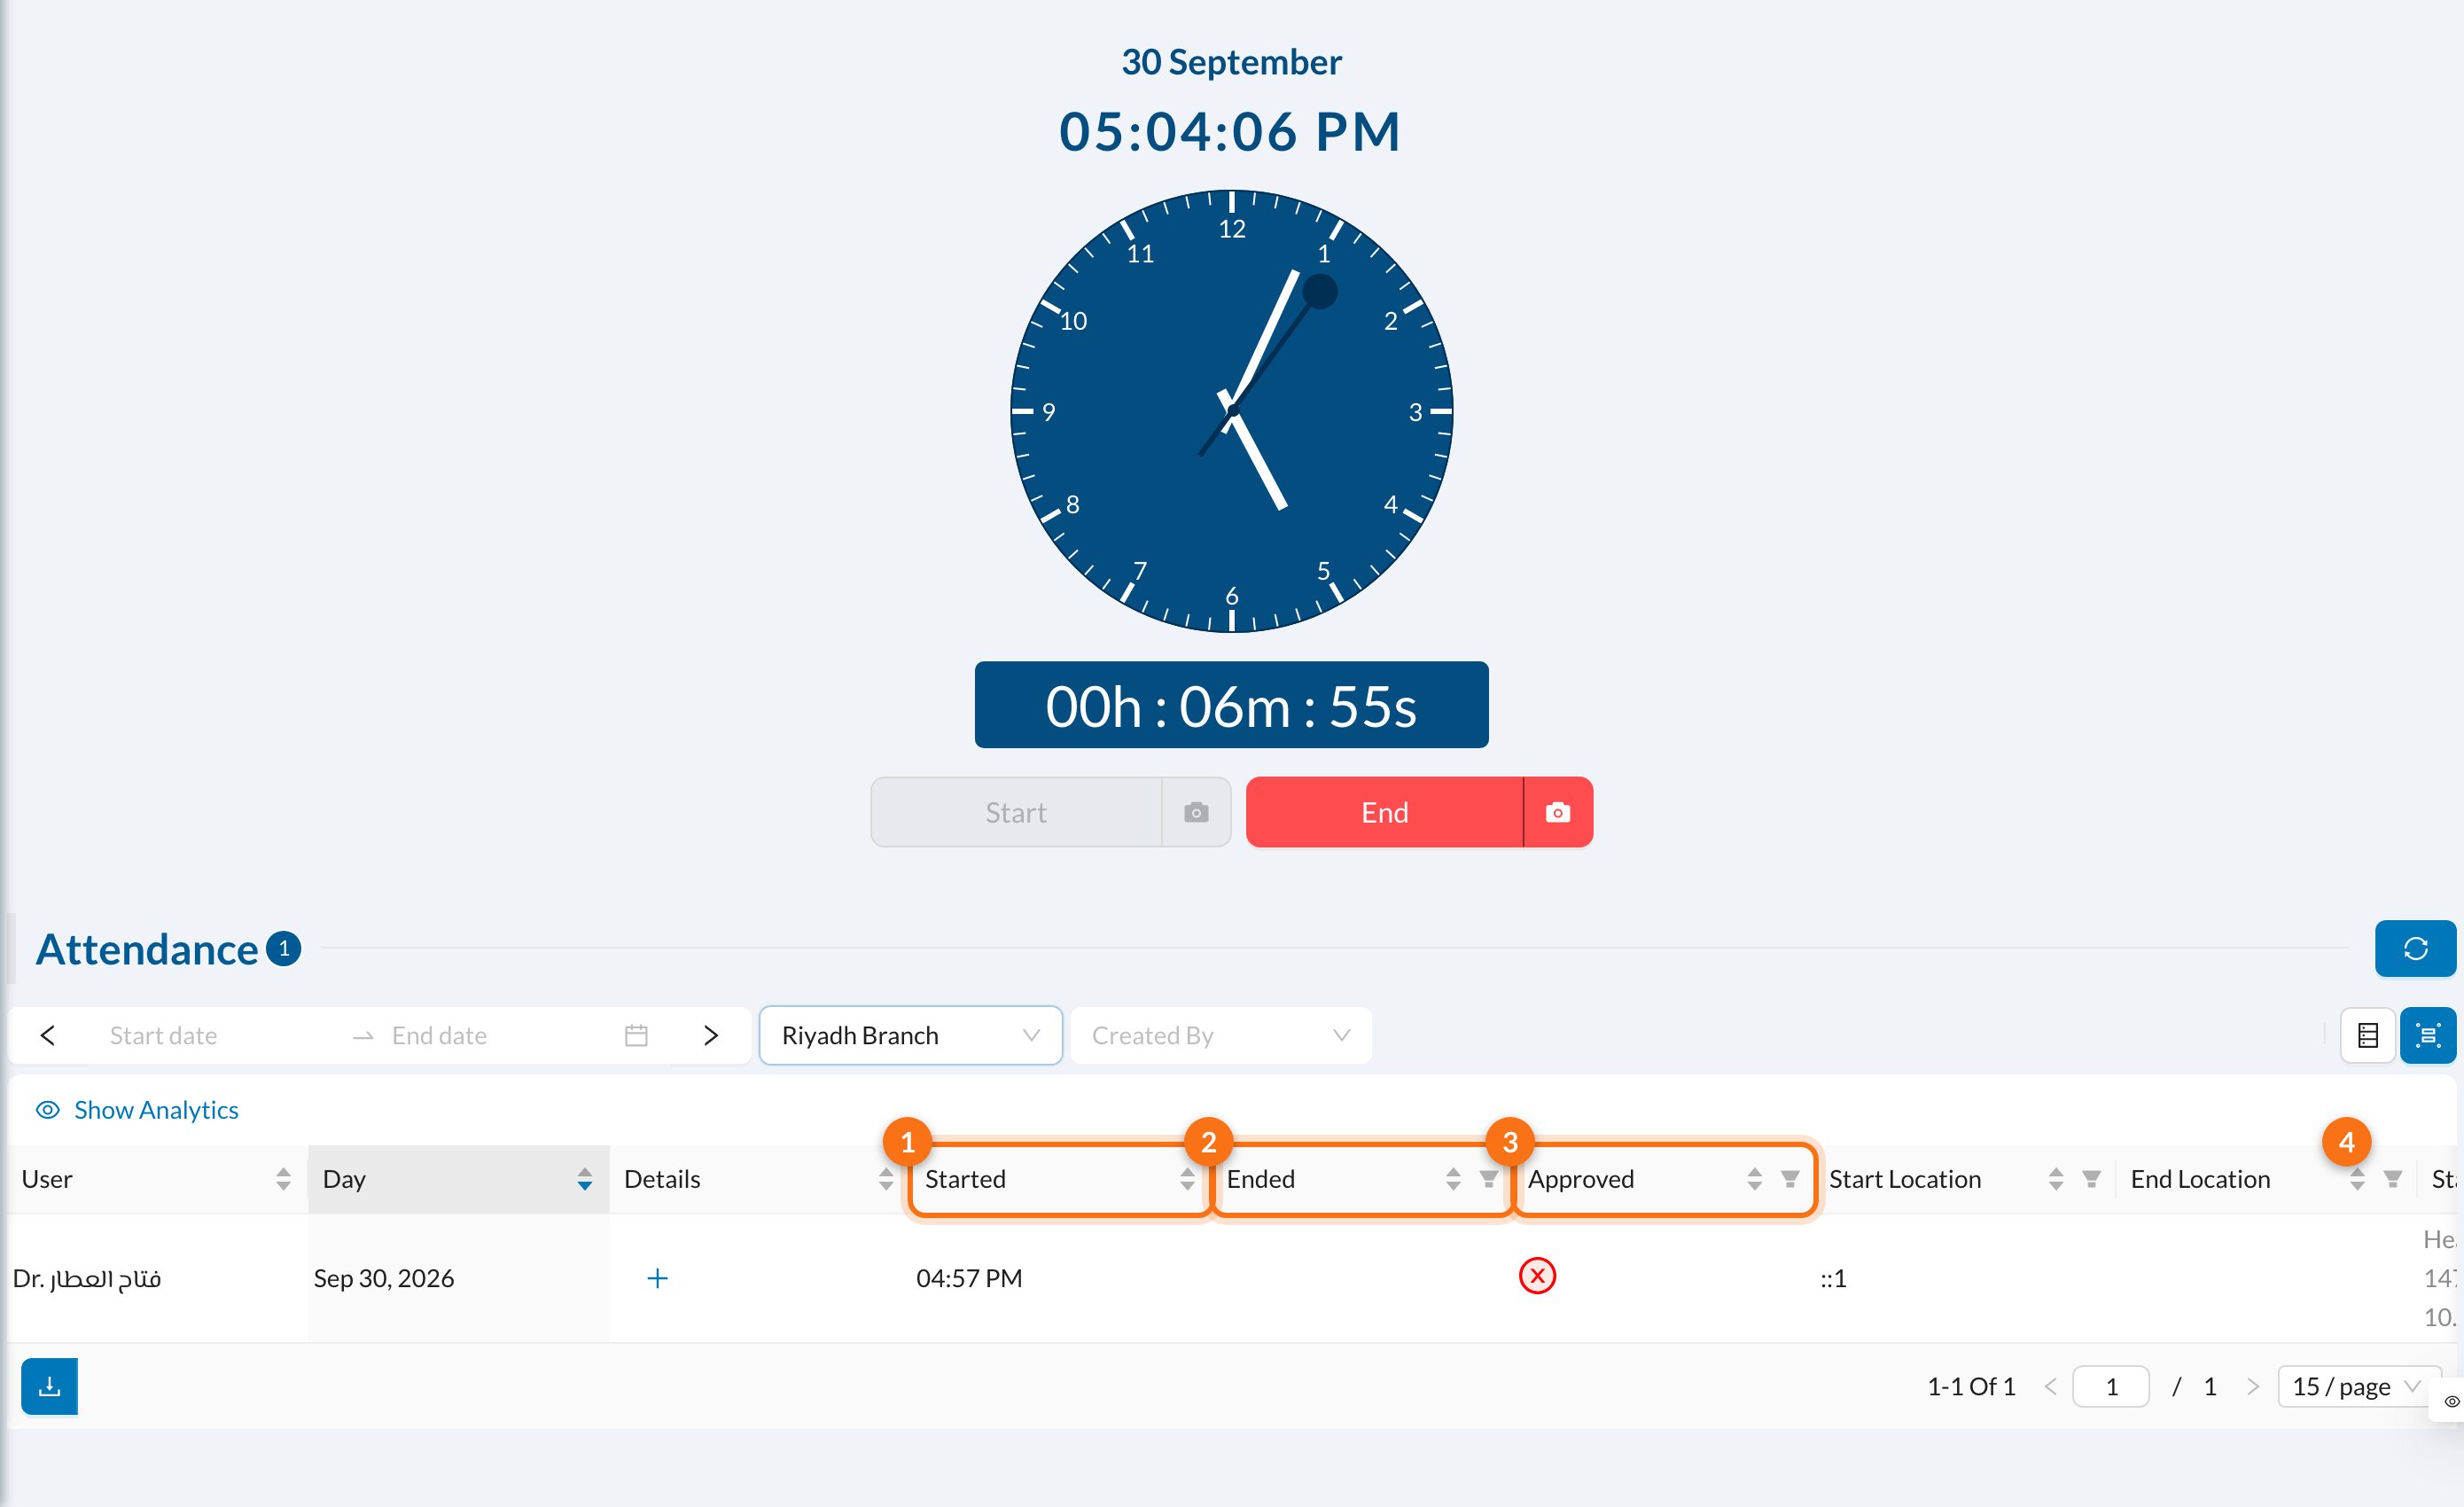
- Started (1) and Ended (2): the start and end time of each shift.
- Approved (3): green when both the start and the end were recorded from the mobile app within an accepted location, red otherwise.
- Duration (4): the length of the shift.
- Details: add a note to a record, for example why a shift was longer.
- Start Device / End Device: the device used. A camera icon shows the photo, if one was taken.
You see only your own records unless you have permission to view users. Times can’t be edited. A wrong record can only be deleted, by a user with the Delete attendance permission, and deleting also removes its photo.
⚙️ Settings (owner or admin)
Accepted locations
Go to Settings → Clinic → Attendance.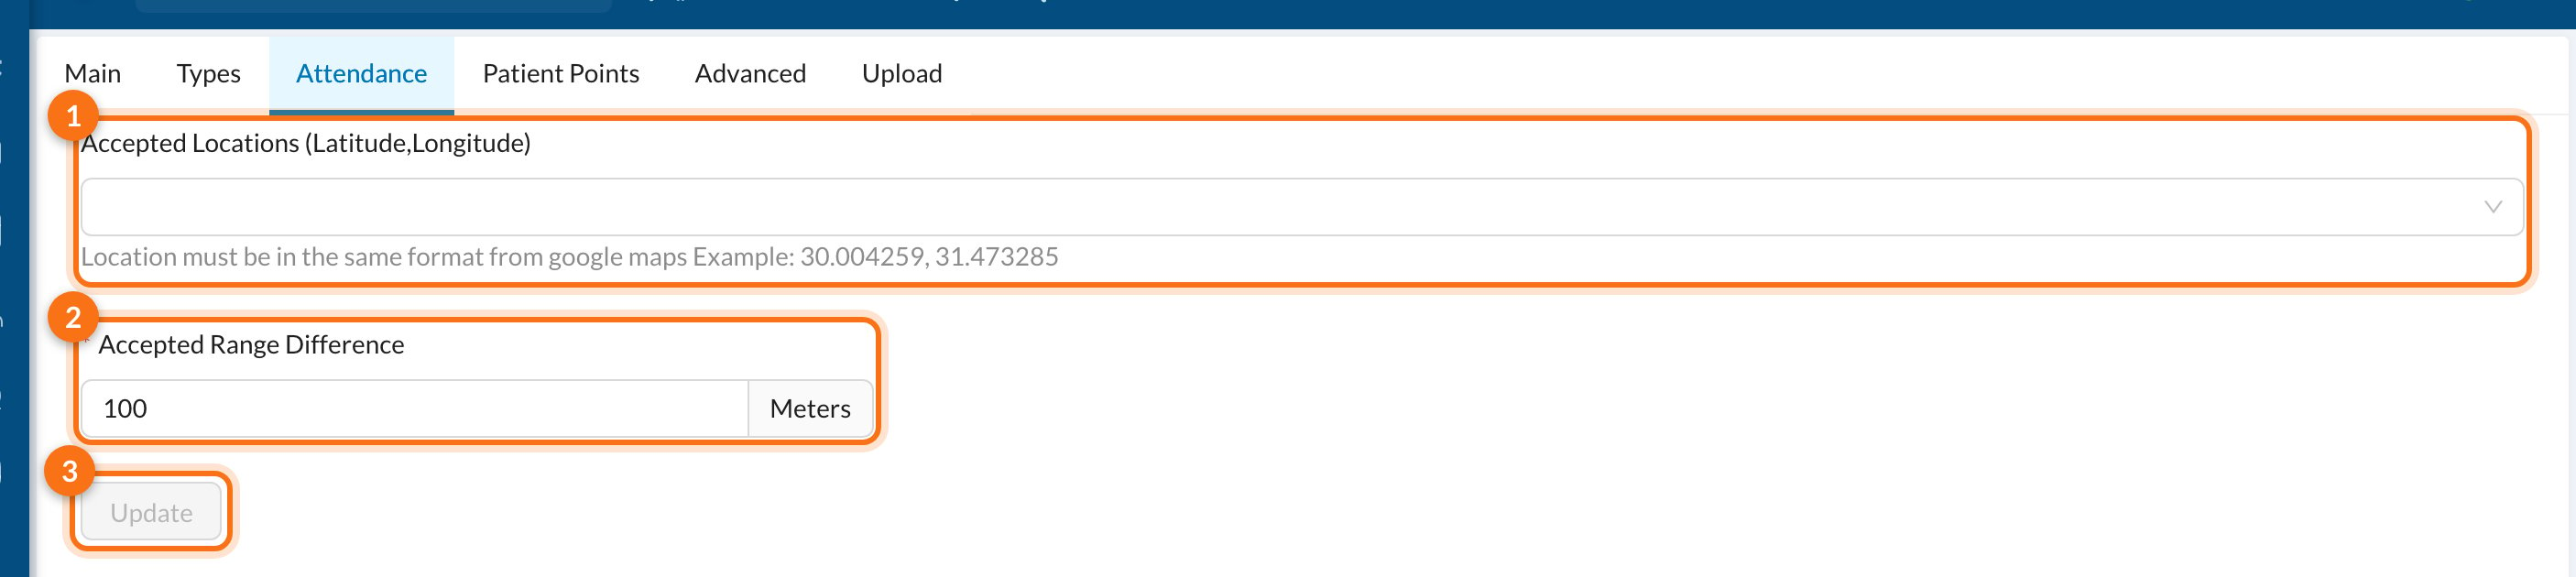
- Accepted Locations: paste the clinic’s coordinates from Google Maps (for example
24.713552, 46.675296) and press Enter. You can add several locations. - Accepted Range Difference: how far from the location, in meters (up to 100), still counts as at the clinic.
- Click Update.
The location doesn’t stop anyone from clocking in. It only decides whether a record is shown as Approved. Clocking in from the web app never sends a location, so web records are never approved.
Per-user options
In Settings → Users, edit a user to set:- Show Attendance Start: show the attendance window right after the user logs in, until they start.
- Require Attendance Screenshot: the user must take a photo to start and end.
❓ FAQ
I forgot to click End yesterday
I forgot to click End yesterday
The shift is still open and keeps counting. Click End now, then ask a manager to add a note to the record, or to delete it if it’s wrong.
I see "There is open attendances"
I see "There is open attendances"
You’re already clocked in, or the request failed. Refresh the page: if the clock is green, click End first.
The camera doesn't open
The camera doesn't open
Allow camera access for the site in your browser (or for the app on your phone), then try again.
Is attendance used to calculate salaries?
Is attendance used to calculate salaries?
No. Attendance hours are for information only and aren’t linked to salaries.