

The Dashboard is the first page you see after logging in. It shows the day’s appointments and the invoices waiting for payment, so reception and doctors can follow the day from one screen.
🧭 The top bar
The top bar is available on every page.
- Search Patients: type a name, phone number or file number to open a patient.
- + (Quick add): create a new patient, appointment, quick invoice, prescription, note, expense, lab order, task and more, from anywhere.
- Tasks: your to-do list, with a badge for open tasks.
- Notifications: notes, prescriptions and patient forms that need attention.
- Attendance clock: red when you haven’t started your shift, green when you have. See Attendance.
- User menu: your account settings, login sessions and Logout. See My user settings.
If your clinic works in more than one specialty, a tooth icon appears next to the clock to switch between the specialty charts.
📋 The side menu
Hover over the left side of the screen to open the menu. Depending on your permissions you’ll see: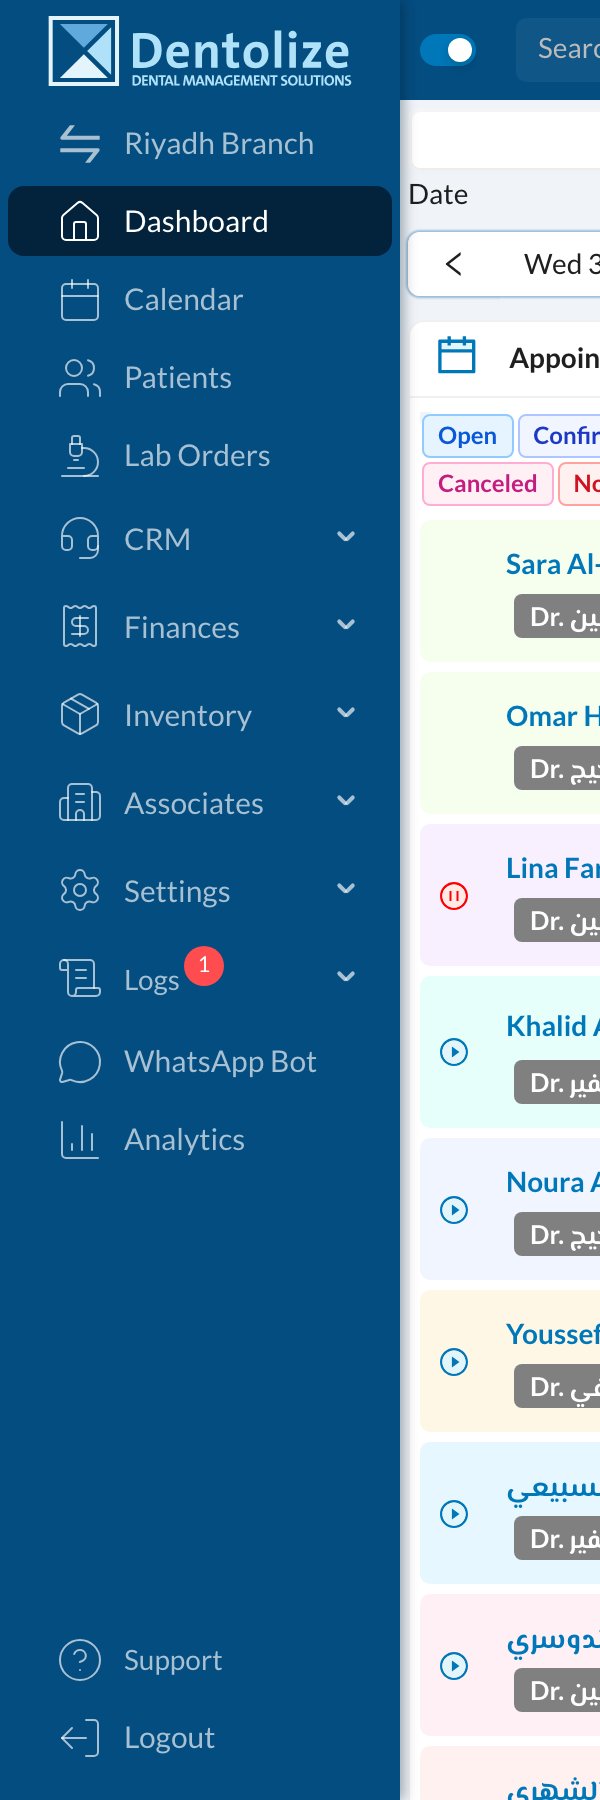
- Branch switcher (top): if you work in more than one branch, click it to switch branch. Dentolize remembers your choice on this computer.
- Dashboard, Calendar, Patients, Lab Orders, CRM, Finances, Inventory, Associates (labs, suppliers, insurance companies), Settings, Logs, WhatsApp Bot and Analytics.
- Support and Logout at the bottom.
🏠 The Dashboard page
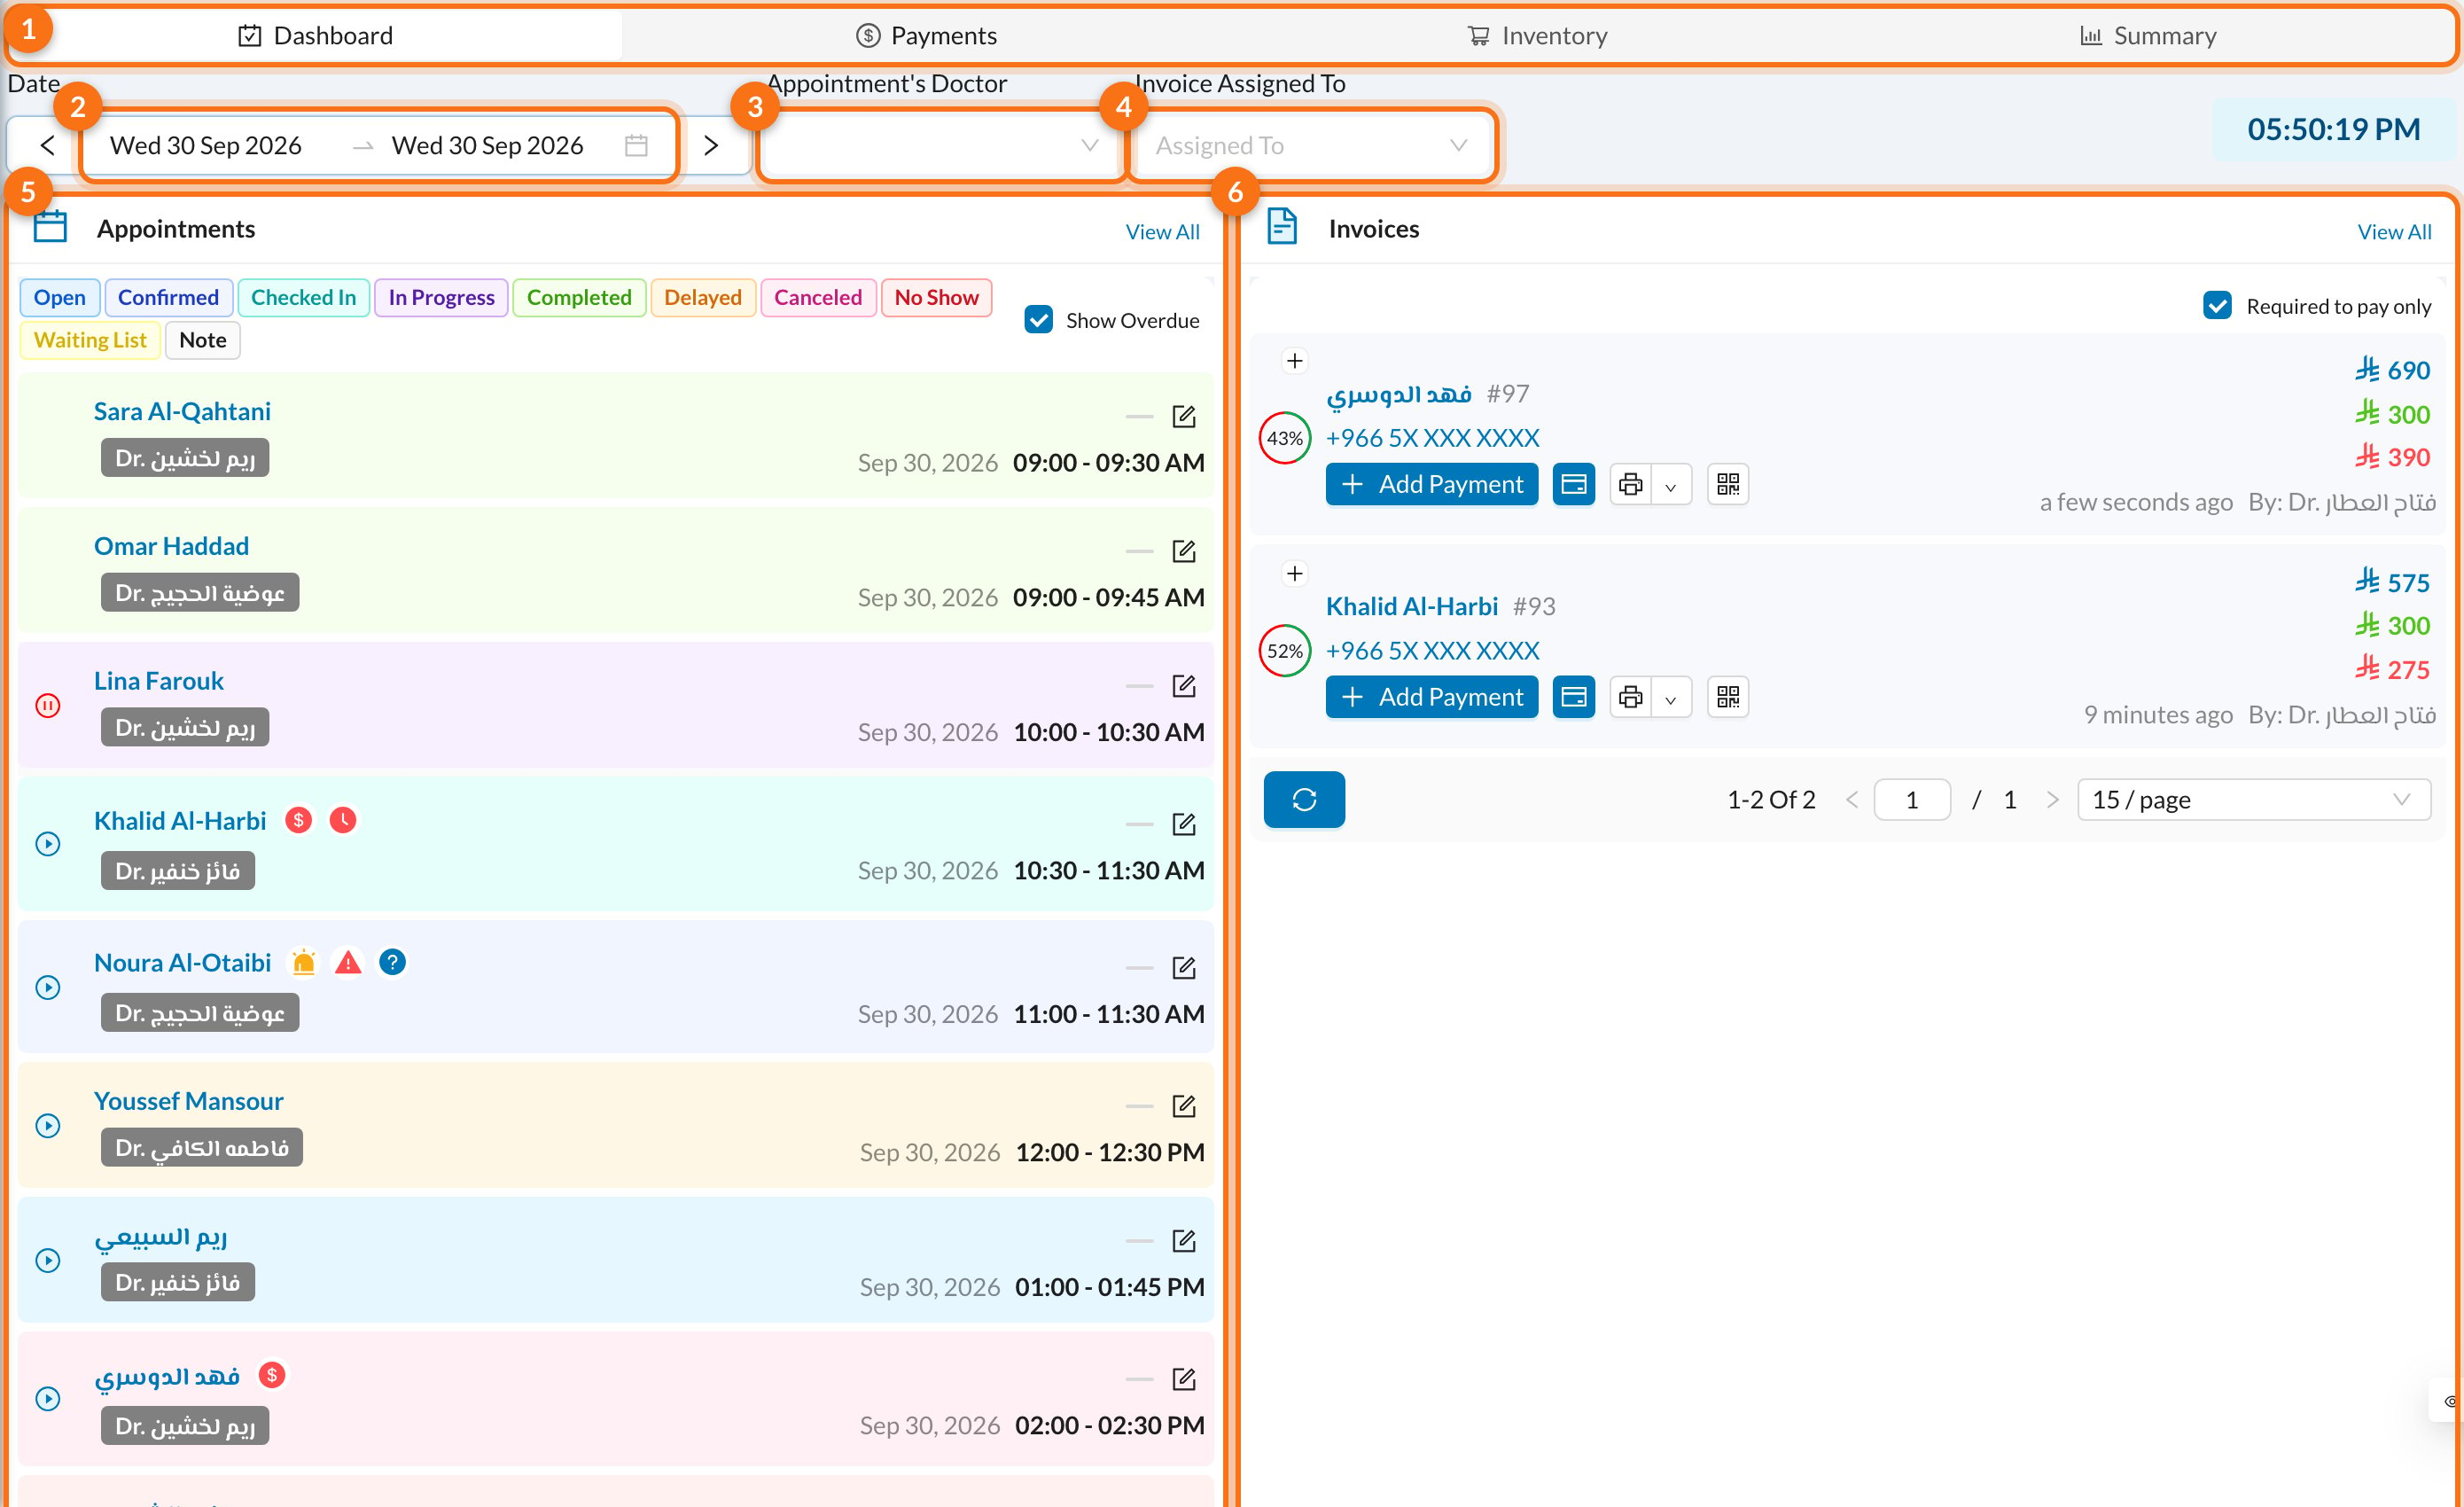
- Tabs: Dashboard (appointments and invoices), Payments (payments received), Inventory (stock alerts and orders) and Summary (the day in numbers, see Today’s summary). You only see the tabs your permissions allow.
- Date: today by default. Use the arrows to move a day, or pick a range such as This Week or This Month.
- Appointment’s Doctor: show only one doctor’s appointments. Doctors see their own appointments here by default.
- Invoice Assigned To: show only invoices assigned to a user.
- Appointments: the day’s appointments, in time order.
- Invoices: invoices that still need payment.
The date goes back to today every time you open the Dashboard. The Doctor filter only applies to appointments, and Invoice Assigned To only to invoices and payments.
Appointments
The colored tags at the top of the list are the appointment statuses. Click a tag to show only that status, and click again to remove the filter.
Show Overdue appears when you’re looking at today. Untick it to hide appointments whose time has already passed.
Each appointment row has:

- Start Session / End Session: starting marks the appointment In Progress and opens the patient’s chart. Ending marks it Completed.
- Patient name: opens the patient’s profile.
- Appointment menu: opens the full details and actions.
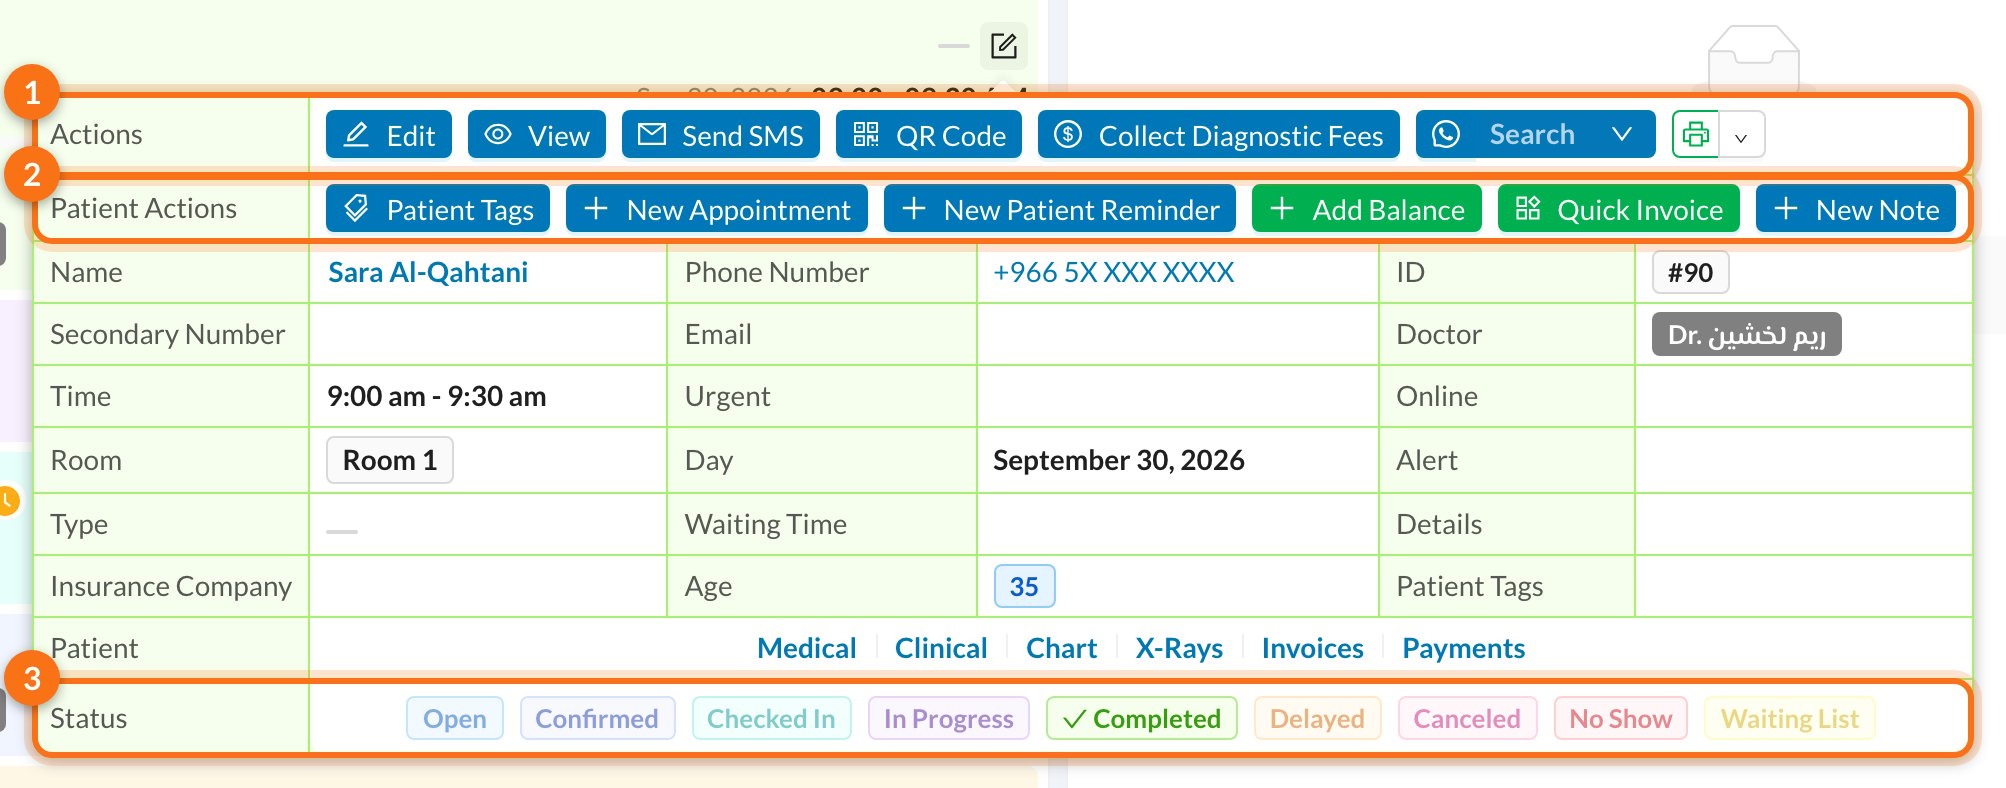
- Actions: edit or view the appointment, send an SMS, show the QR code, collect diagnostic fees, open WhatsApp, or print.
- Patient Actions: add tags, book a new appointment, add a patient reminder, add balance, create a quick invoice, or add a note.
- Status: click a status to change it. For example, click Checked In when the patient arrives. Choosing Canceled asks for a cancellation reason.
Invoices
The Invoices list shows invoices that still have an amount to pay. For each invoice you can Add Payment, create a payment link, or print. Click an invoice to open it.Required to pay only is ticked by default, so invoices with nothing left to pay are hidden. Untick it to see all of the day’s invoices. When you’re looking at a single day, the list also includes older unpaid invoices of the patients who have an appointment that day.