

🧾 Create an invoice
Invoices are created from the patient’s Chart. Select the procedures to invoice, then click Invoice at the bottom of the chart:
If you changed a price in the chart, the button shows Save and Invoice. When an insurance approval is still pending, the button shows Waiting Approval for Insurance and can’t be clicked yet.
1
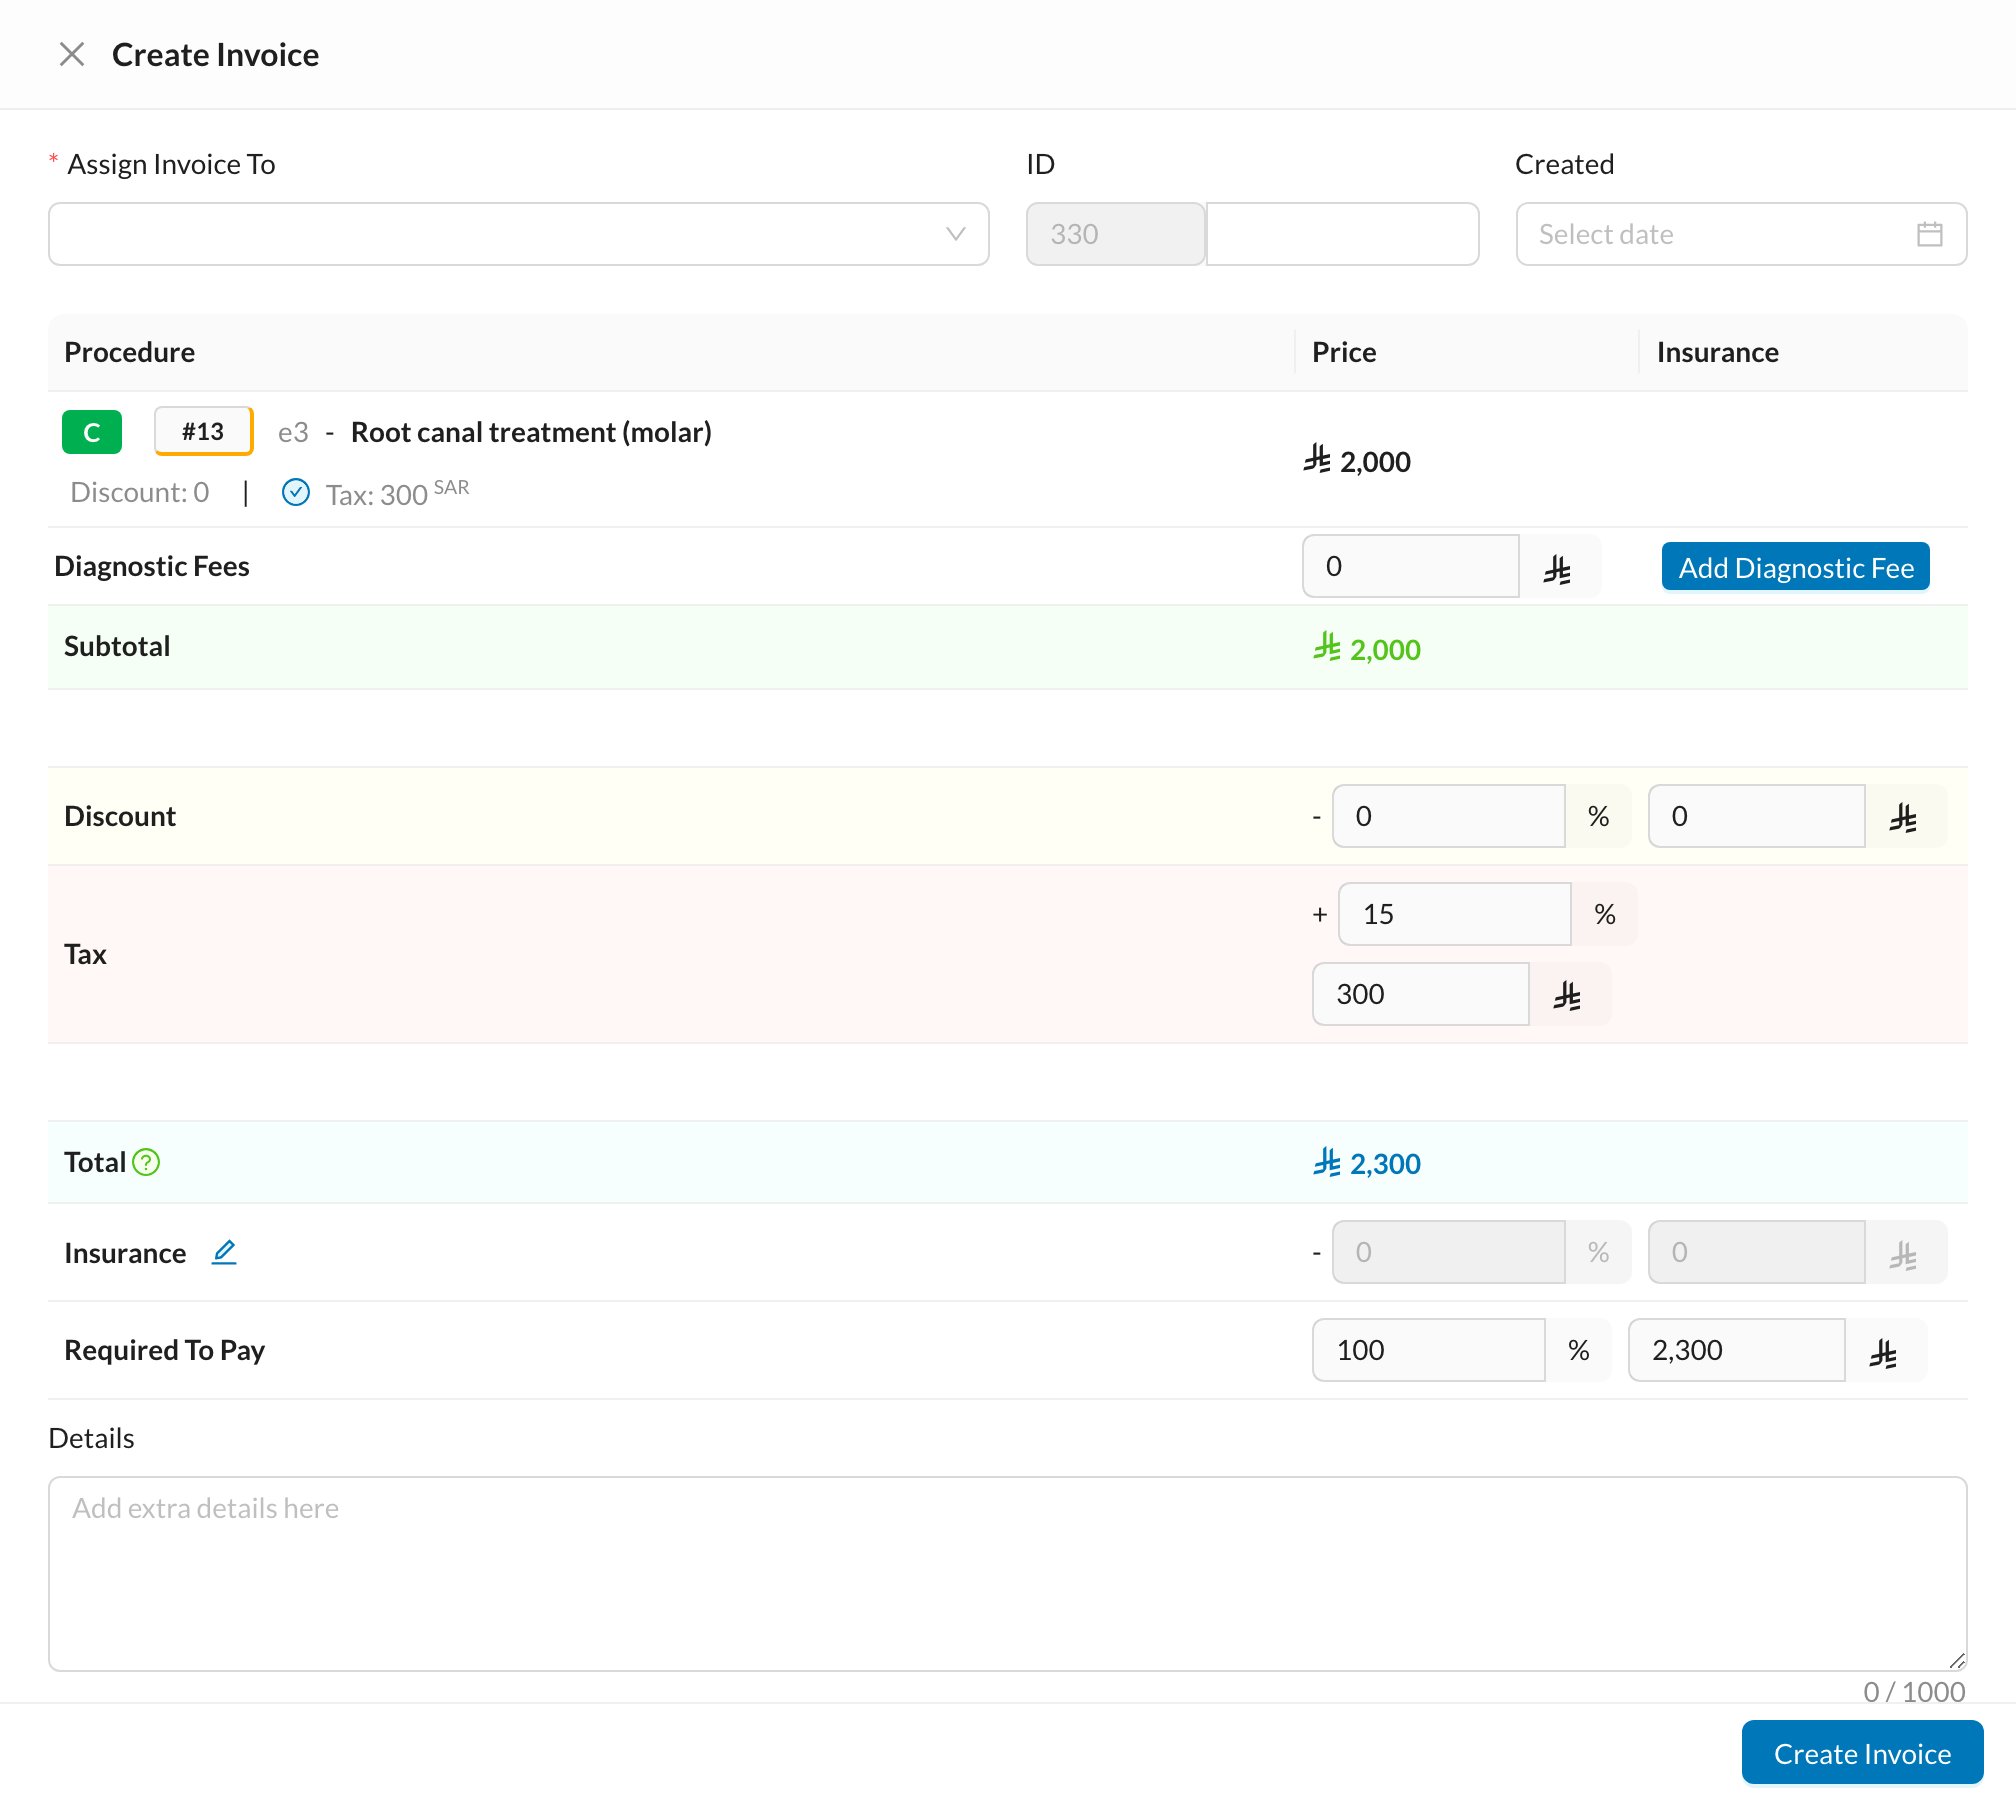
Check who the invoice is assigned to
Assign Invoice To is required. Check the Branch and Doctor too.
2
Check the procedures and fees
Each procedure shows its price and, for insured patients, whether insurance covers it. Click Add Diagnostic Fee to add a diagnostic fee.
3
Apply a discount and tax
Enter the Discount as a percentage or an amount. The Tax comes from your VAT settings. Each user can only give up to their maximum discount.
4
Check what the patient pays now
Insurance shows the insurance share. Required To Pay is what the patient must pay now; lower it to let the patient pay part now and the rest later.
5
Create the invoice
Click Create Invoice. If the patient is in an appointment, Invoice And End Session creates the invoice and marks the appointment completed.
📋 The invoices list
Go to Finances → Invoices: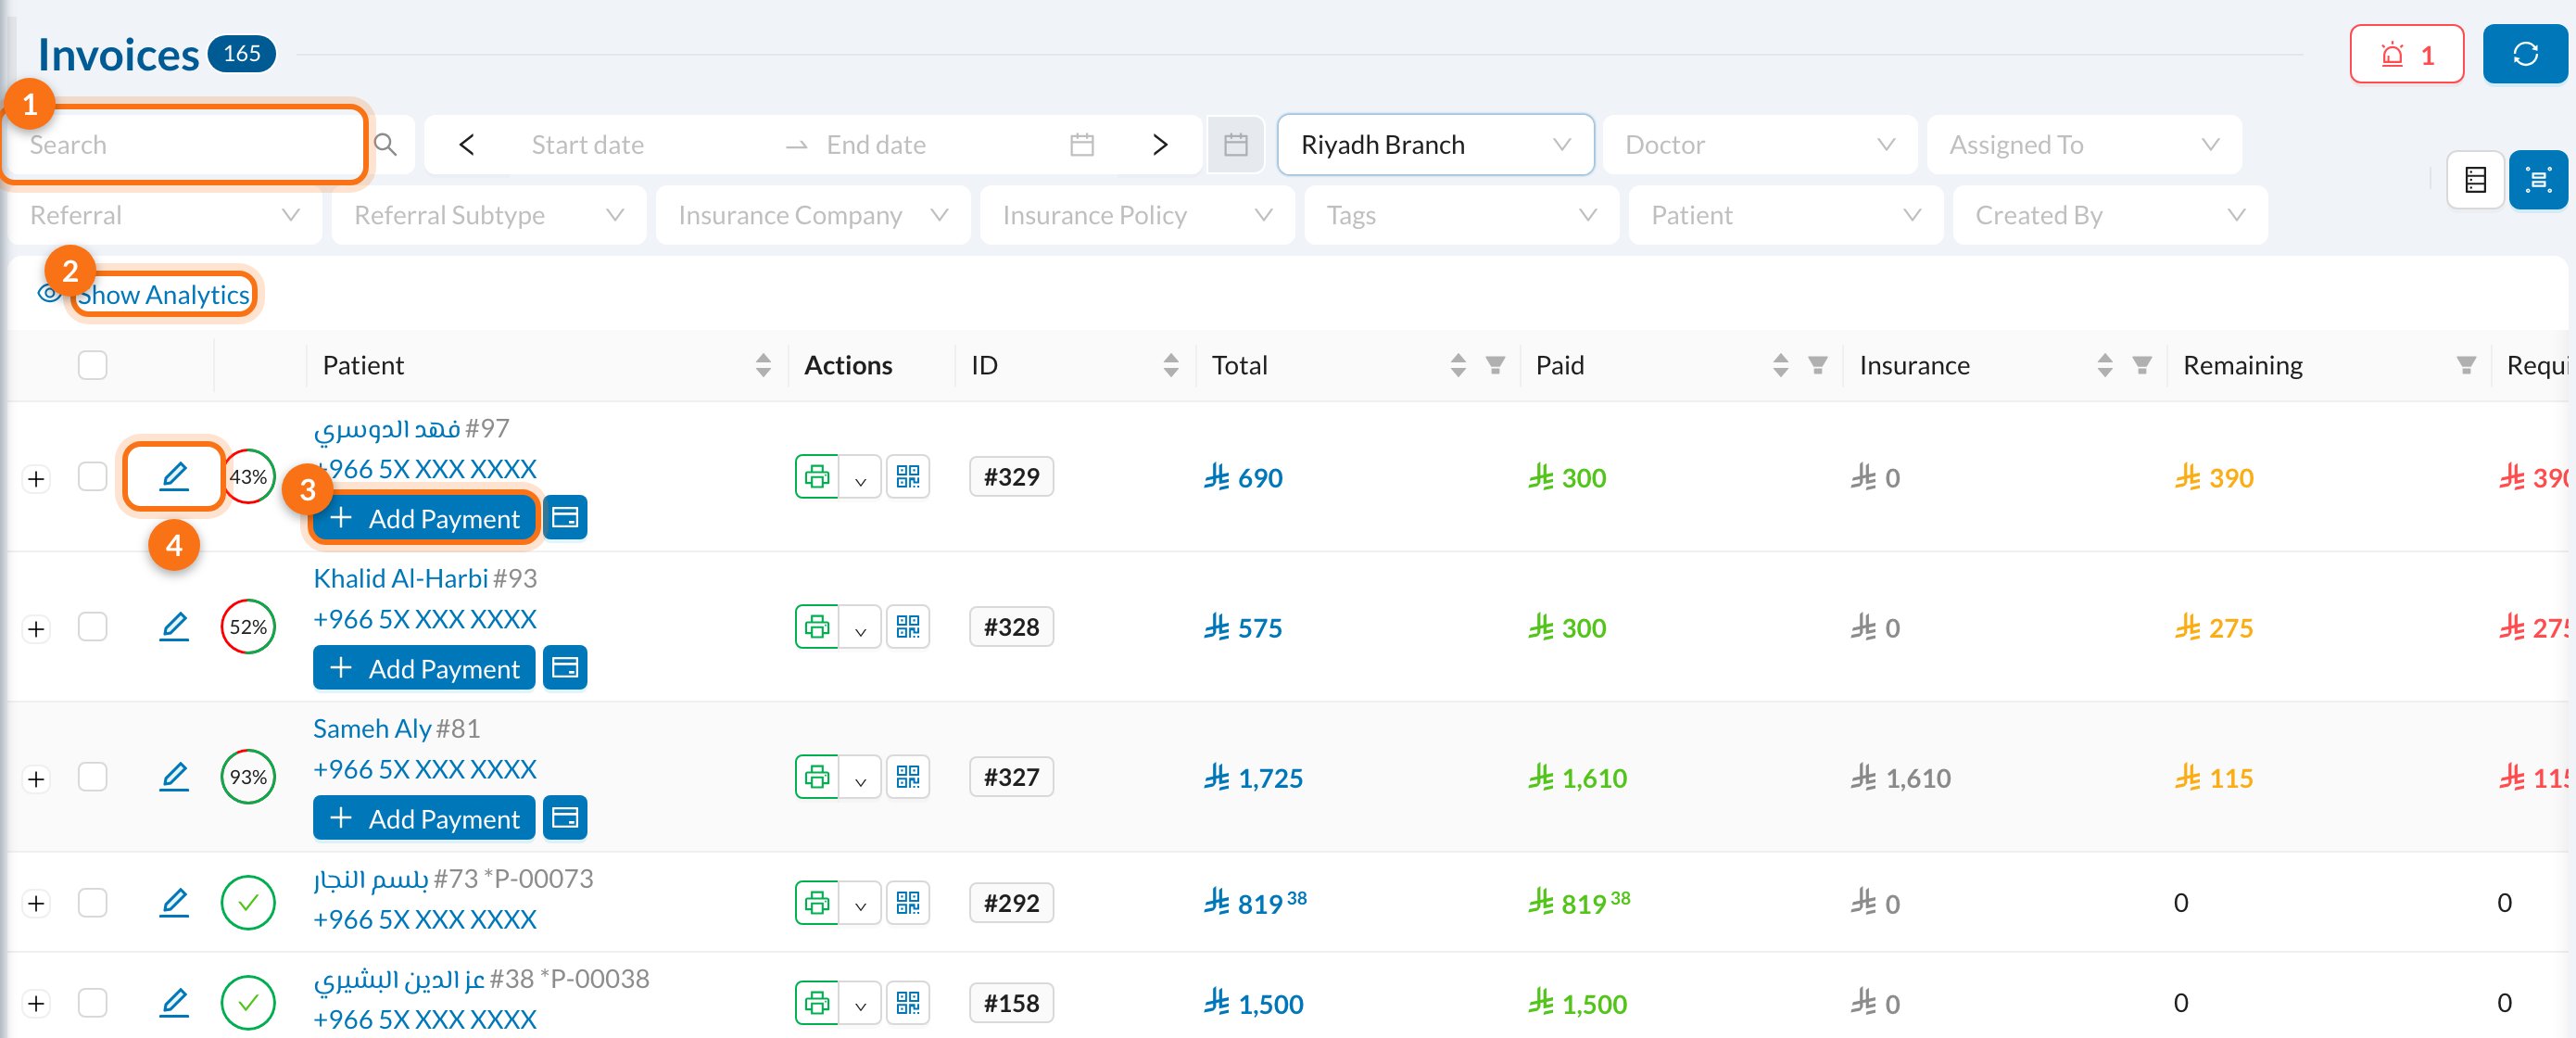
- Search and filters: filter by date, branch, doctor, patient, insurance company, referral, tags and more.
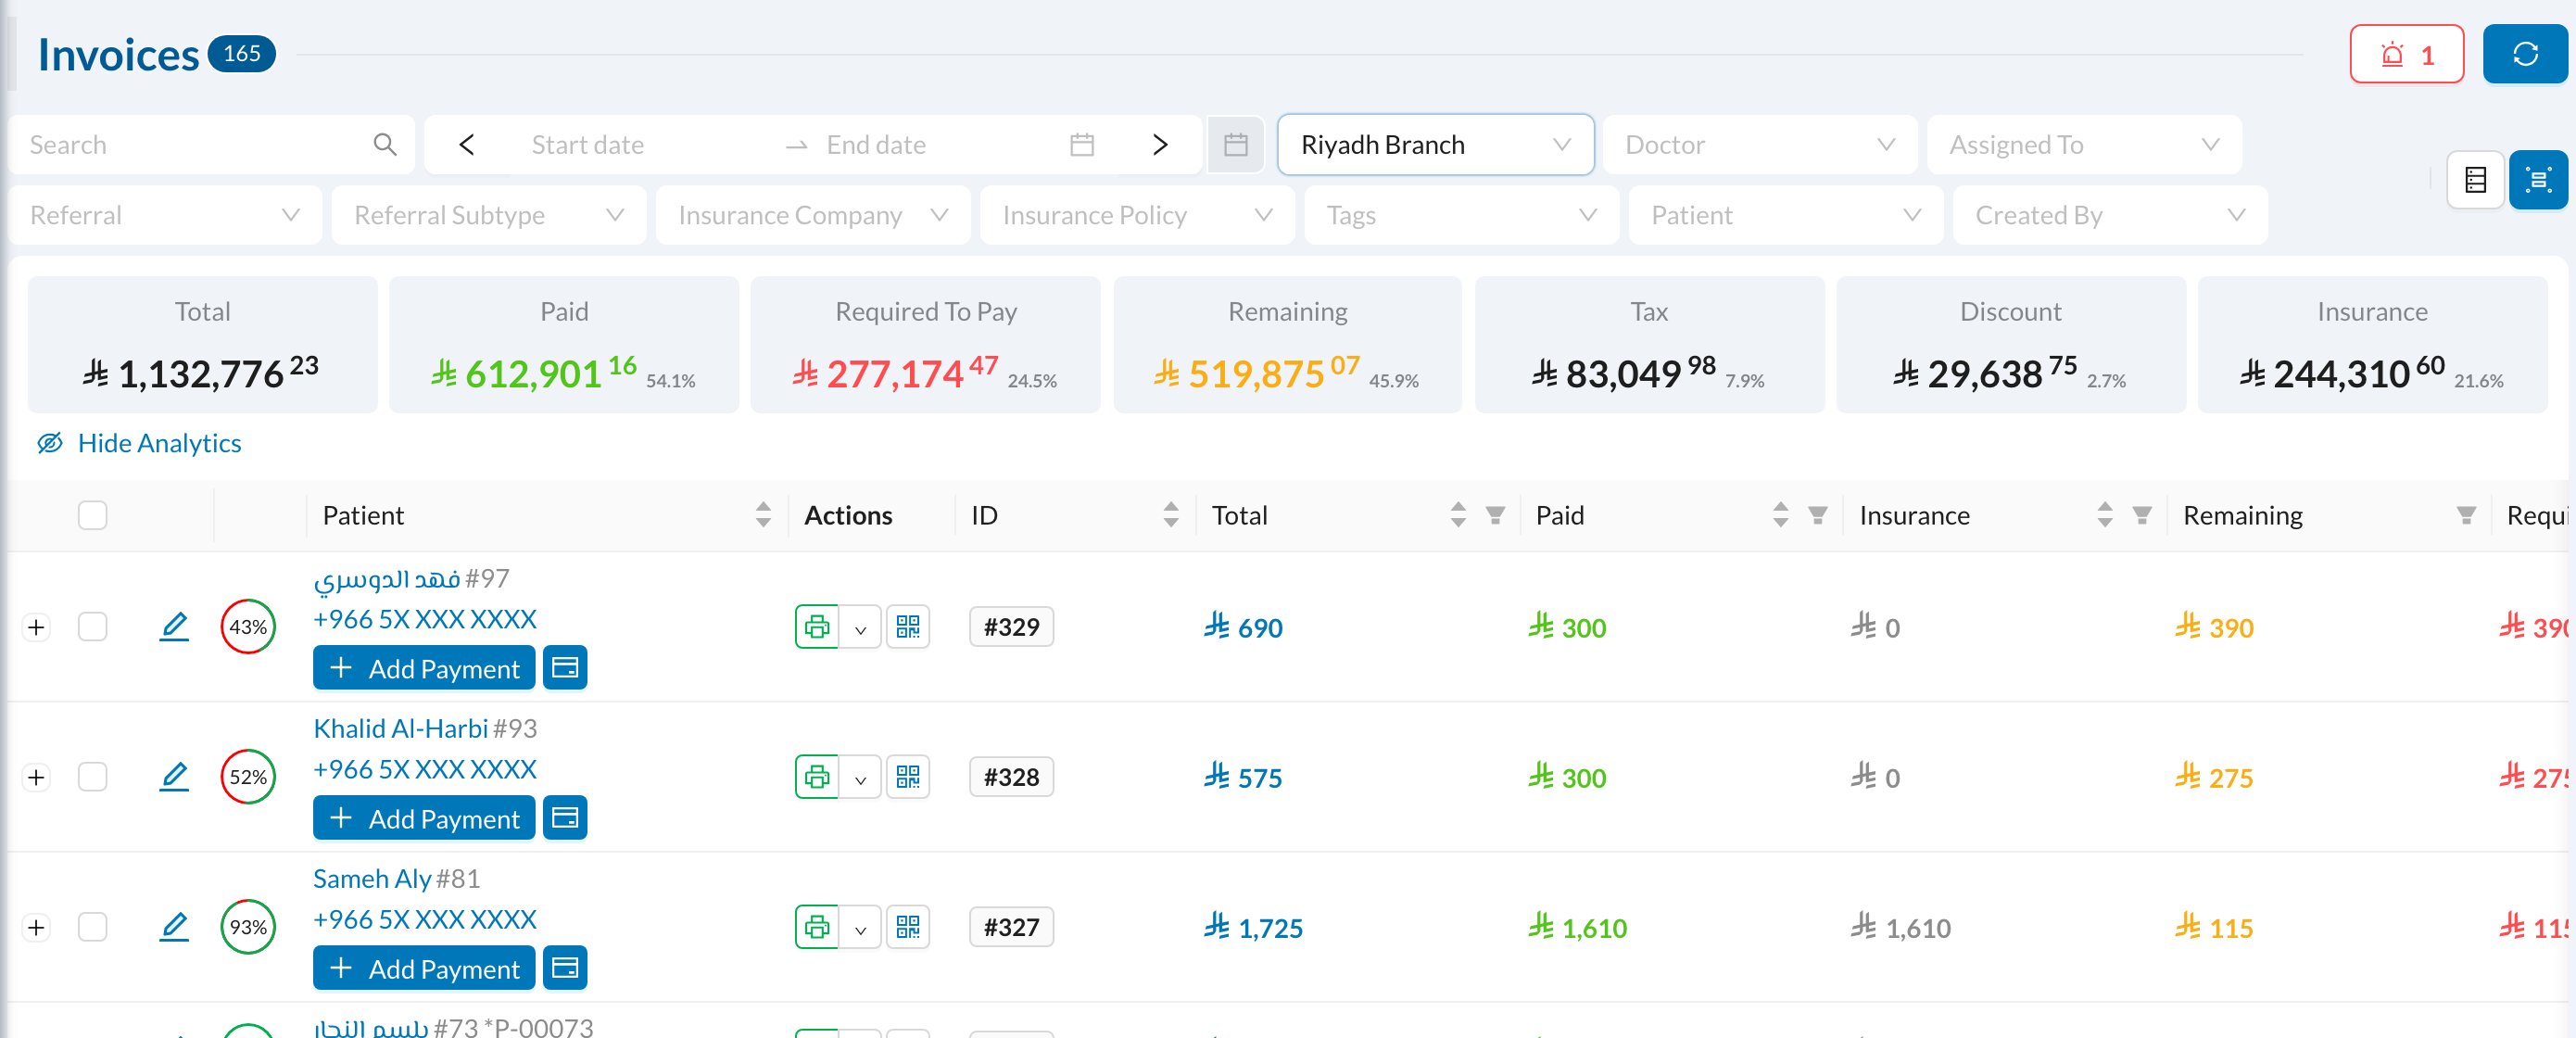
- Show Analytics: totals for the filtered invoices.
- Add Payment: shown on invoices that aren’t fully paid. The icon next to it generates a payment link.
- Edit the invoice.
🔍 Invoice details
Click an invoice to open its page: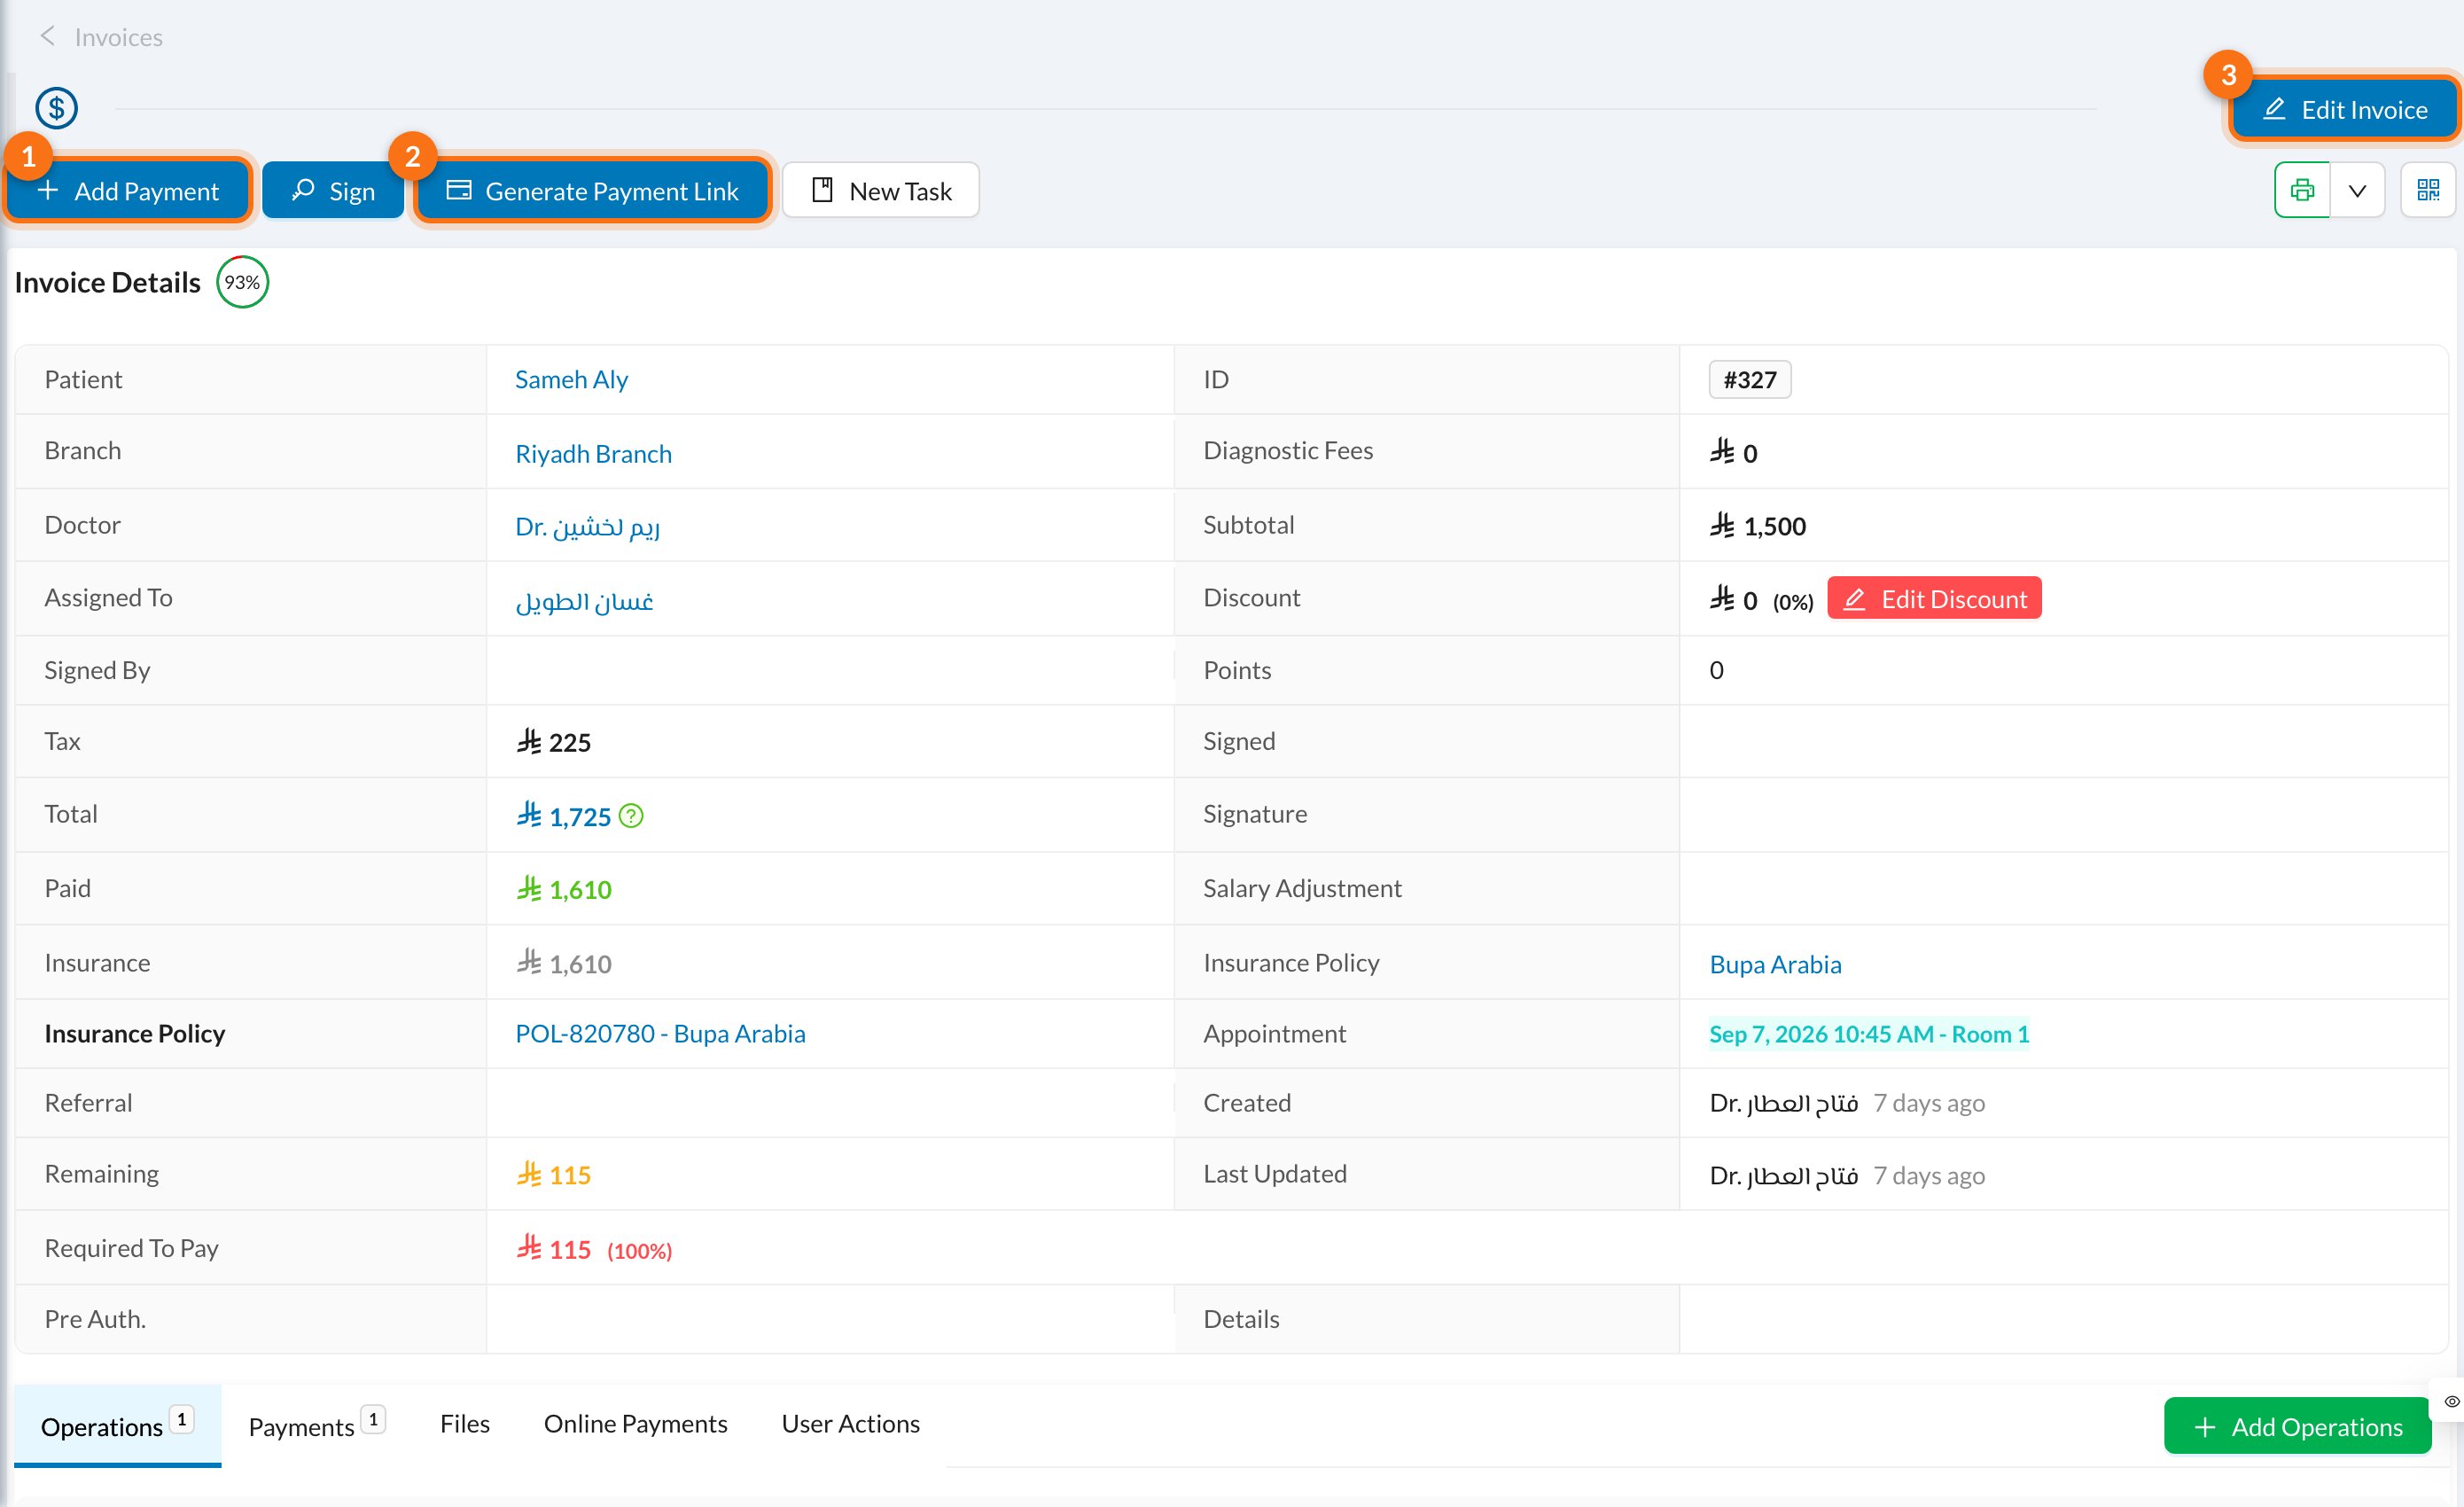
- Add Payment.
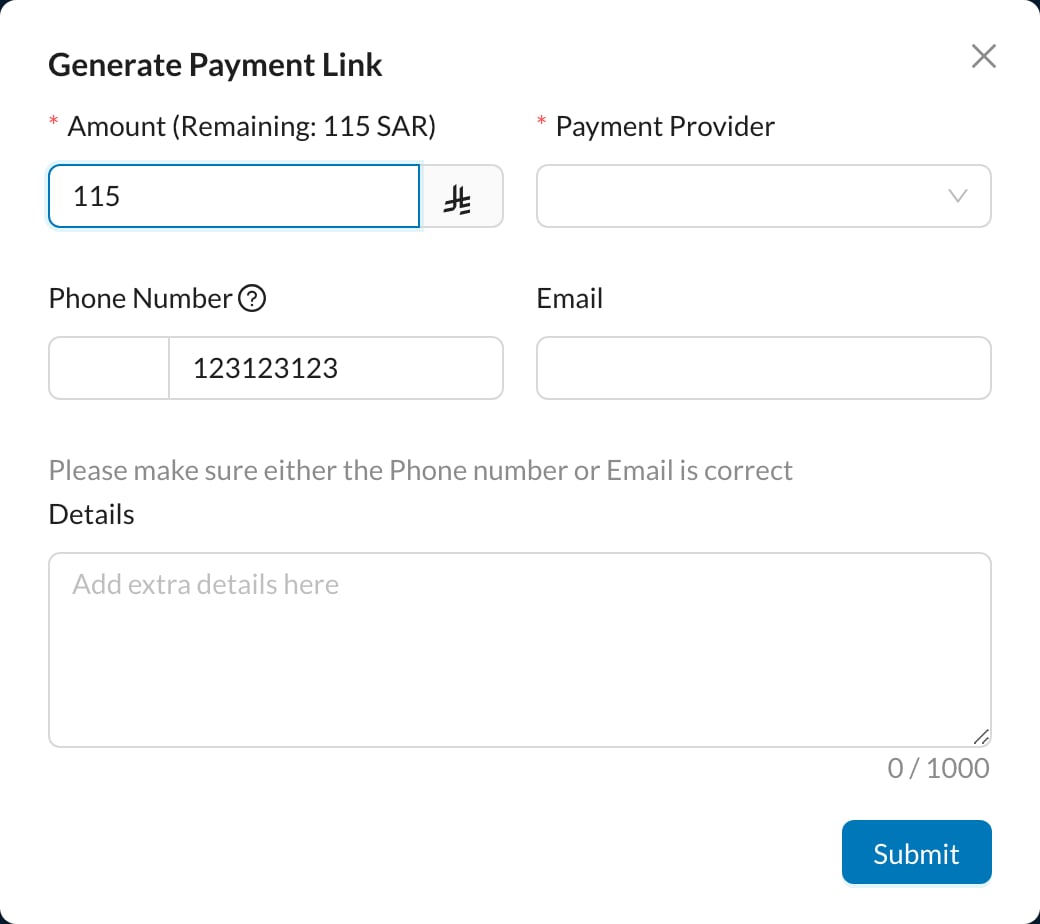
- Generate Payment Link: send the patient a link to pay online.
- Edit Invoice.
Send a payment link
✏️ Edit, release or delete an invoice
Open the invoice with the edit icon:- Update saves your changes.
- Release writes off the remaining amount (for example, a debt you won’t collect). Any remaining payments are removed, and the amount shows in the Released column.
- Delete removes the invoice.
❓ FAQ
Can the patient pay in installments?
Can the patient pay in installments?
Yes. Set Required To Pay to what the patient pays now, and add each payment to the invoice when it’s paid. The Remaining column shows what is still due.
Why can't I give a bigger discount?
Why can't I give a bigger discount?
Each user has a maximum discount, set in Users.