

Go to Settings → Users and click New User:
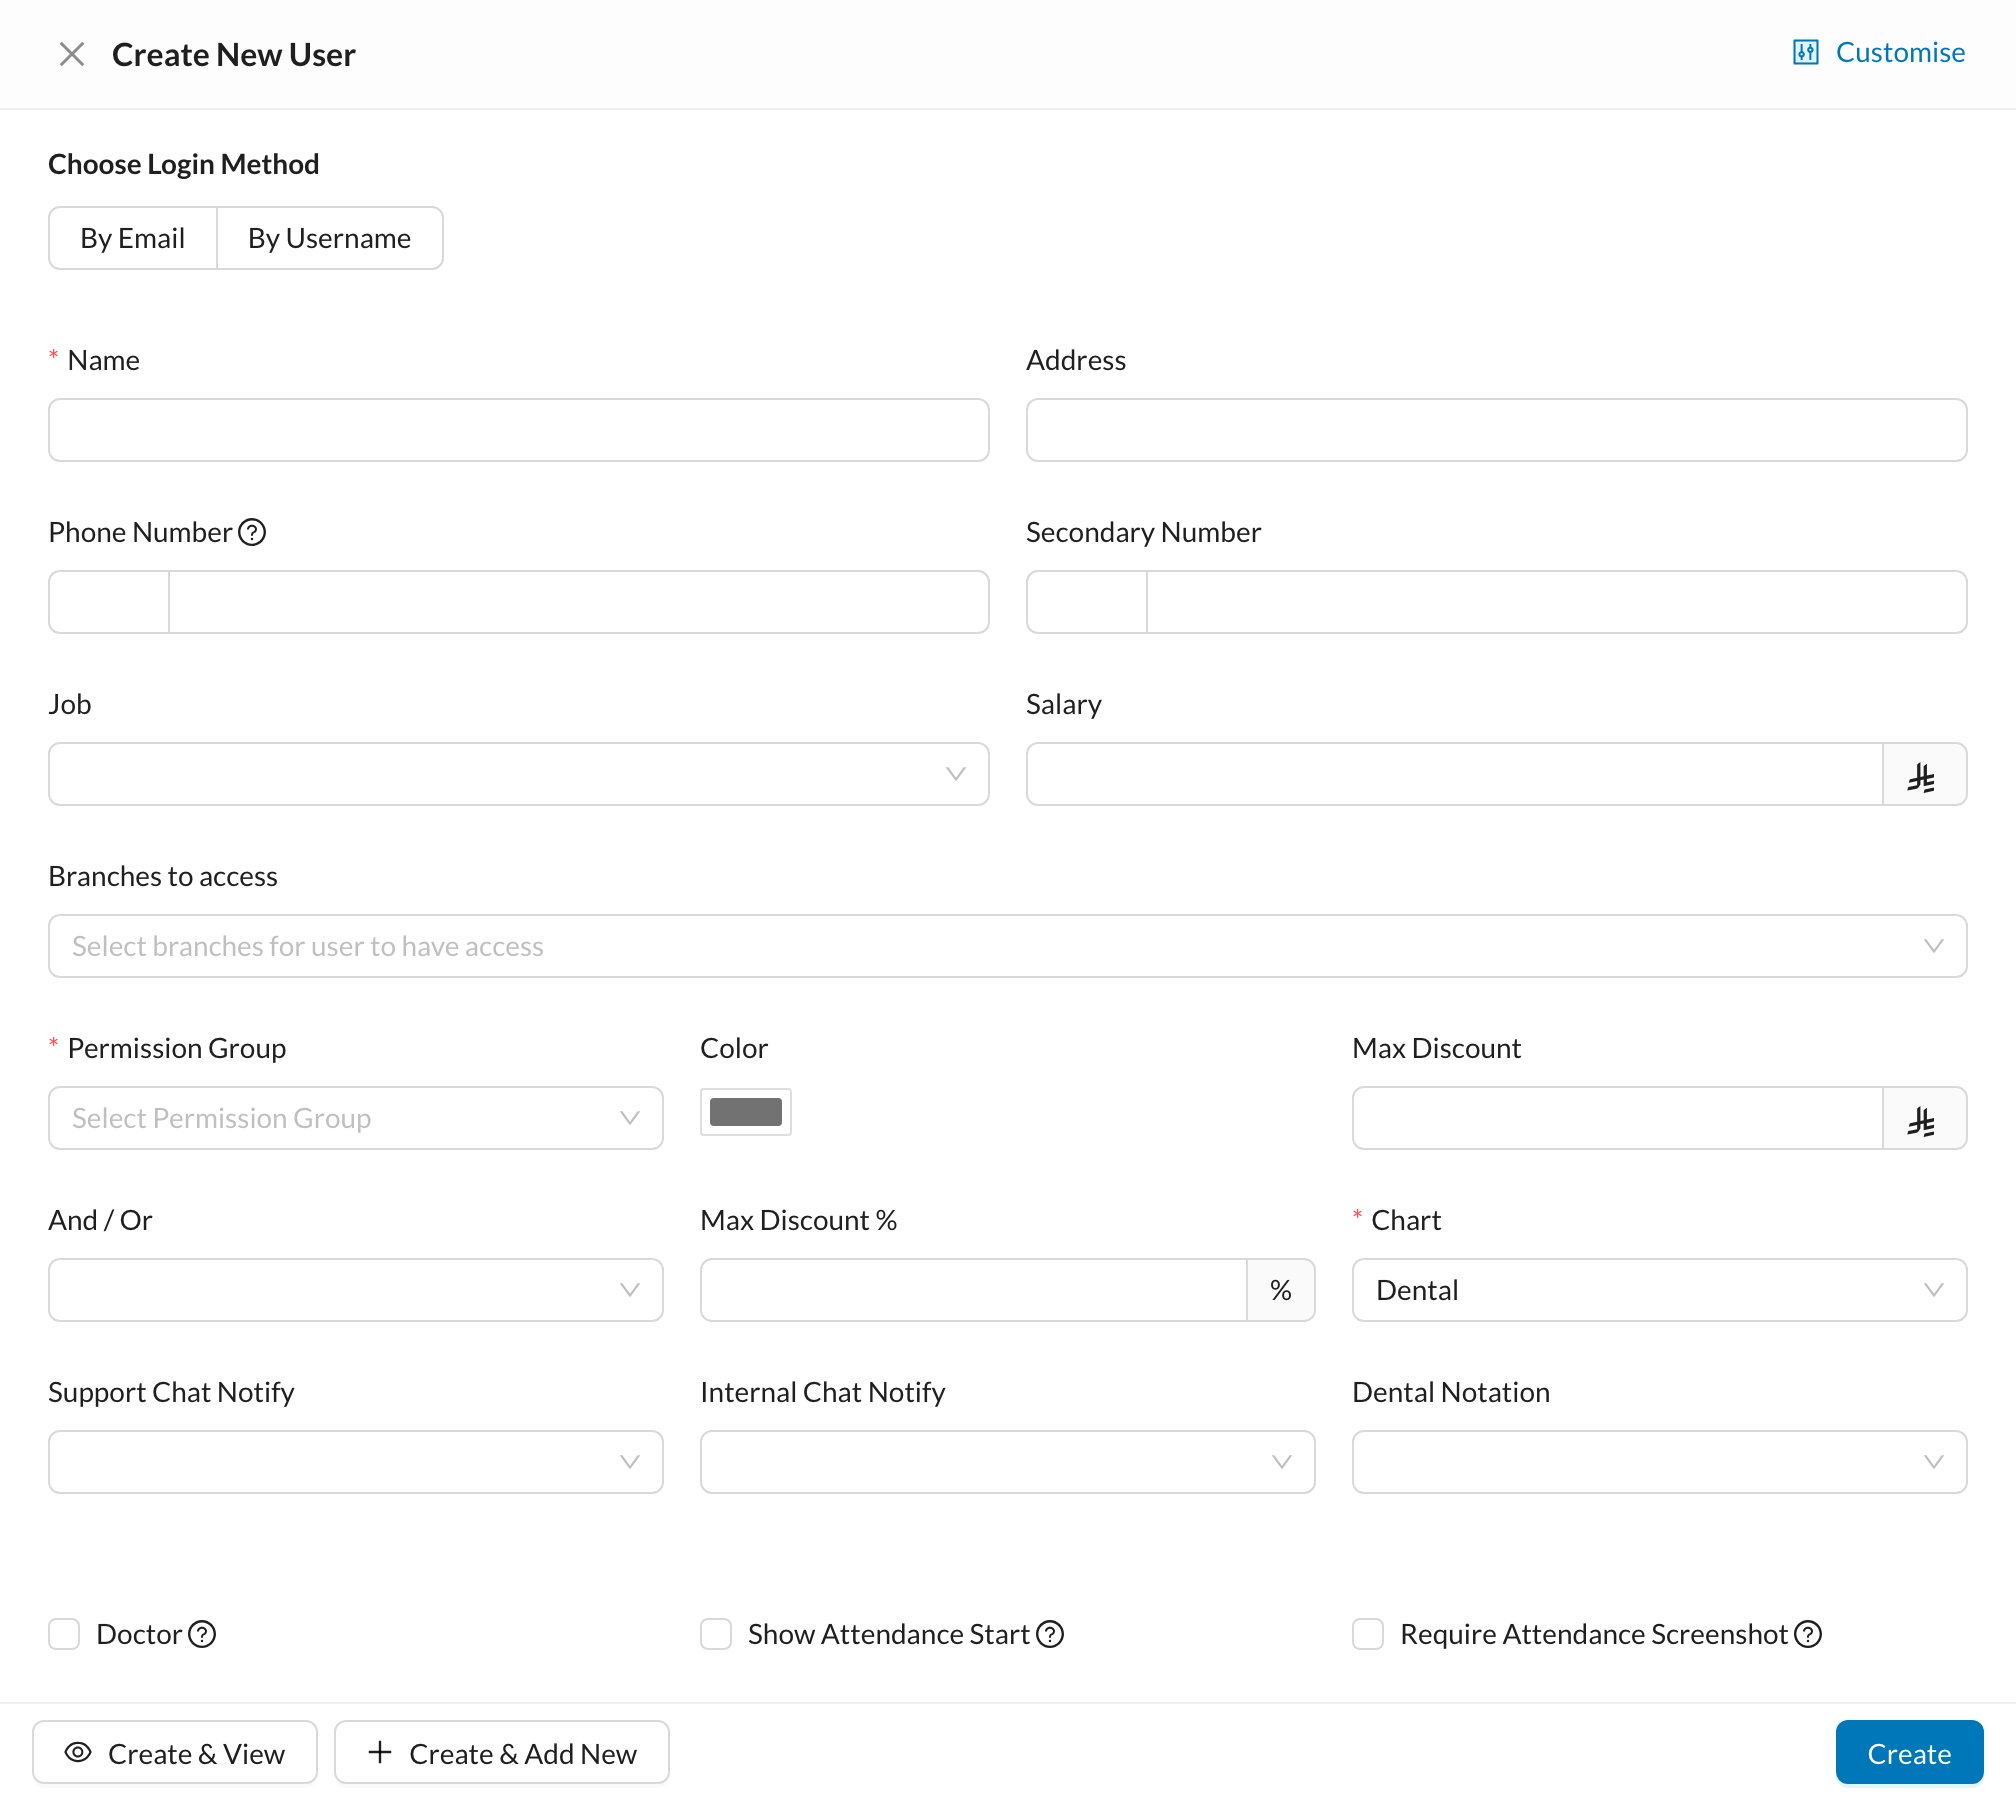
🔐 Choose the login method
- By Email: enter the user’s email. They receive an email to set their password (the link works for 5 days).
- By Username: enter a username and password. The user logs in with the clinic login name, the username and the password.
📝 Fill in the details
- Name, Phone Number, Job and Salary.
- Branches to access and Permission Group (required): what the user can see and do. See User permissions.
- Color: the user’s color on the calendar.
- Max Discount (amount and/or %): the most discount they can give.
- Chart and Dental Notation.
- Doctor: tick it for doctors, so they appear in the calendar. Then set the Doctor percentage, Doctor fees from Diagnostic, the lab orders deduction, and how their salary is calculated.
- Show Attendance Start and Require Attendance Screenshot. See Attendance.
👤 The user’s page
Click a user to open their page: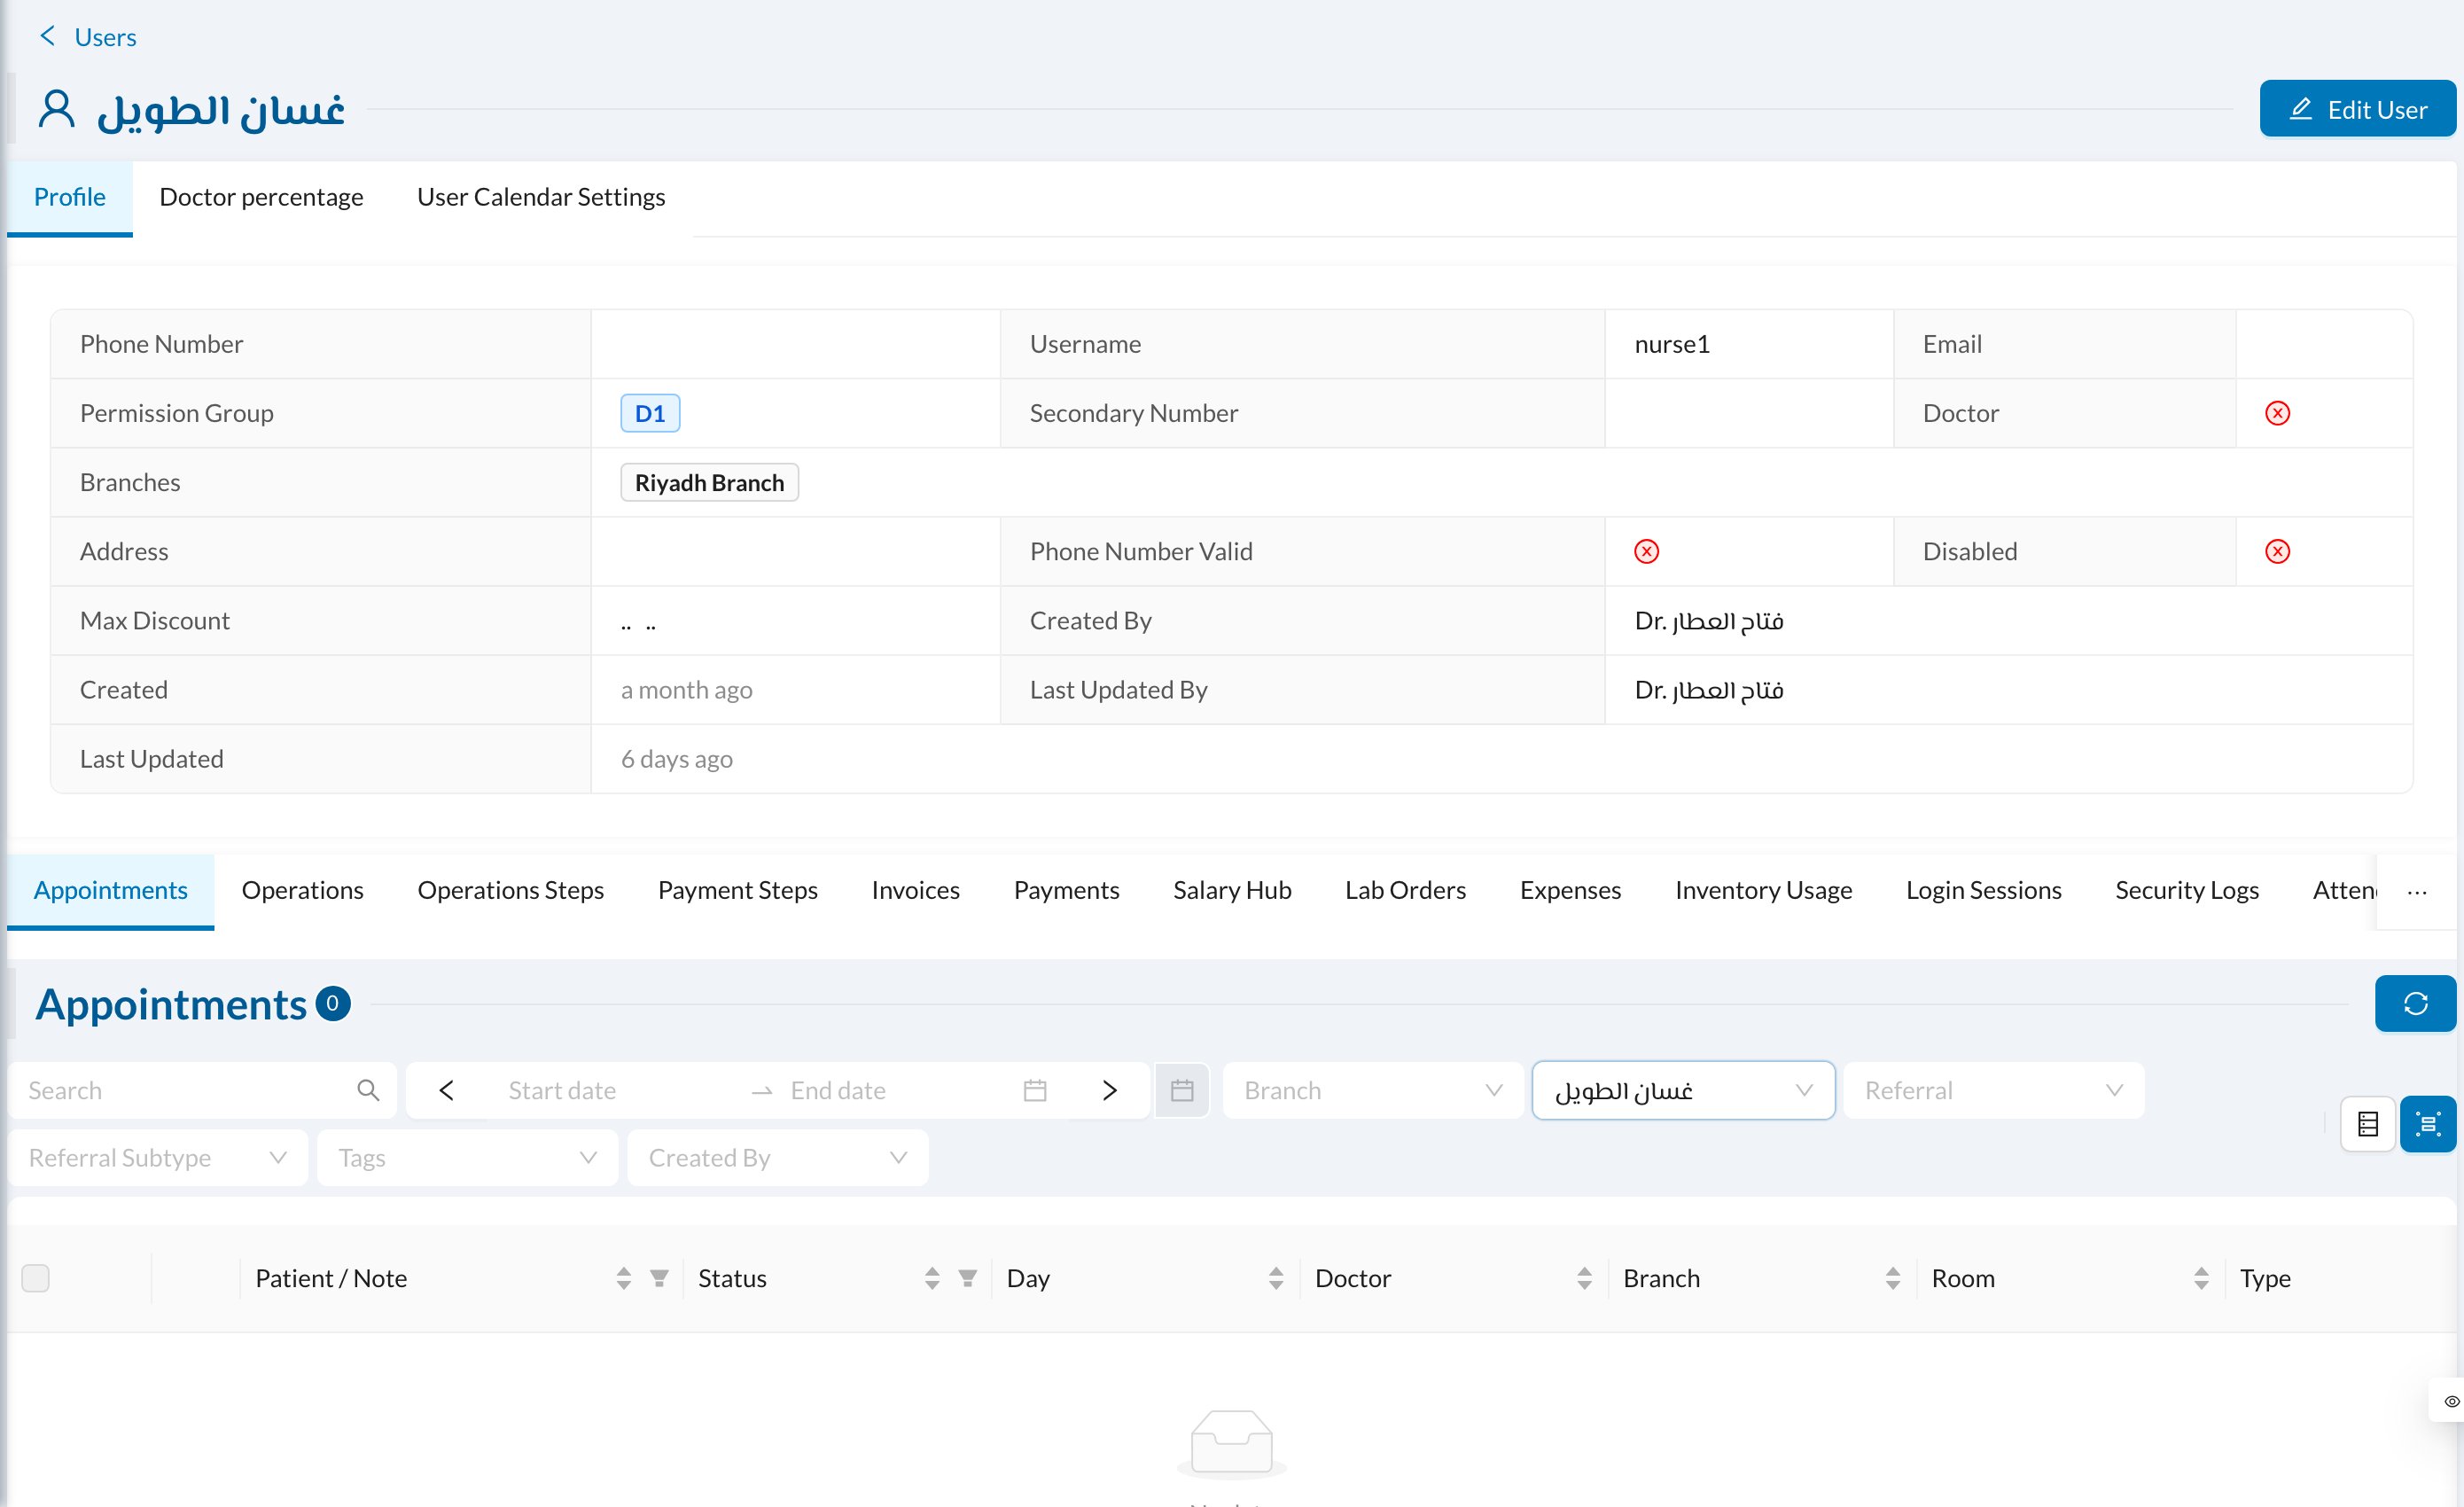
- Doctor percentage: a different percentage for specific procedures.
- User Calendar Settings: the doctor’s own working days, hours, breaks, rooms and the branch they work in each day.
- Their attendance, login sessions and activity.
✏️ Edit, reset password or disable
Open the user and click Edit. To change their email, username or password, turn on Update Login Method. Click Disable to stop a user from logging in.Editing a user logs them out. The number of active users is limited by your subscription; disabling a user frees a place.