

Each user belongs to a permission group that decides what they can see and do. Dentolize comes with ready-made groups such as Owners, Doctors, Reception, Nurses, Accountant, Inventory and Manager.
Go to Settings → Permission Groups.
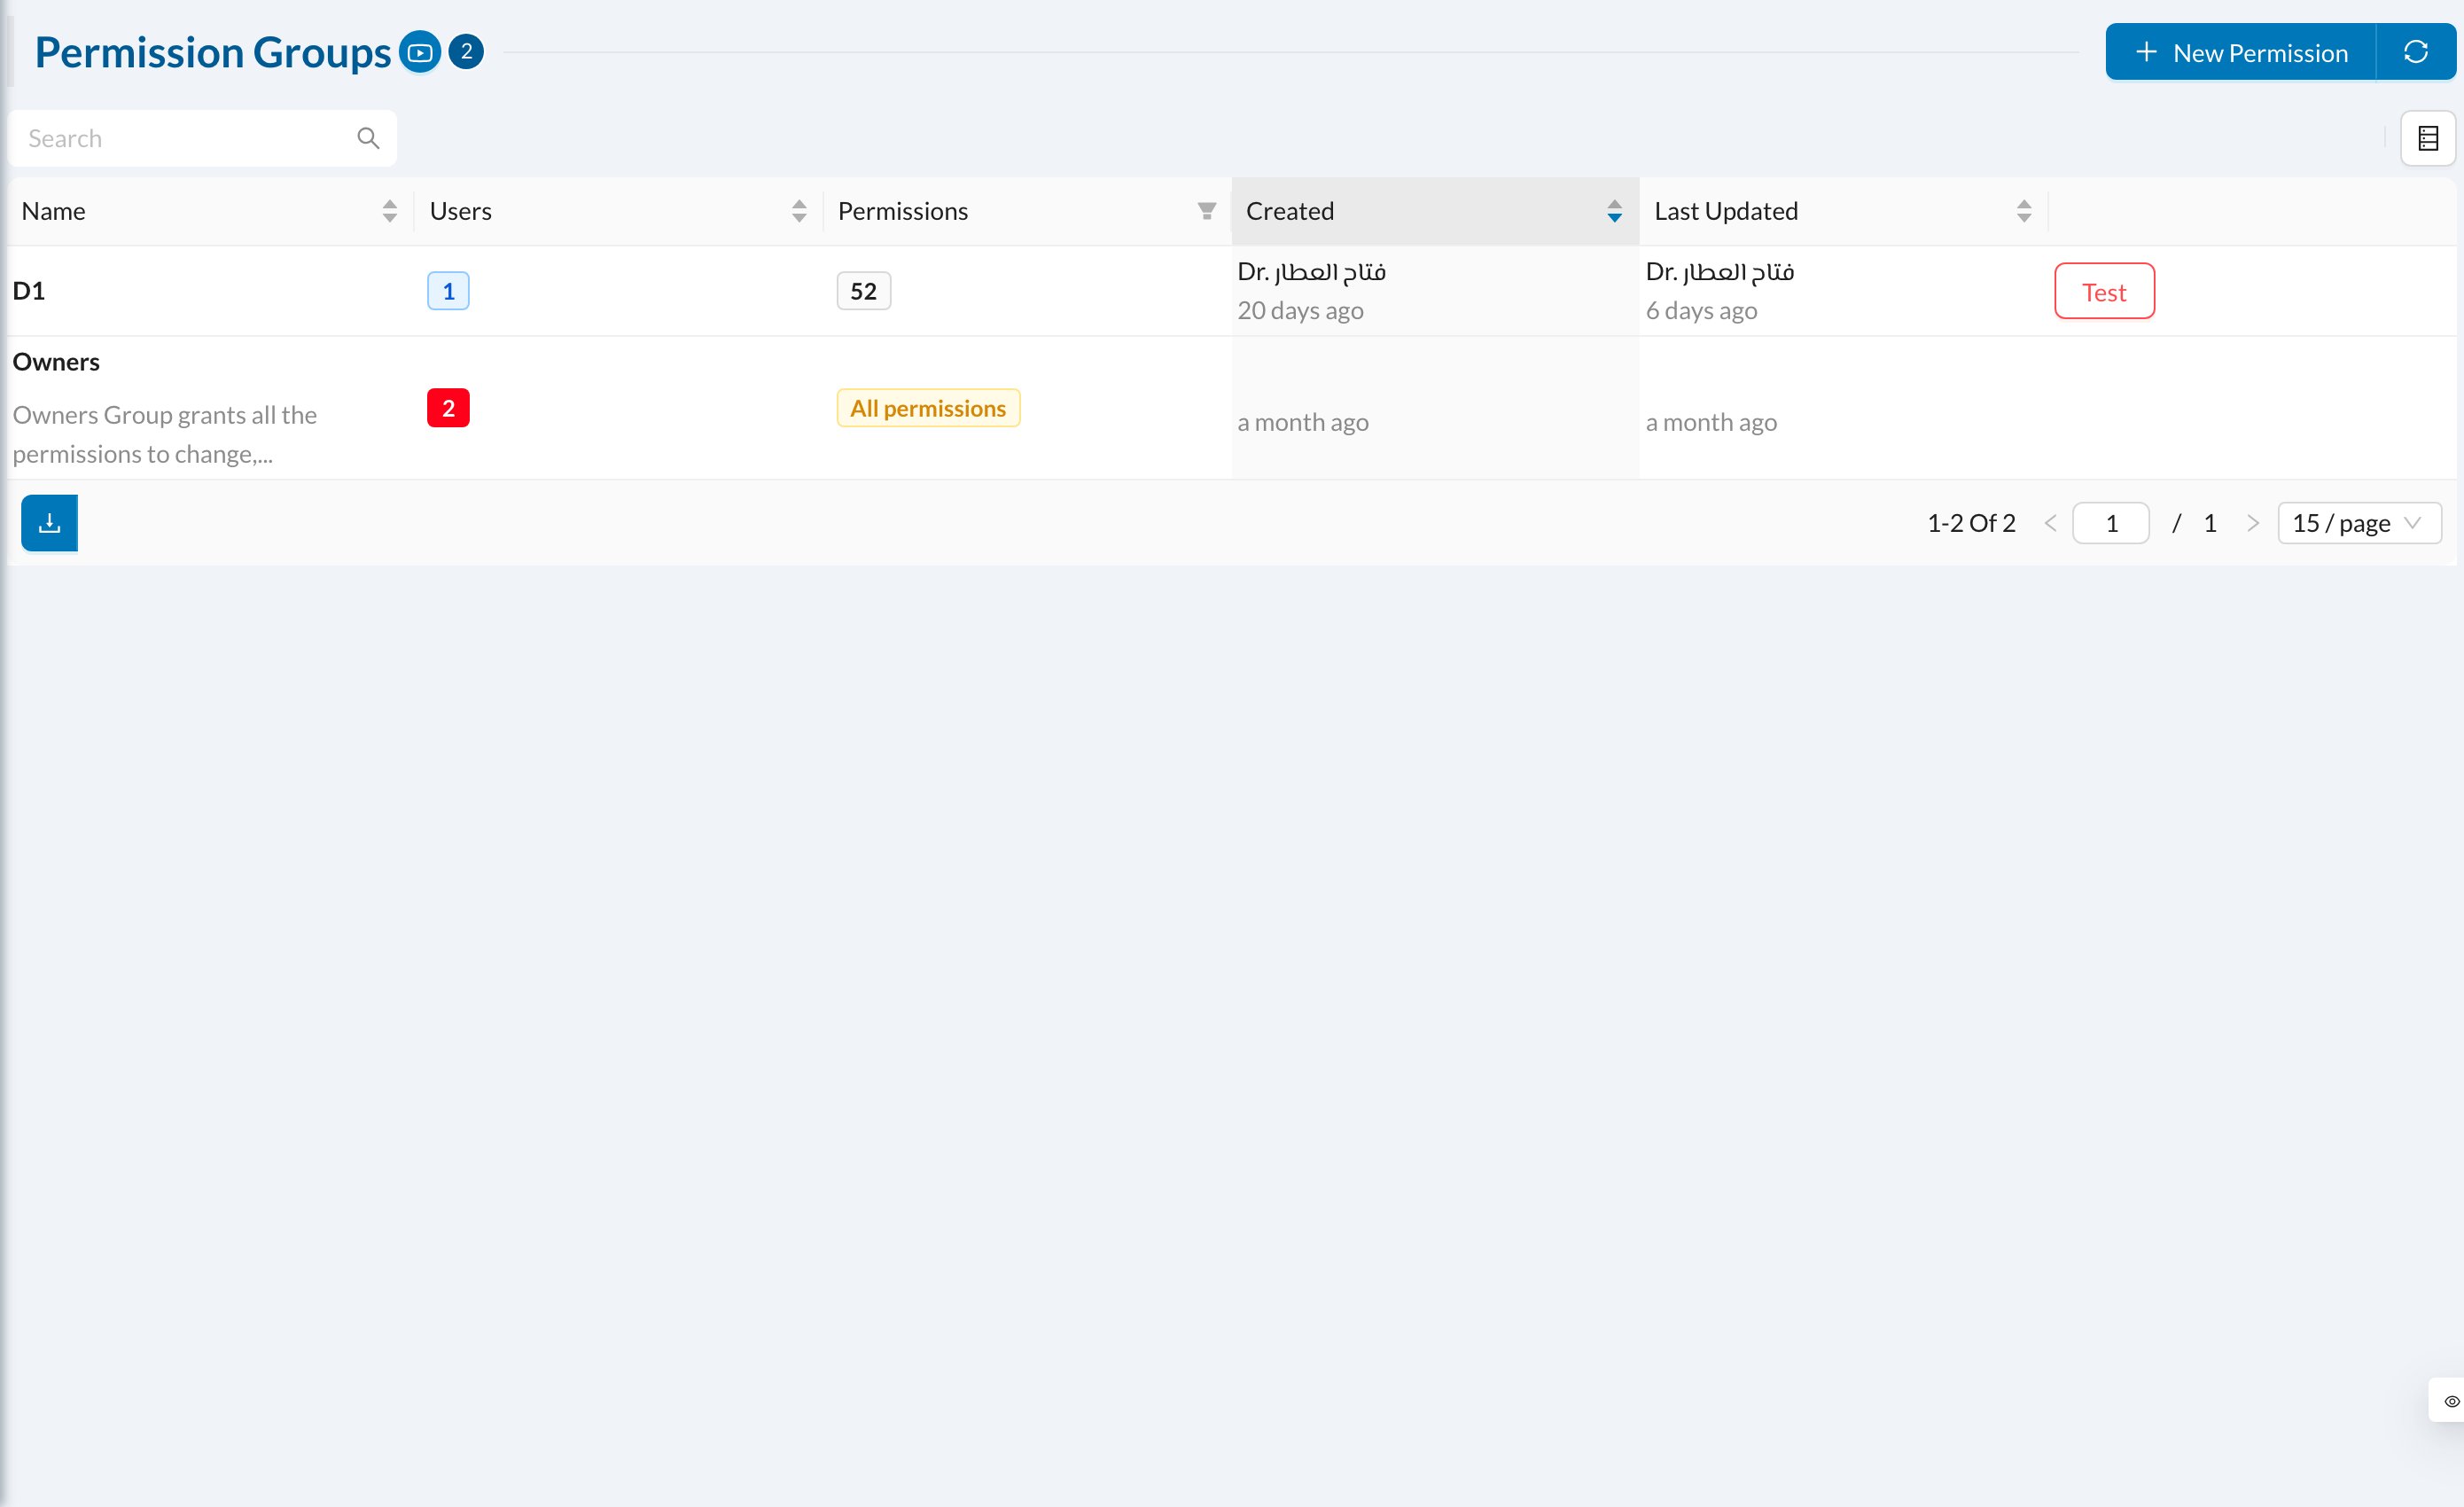
➕ Create or edit a group
Click New Permission, or a group to edit it: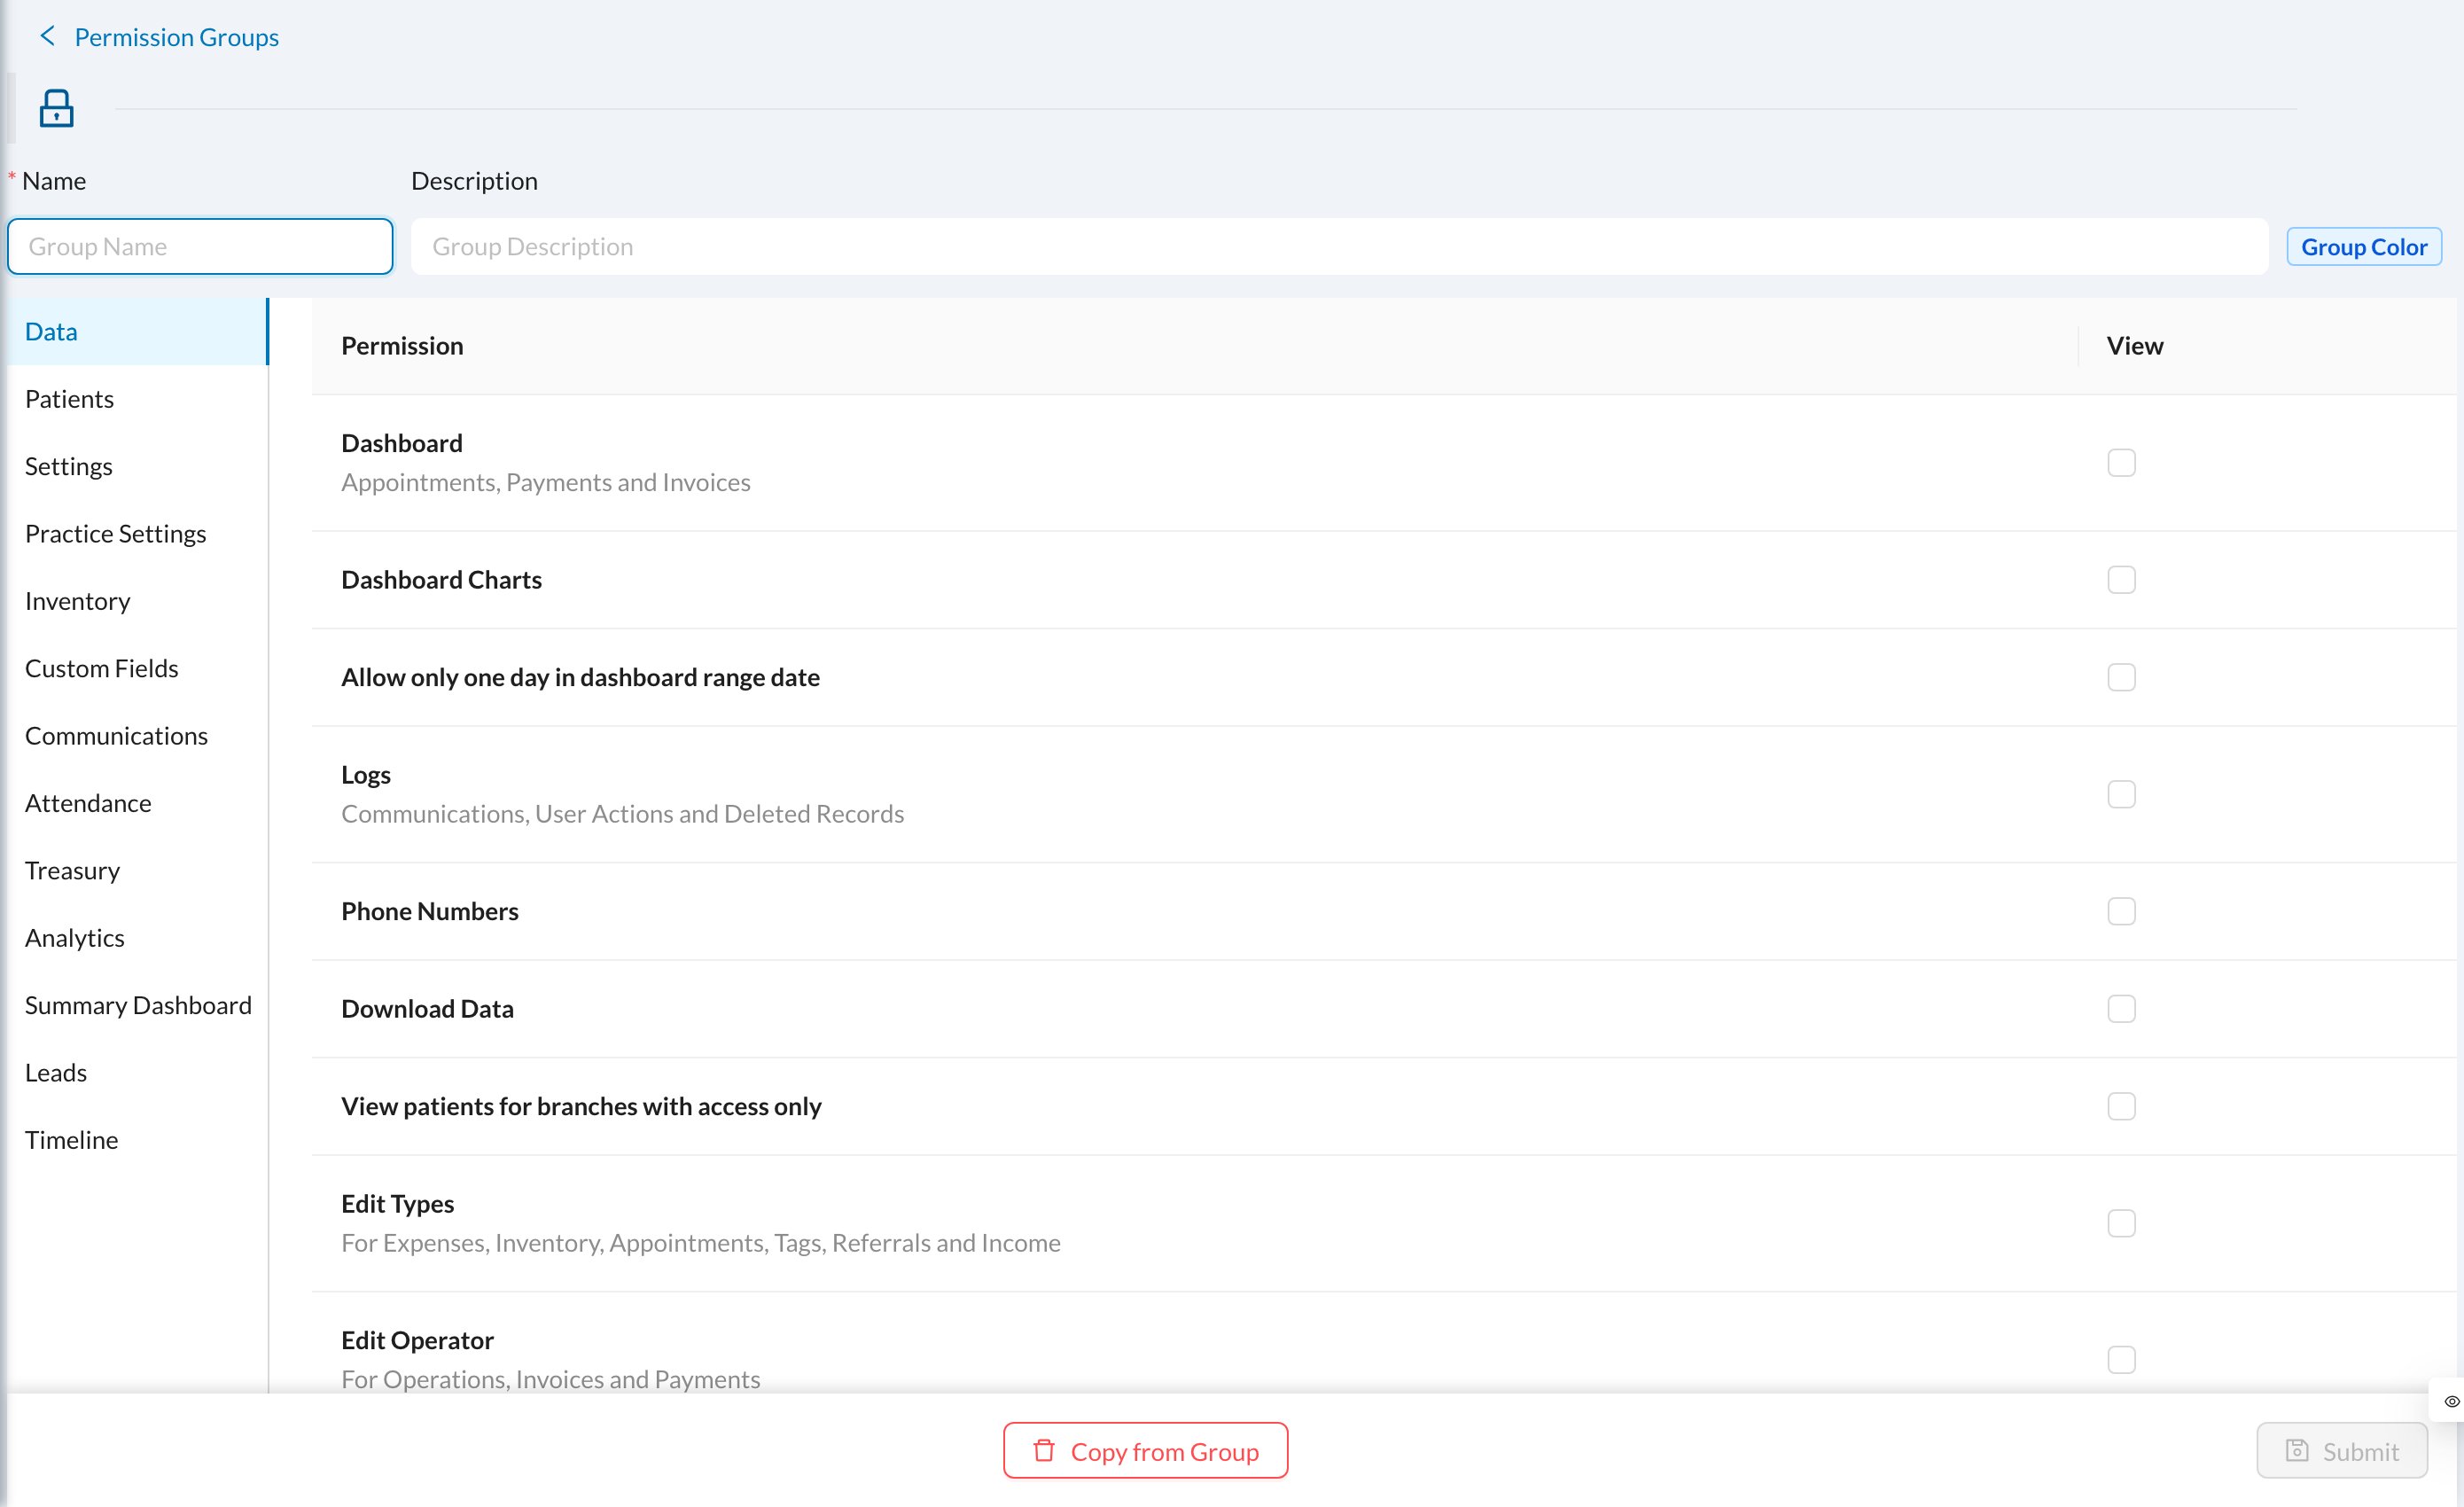
- Enter the Name, a Description and a Group Color.
- To start from an existing group, click Copy from Group.
- Go through the tabs on the left (Data, Patients, Settings, Inventory, Treasury, Analytics…) and tick the permissions:
- View All: see all records. View Created/Assigned Only: see only records they created or are assigned to.
- Add New, Edit, Delete / Disable / Merge. Edit and Delete need one of the View boxes first.
- Click Submit.
- Phone Numbers: untick to hide patients’ phone numbers.
- Hide Operation Prices.
- Allow only one day in dashboard range date.
- Download Data and View patients for branches with access only.