📍 Where to send from

  • An appointment: click the appointment on the Calendar or Dashboard, then Send SMS (1).
  • A patient’s profile: click the message button, or the WhatsApp button.
  • The + menu in the top bar → Send SMS.
  • Many patients: select them in the Patients, Appointments or Invoices list, then click Send Message To Selected at the bottom.
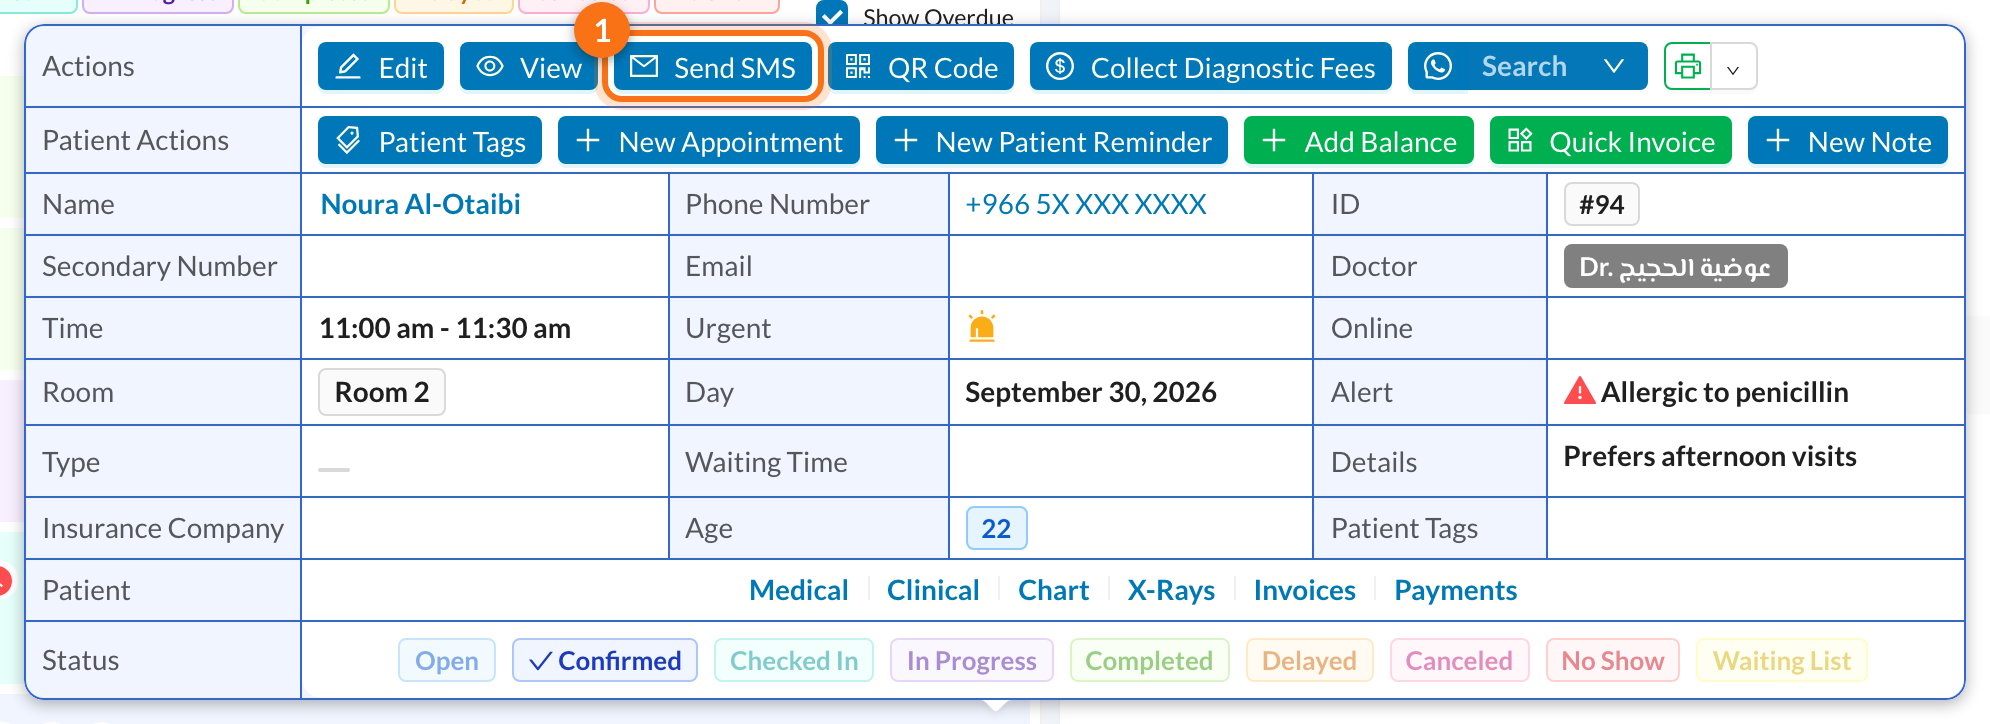
1 Send SMS in the appointment menu

✉️ Write and send the message

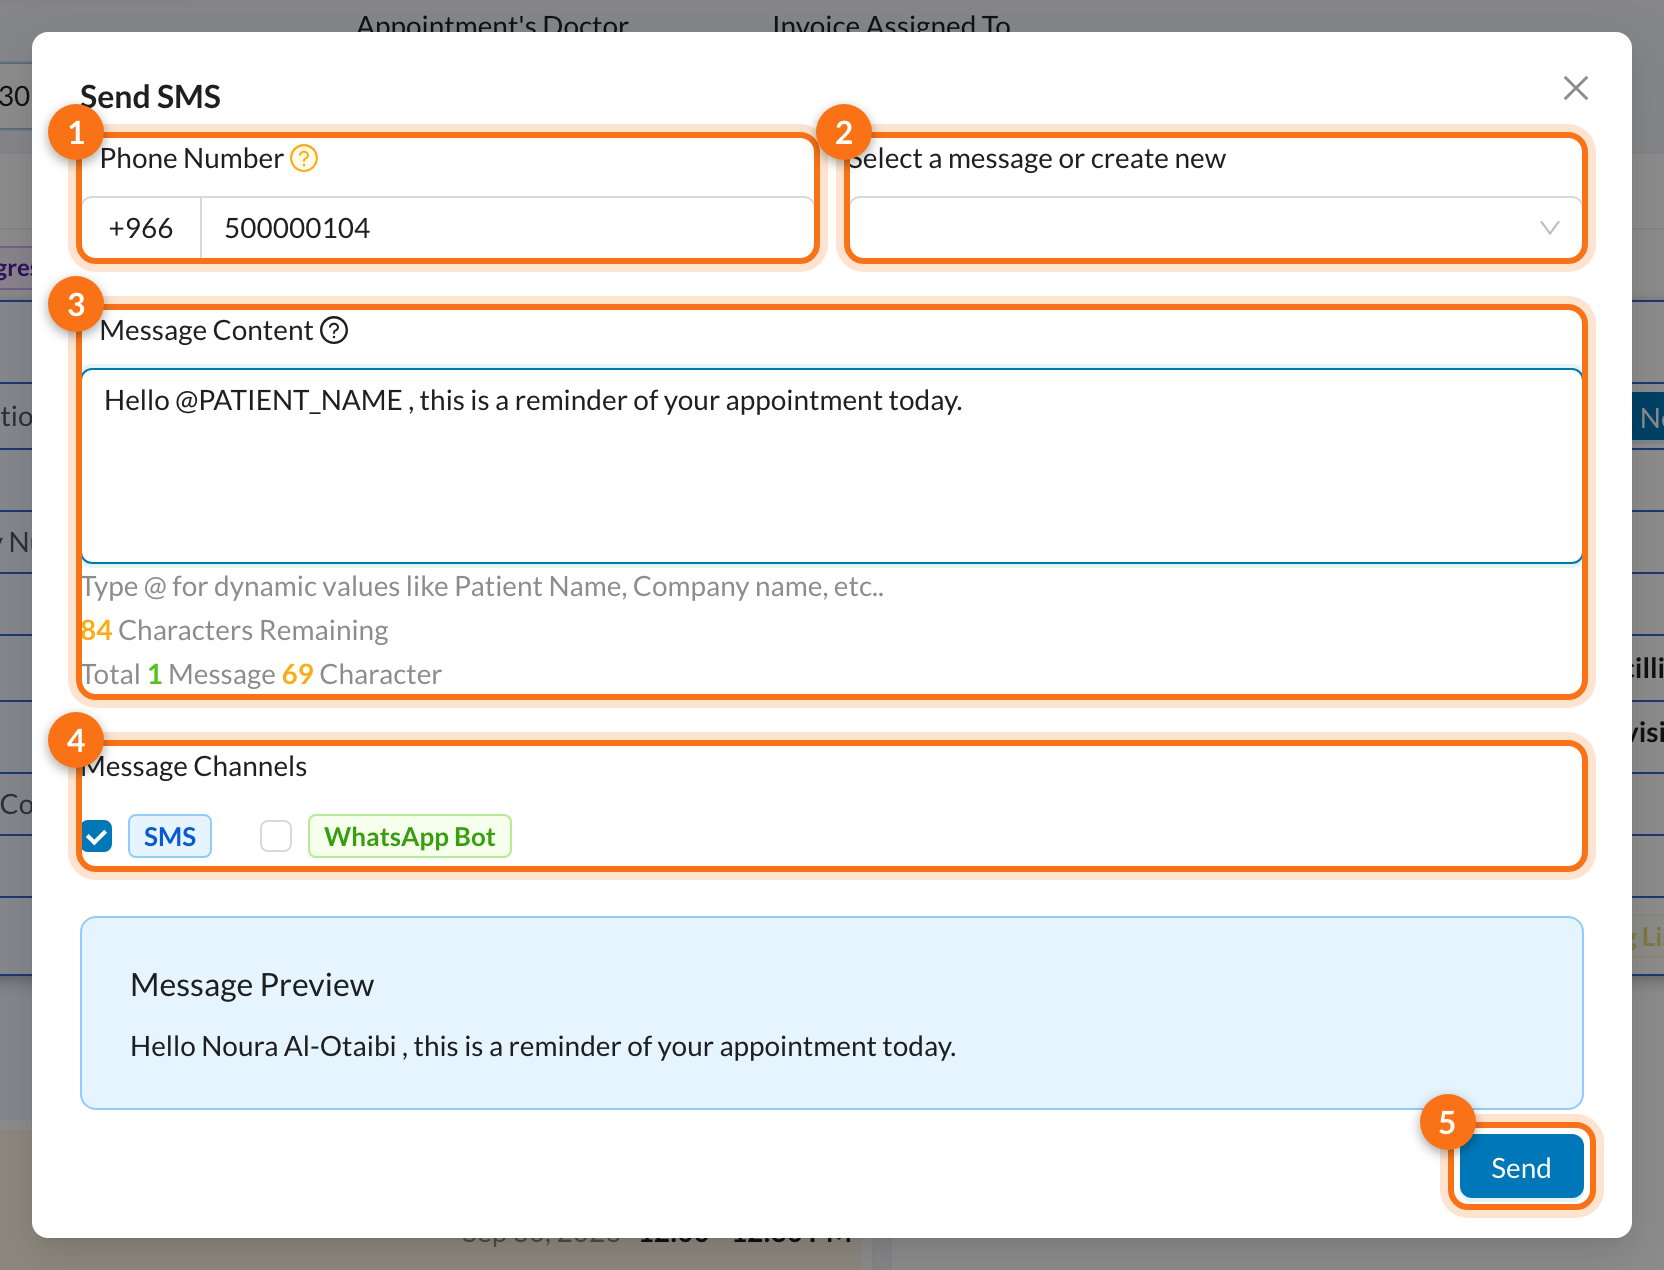
1 Phone Number, 2 Select a message, 3 Message Content, 4 Message Channels, 5 Send
  1. Phone Number: filled in from the patient. It must include the country code.
  2. Select a message or create new: pick a saved template to fill in the text.
  3. Message Content: type the message. Type @ to insert details that are filled in for each patient, such as @PATIENT_NAME, @DATE, @START_TIME, @DOCTOR_NAME or @BRANCH_PHONE. The counters show how many SMS the message will use.
  4. Message Channels: SMS, WhatsApp Bot, or both. With both, WhatsApp is tried first and SMS is used only if WhatsApp fails.
  5. Click Send. You’ll see Message sent.
The Message Preview shows the text as the patient will receive it.
When you send from an appointment, the message may start with the appointment’s details text. Check the content before sending.
When you open Send SMS from the + menu, choose who to send to: A Patient, All Patients, a Price List Group, or A User (a staff member).
Send Message To All sends to every patient matching the list’s current filters, not only the ones on the screen. The number in the button shows how many.

✅ After sending

Messages are sent within a few seconds. Check them in Logs → Communications. See SMS for your balance and message counting, and WhatsApp for WhatsApp messages.
The WhatsApp icon on an appointment opens the patient’s chat in your own WhatsApp with the message ready, without using the WhatsApp Bot. These messages aren’t recorded in Dentolize.