

Download the PDF guide
The same guide in 3 pages, to print or keep.
Log in and get the app
- Log in: Open my.dentolize.com (dental) or my.medicolize.com (medical). Log in with your email, or click Or login with username and enter the Clinic Login Name, your username and password.
- Forgot password: Email login: click Forgot your password? and use the link we email you. Username login: ask your clinic owner or admin to reset it in Settings → Users.
- Mobile app: Install it from the links below. One app works for both Dentolize and Medicolize accounts.
my.dentolize.com
Dental clinics
my.medicolize.com
Medical clinics
App Store
iPhone app
Google Play
Android app
1. Main and branch storages
Go to Inventory → Storages and click New Storage. Tick Master Inventory (2) for the main store, where stock is bought and then distributed. Leave it unticked for a branch storage and choose its Branch (3), for example a cupboard or a treatment room. Materials used in treatments are always taken from a branch storage. Master Inventory can’t be changed later, and storages can’t be deleted, only merged.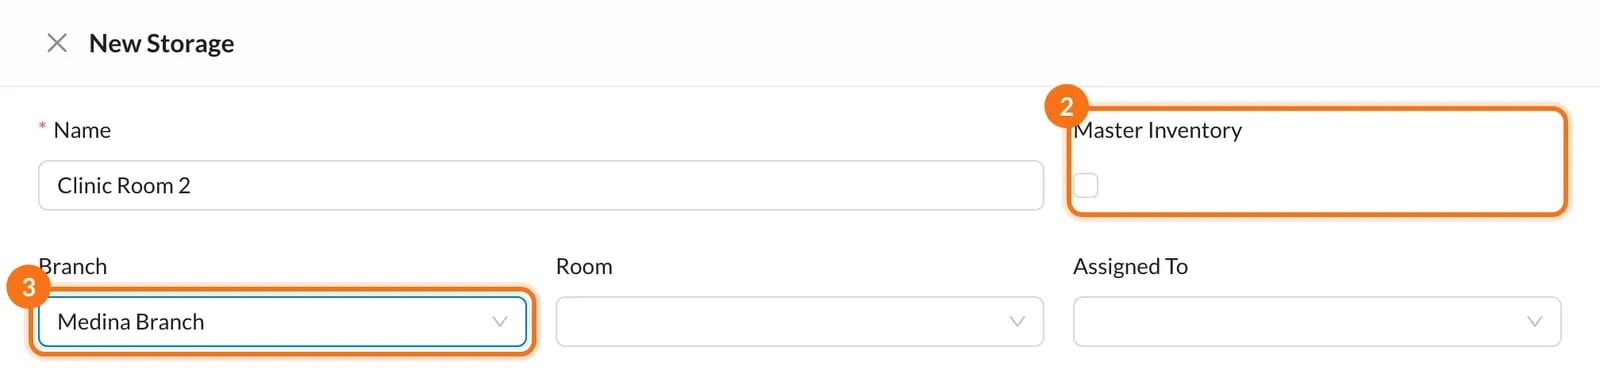
2. Add items with their opening quantity
Go to Inventory → Inventory Items and click New Inventory Item. Enter the Item Name (2), Type (3), the Price per Item or Box (4) and Total Items in One Box (5). Set the Min. Amount (6) to be alerted when stock is low. Then click Locations for Current Stock to enter the storage, the quantity you have now and its expiry date, and click Create. Box size and opening stock can only be set when creating the item.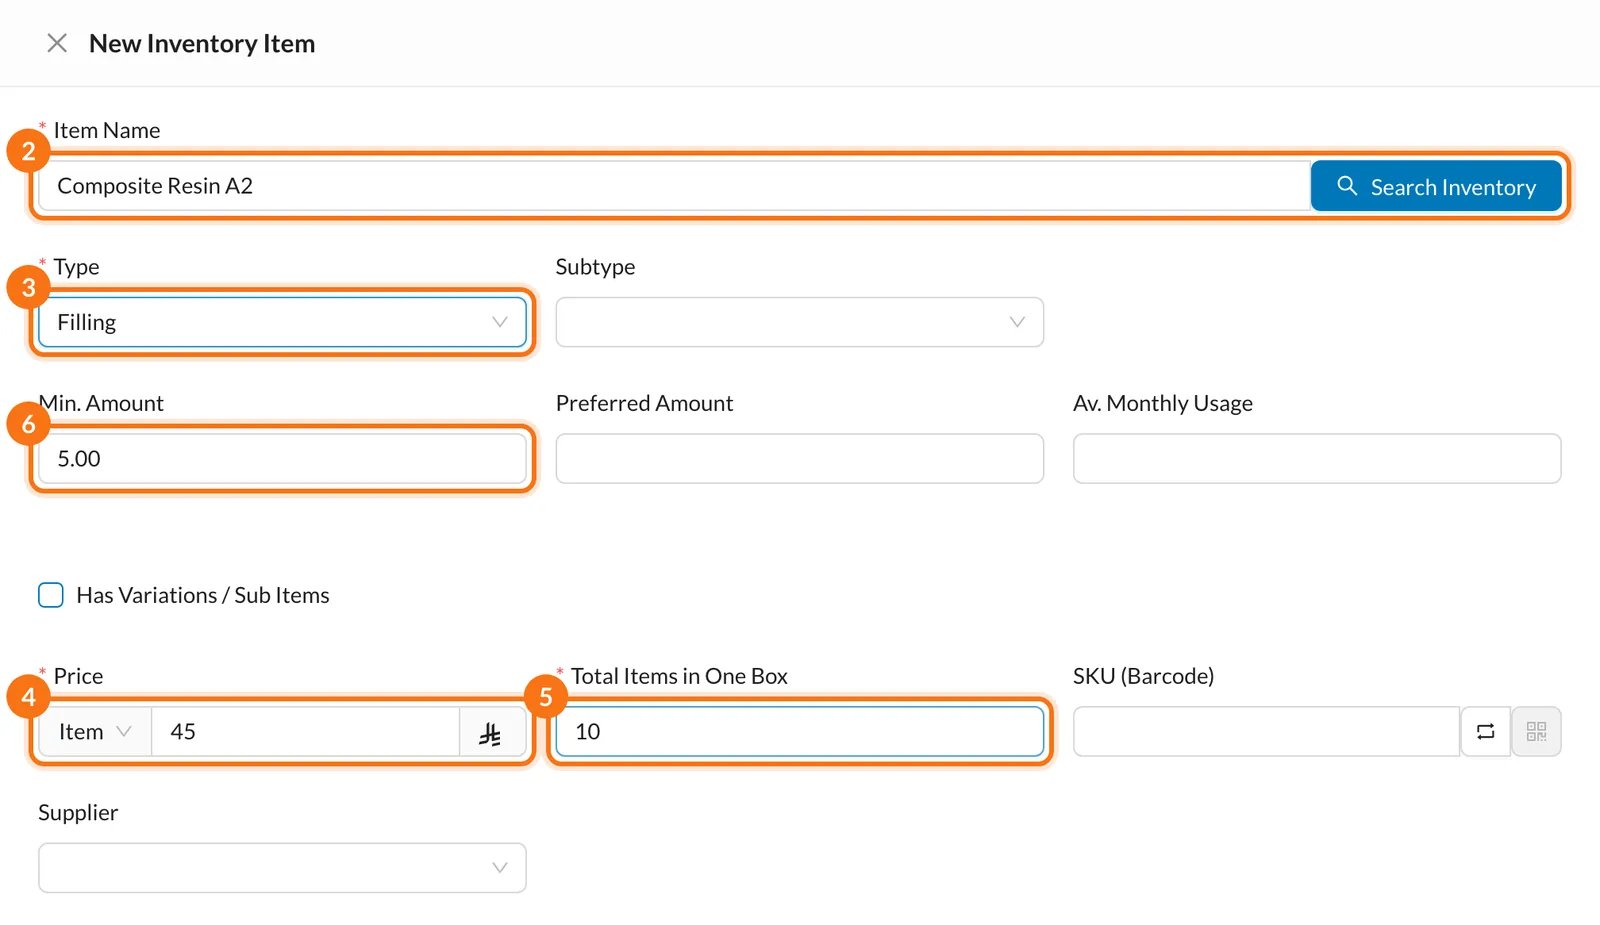
3. Purchase orders and suppliers
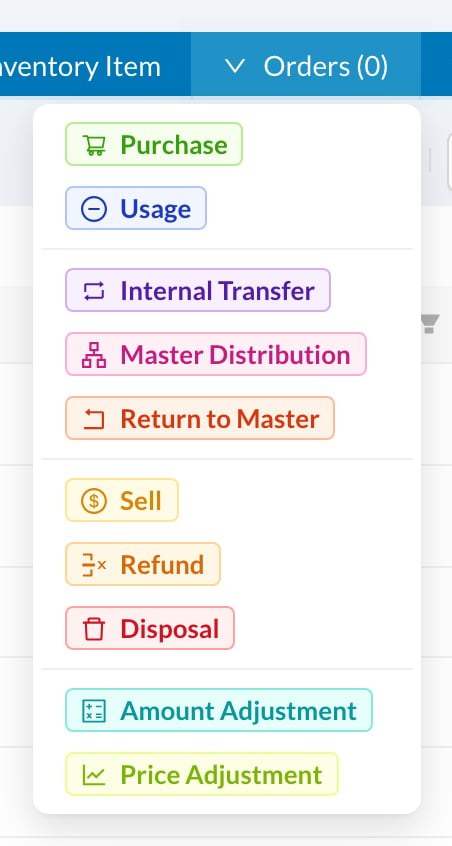
Every stock movement is an order. Select items on the Items or Stock page, click Orders and choose Purchase.- Choose the Supplier, and any Delivery cost or Discount.
- Click Add New Item: amount, storage, price and Expiration Date.
- Set the Status. Only Completed adds the stock.
- Click Create and save the expense form that opens (or later: Add to Expenses on the order).
4. Move stock between storages
Select the items (1), click Orders (2) and choose a moving order (3): Master Distribution (main to branch), Return to Master (branch to main) or Internal Transfer (between two branch or two master storages). Fill in the amounts and storages, set the Status to Completed and click Create. A completed order can’t be edited or deleted.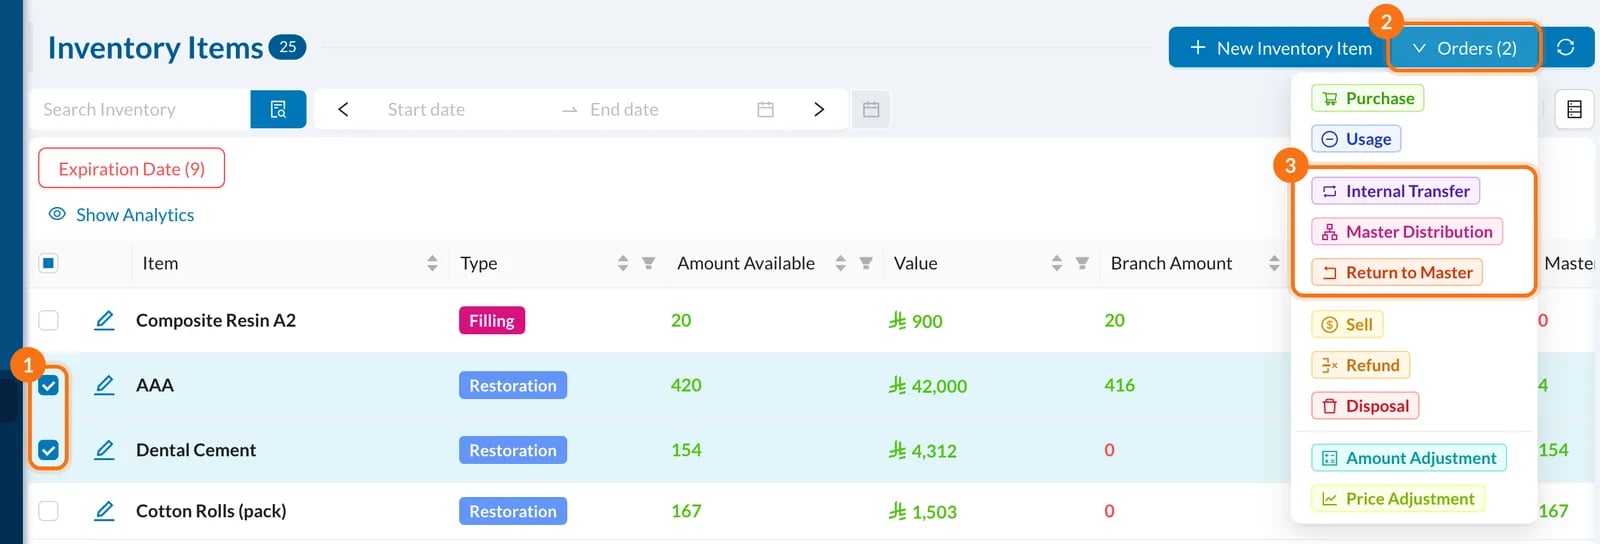
5. Deduct materials automatically
Open the item, click Edit Item and scroll to Inventory Usage. Click Add Procedure (2), choose the procedure (3) and the Amount used in single procedure (4), pick After Procedure or After Procedure Steps (5) and click Update (6). When the treatment is completed, the Usage form opens: nothing is deducted until it is saved as Completed.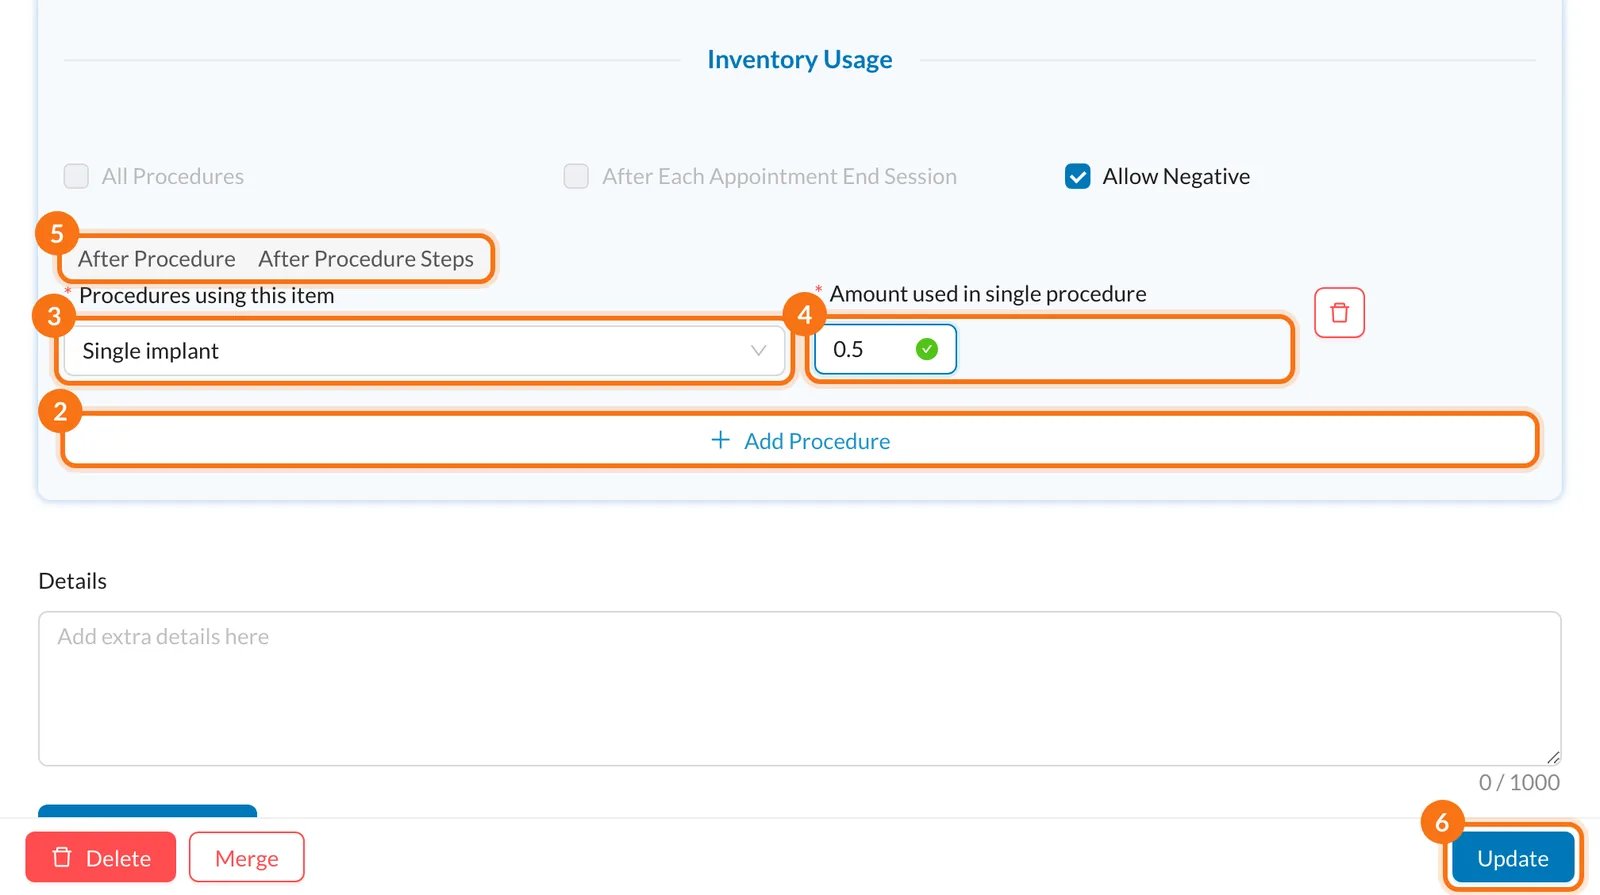
6. Counts, logs and alerts
After a stock count, correct the difference with an Amount Adjustment order (positive adds, negative subtracts), and take out damaged or expired stock with Disposal. Inventory → Transactions lists every completed movement, with filters, Group By and Download; use Return Usage to put back materials recorded by mistake. The Dashboard → Inventory tab shows stock value, Low / Good / Overstock items and expiry alerts, and lets you tick low items to create a Purchase order. Read more: Inventory logs · Inventory summaryYour first-week checklist
- ☐ Create your master and branch storages
- ☐ Add your items with their opening stock
- ☐ Set a Min. Amount for key items
- ☐ Create a purchase order and record its expense
- ☐ Distribute stock from the master store to a branch
- ☐ Link a material to a procedure
- ☐ Correct a count with Amount Adjustment
- ☐ Check Low stock and expiry alerts
On your phone
- Get notifications for low Inventory (choose them in Settings → Account → Main → Show Notifications For).
- Clock in and out for attendance from your phone.
- See the day’s appointments on the go.