

Download the PDF guide
The same guide in 3 pages, to print or keep.
Log in and get the app
- Log in: Open my.dentolize.com (dental) or my.medicolize.com (medical). Log in with your email, or click Or login with username and enter the Clinic Login Name, your username and password.
- Forgot password: Email login: click Forgot your password? and use the link we email you. Username login: ask your clinic owner or admin to reset it in Settings → Users.
- Mobile app: Install it from the links below. One app works for both Dentolize and Medicolize accounts.
my.dentolize.com
Dental clinics
my.medicolize.com
Medical clinics
App Store
iPhone app
Google Play
Android app
1. Users and permissions
Add staff in Settings → Users → New User, choosing their Branches to access and Permission Group. To change someone later, open the user and click Edit; for someone who left, click Disable. What a group can see is set in Settings → Permission Groups: on the Patients tab (1), tick View Created/Assigned Only (2) instead of View All so doctors see only their own records. Click Save: users in the group log in again to get the change.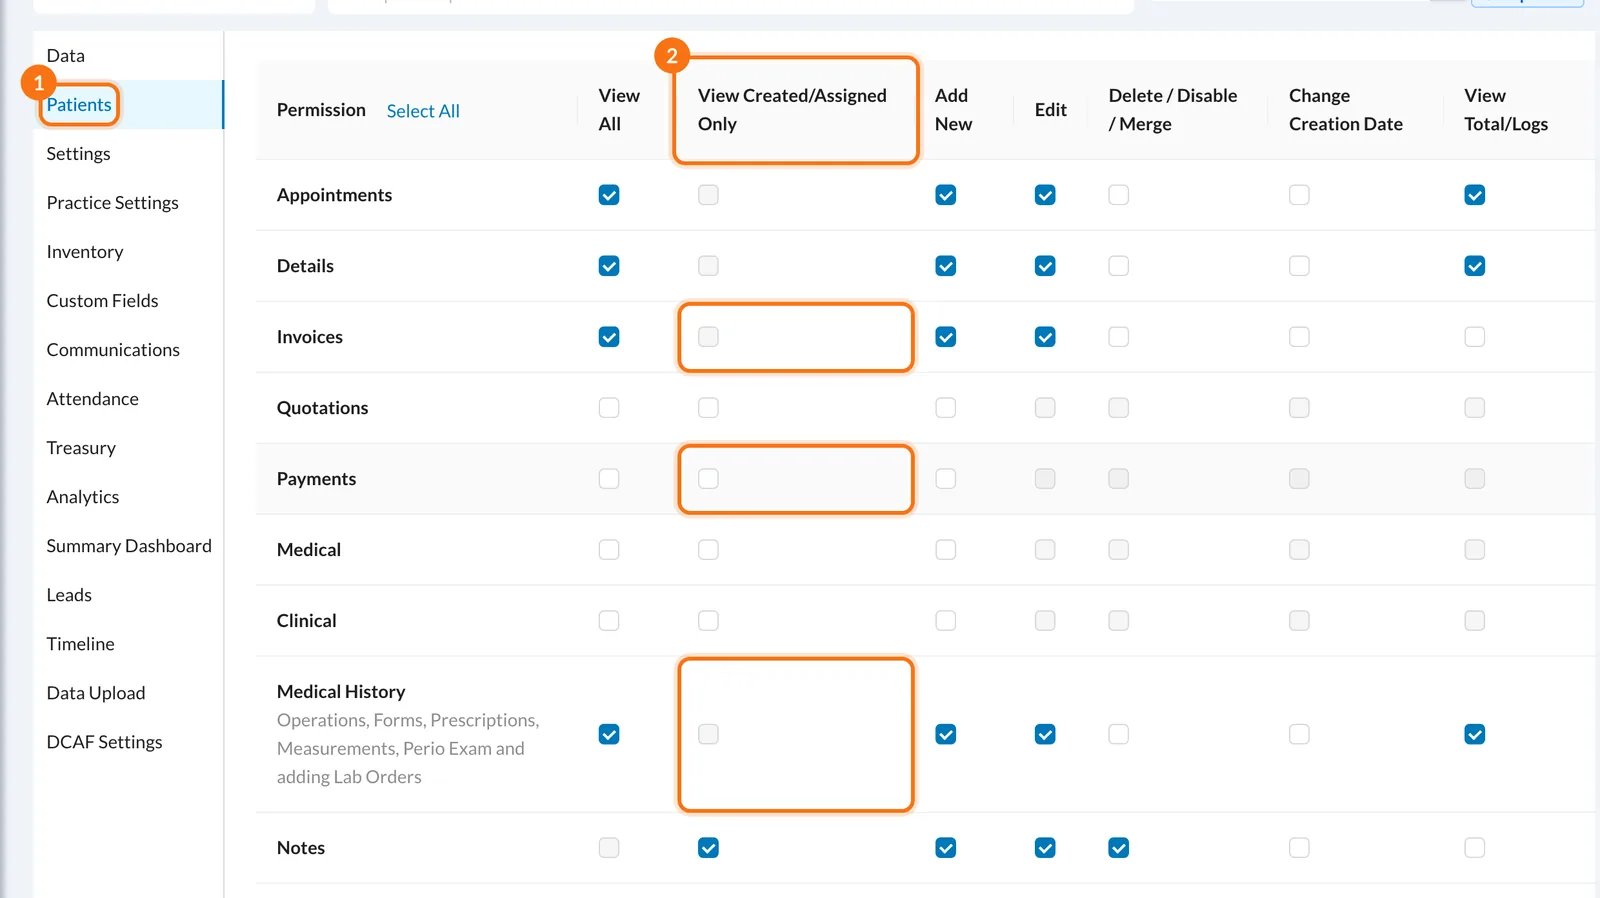
2. Calendar and doctors’ hours
Branch hours are set from the gear in Calendar. Each doctor also has his own hours: in Settings → Users, click the doctor, open User Calendar Settings and set his days off in Open All Days Except.. (3), his Holidays (4), his times for each day (5) and the branch he works in each day (6). Click Update (7). In Calendar, By Doctor shows one column per doctor.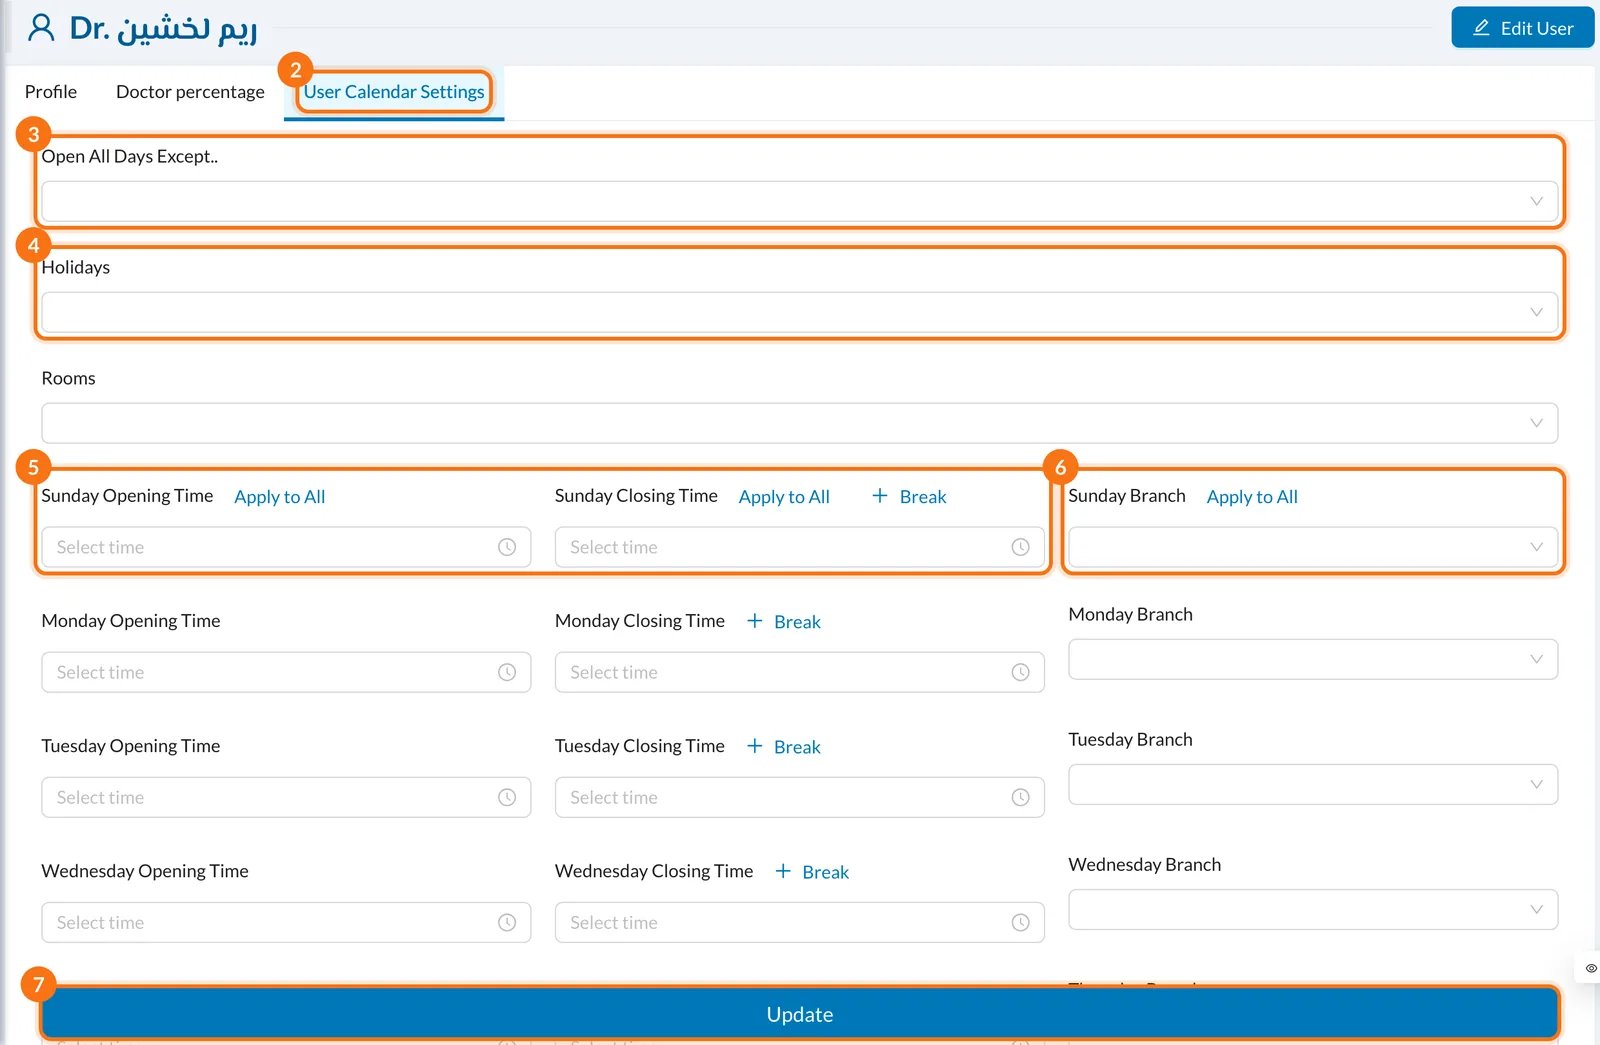
3. Tasks and reminders for the team
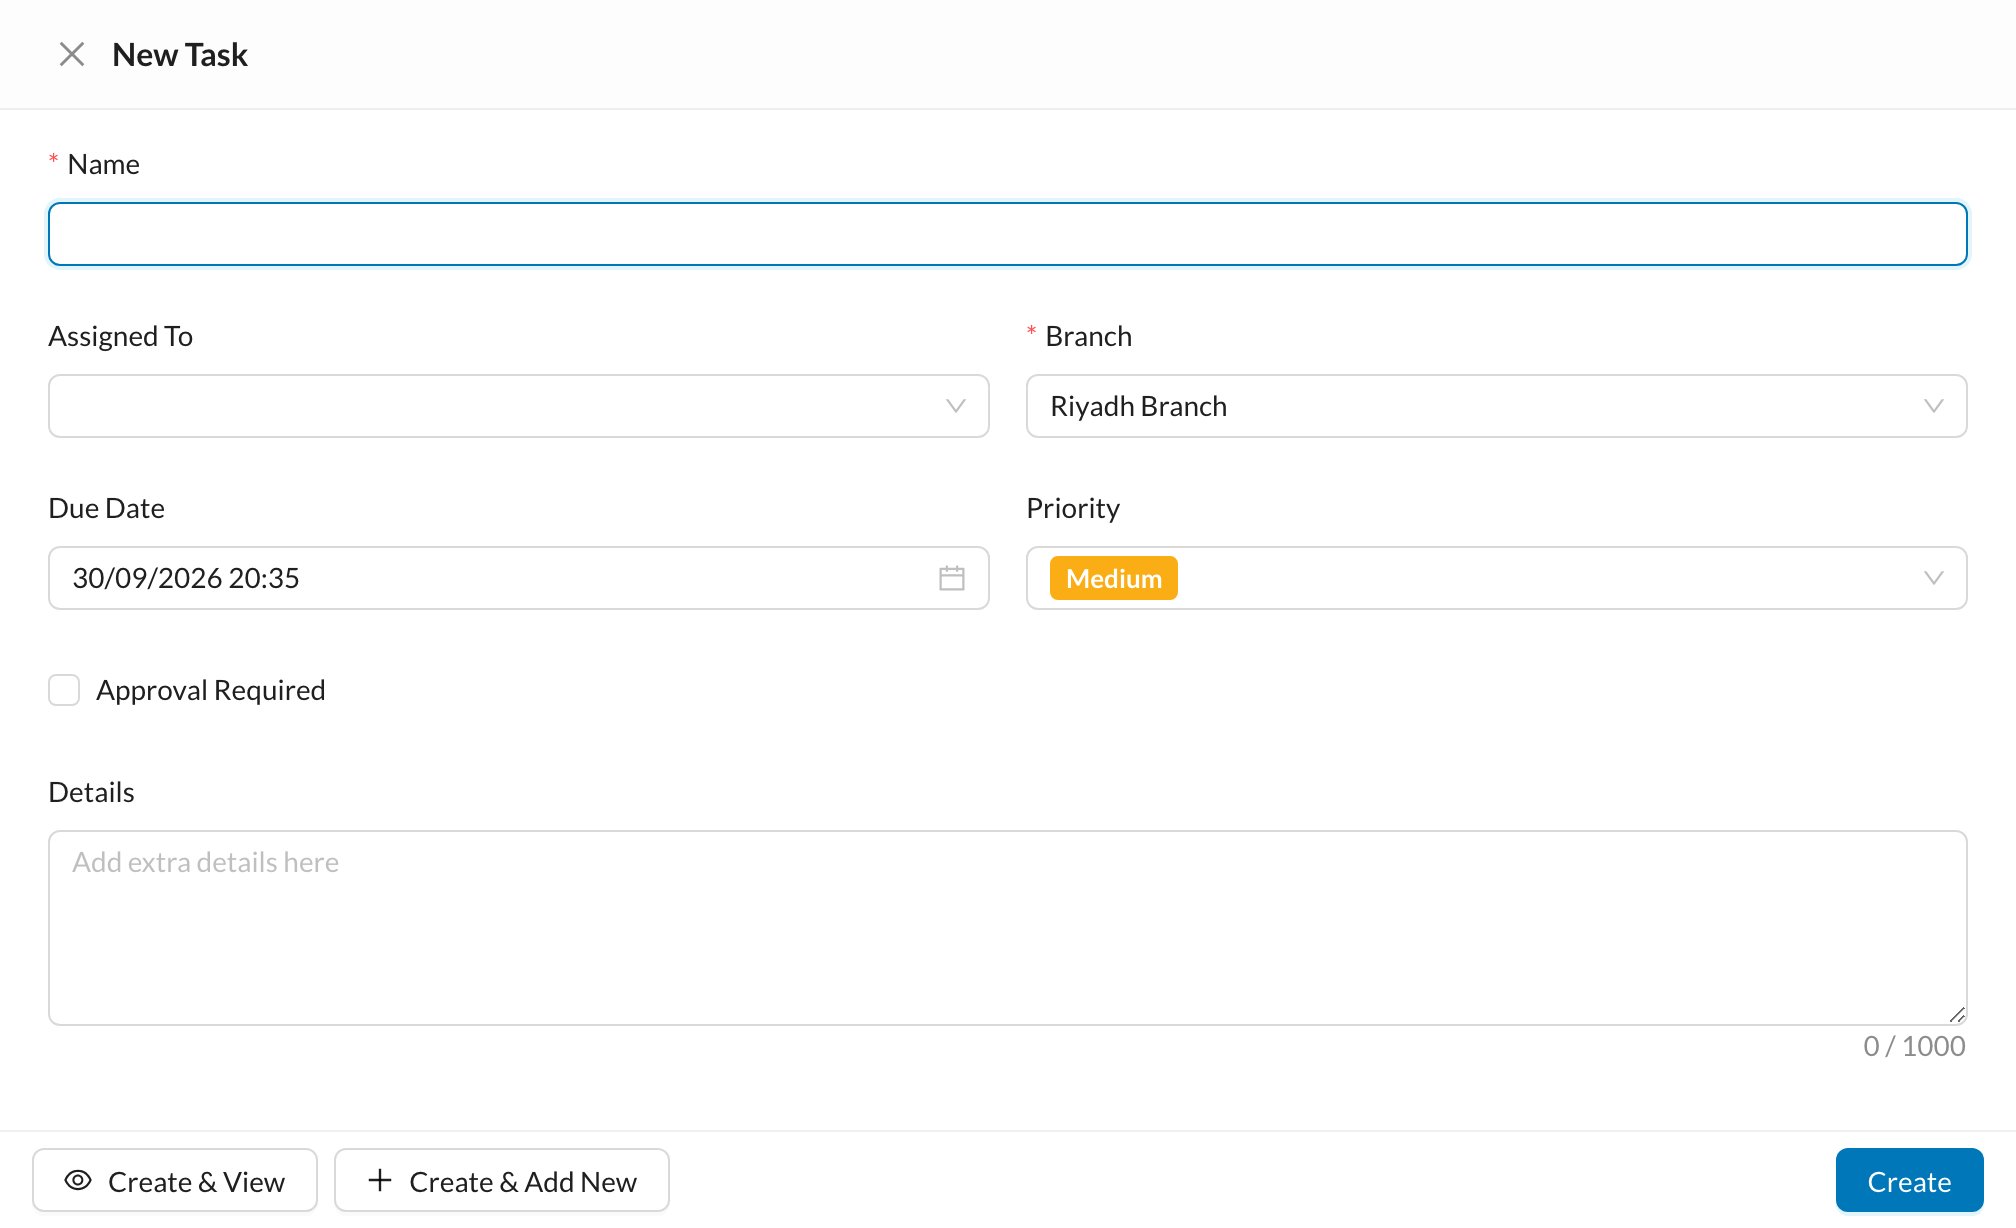
Give a colleague a job, like calling a patient back. Go to Logs → Tasks and click New Task.- Enter the Name, choose who it’s Assigned To and the Branch.
- Set the Due Date and Priority.
- Tick Approval Required if you want to approve it when it’s done, then click Create.
4. Attendance log
Staff clock in with the clock in the top bar. Open Logs → Attendance to see when each shift Started and Ended, its Duration, and whether it is Approved (recorded from the mobile app at the clinic). Filter by dates, branch or user, and click Show Analytics for the Total Hours. Times can’t be edited: add a note in Details. Read more: Attendance5. Reports and analytics
For today, open Dashboard → Summary. For any period, open Analytics: each card is a report. Reports sums up the month on one printable page, Doctors shows each doctor’s work, and Quick Reports has ready-made lists. You see only the reports your permissions allow.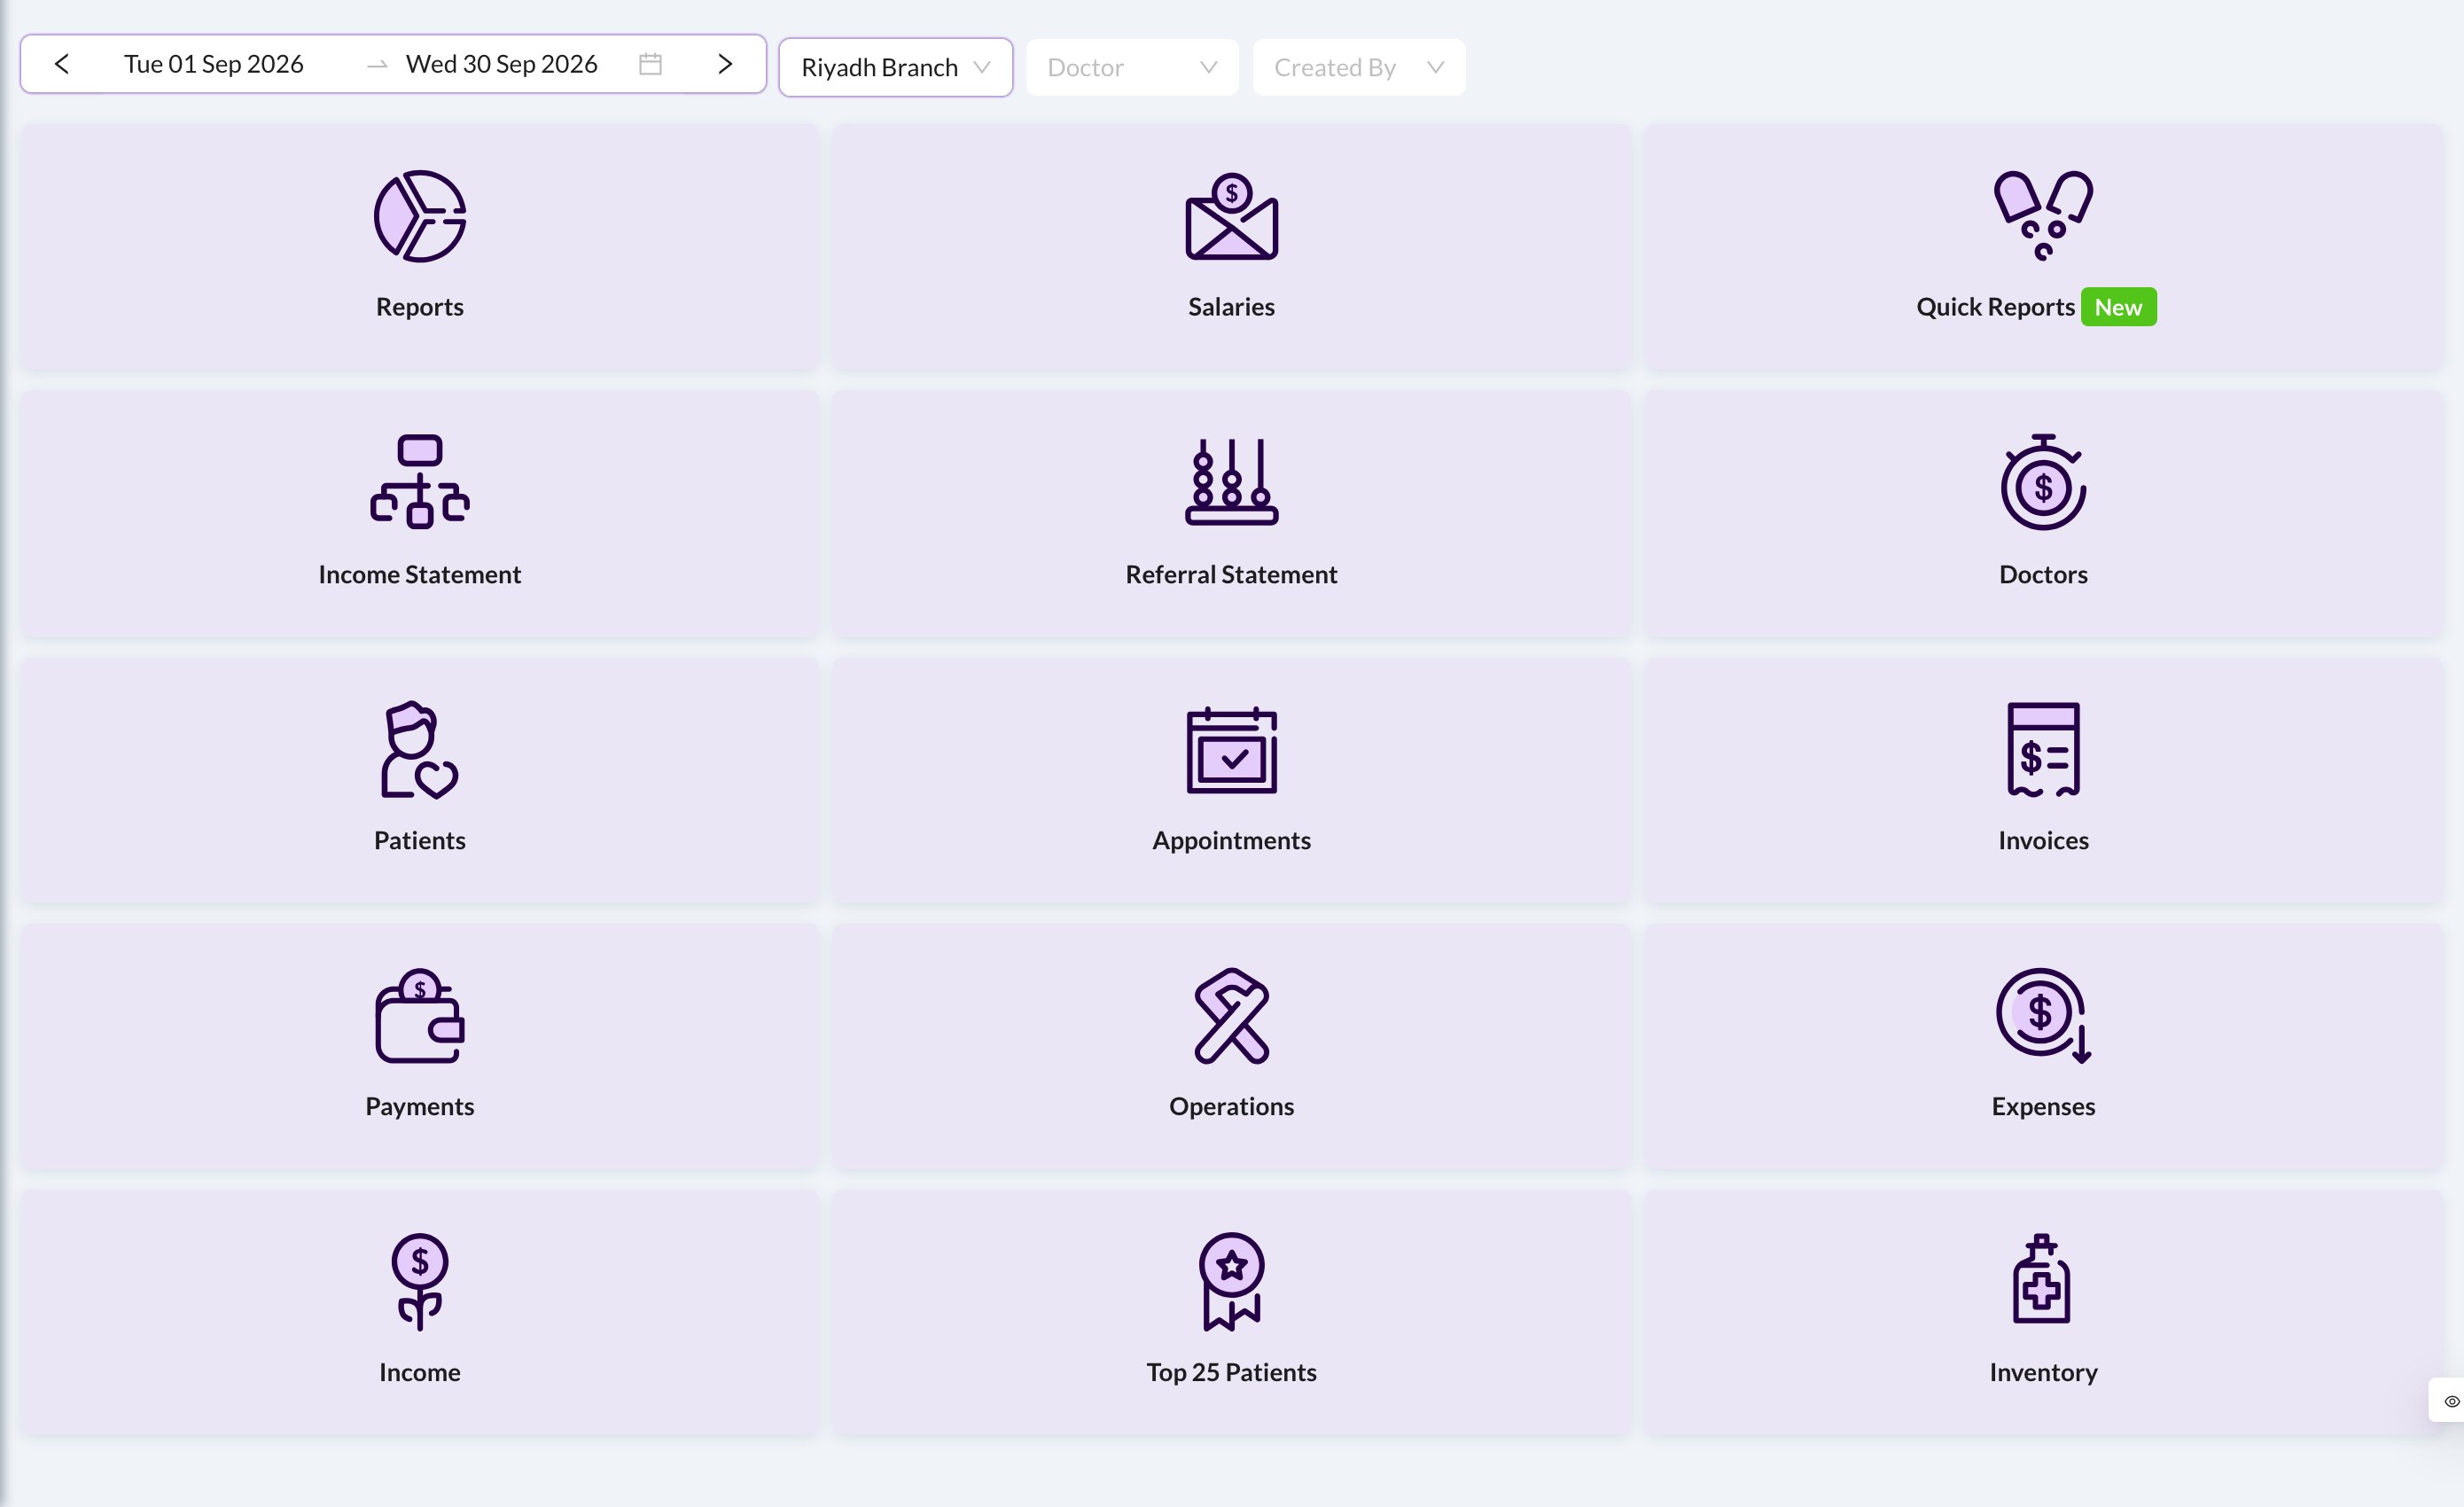
6. Doctors’ salaries and percentages
In Settings → Users, open the doctor and click Edit User. Set Doctor percentage (1), Doctor fees from Diagnostic (2) and Calculate Salary From (3): Payments or Operations. Each month, check Analytics → Salaries with one full month selected. Add bonuses or deductions in Logs → Salary Hub → New Item.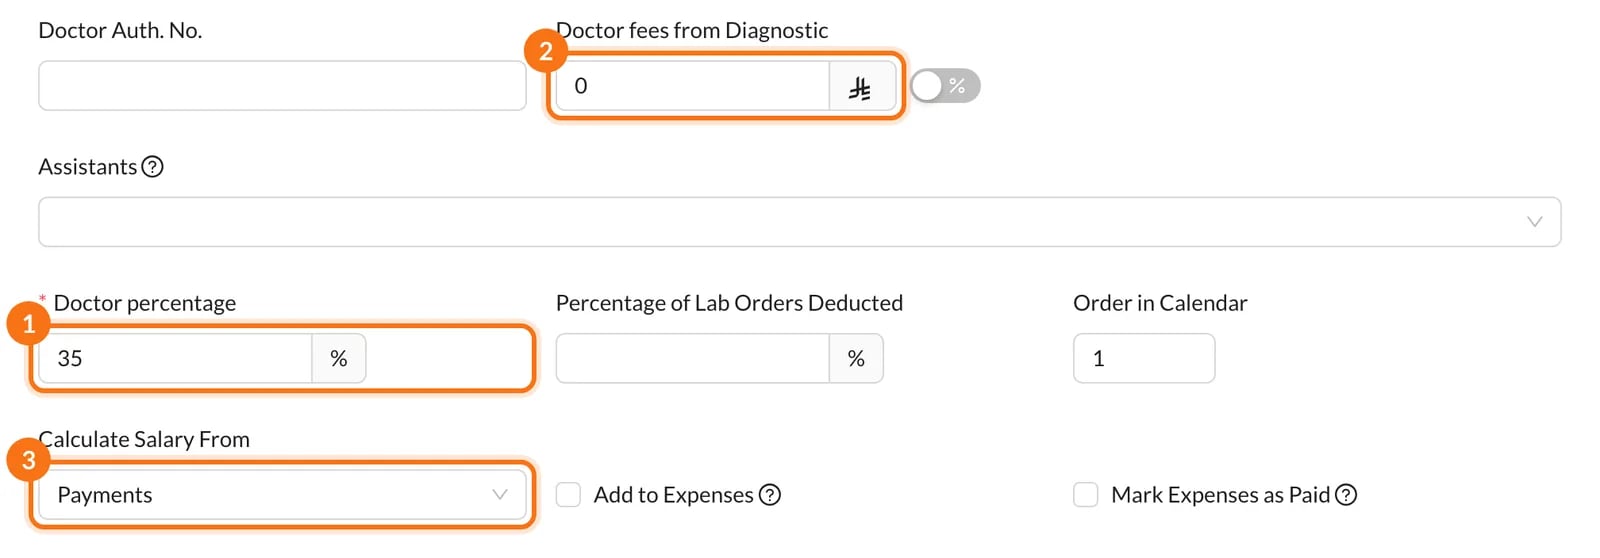
7. Logs and user actions
Logs → User Actions shows who changed what and when, for example an edited invoice or a new payment. Deleted Records lists what was deleted and by whom (it can’t be restored), and Communications lists every SMS and WhatsApp message. Read more: Audit logs · Logs overviewYour first-week checklist
- ☐ Check every user’s group and branches
- ☐ Disable users who have left
- ☐ Check each doctor’s working hours
- ☐ Create a task and follow it to the end
- ☐ Review this week’s attendance log
- ☐ Open Dashboard → Summary each day
- ☐ Check Analytics → Salaries for last month
- ☐ Look through Logs → User Actions
On your phone
- Get the Daily Summary of the clinic every night at 11:30 PM.
- Clock in and out from the app, so your record can be Approved.
- See the day’s appointments and patient files on the go.