

Download the PDF guide
The same guide in 3 pages, to print or keep.
Log in and get the app
- Log in: Open my.dentolize.com (dental) or my.medicolize.com (medical). Log in with your email, or click Or login with username and enter the Clinic Login Name, your username and password.
- Forgot password: Email login: click Forgot your password? and use the link we email you. Username login: ask your clinic owner or admin to reset it in Settings → Users.
- Mobile app: Install it from the links below. One app works for both Dentolize and Medicolize accounts.
my.dentolize.com
Dental clinics
my.medicolize.com
Medical clinics
App Store
iPhone app
Google Play
Android app
1. Your day on the Dashboard
The Dashboard opens after you log in and shows your own appointments for the day. Each row has Start Session (1), the patient’s name (2) and the appointment menu (3).- When the patient goes in, click Start Session (▶) next to the appointment: it becomes In Progress and the patient’s Chart opens.
- Click End Session when you finish: the appointment becomes Completed.

2. Open the patient file and medical history
Click the patient’s name to open their file, with tabs such as Medical, Chart, X-Rays and Timeline. Check Medical before you treat: alerts such as allergies turn the tab icon red and add a red ! to the patient’s appointments. Click Save after changes, then Sign for the patient’s signature. Read more: Medical history · Timeline3. The chart and treatment plan
Add treatments on the patient’s Chart. It follows your specialty: teeth for dental clinics, your own chart for other specialties. Choose Procedures or Conditions (1), set the status (2): P Planned, IN In Progress, C Completed, E Existing. Check the Doctor (3), pick a procedure group (4) and the area to treat (5). Invoice (6) bills the selected treatments.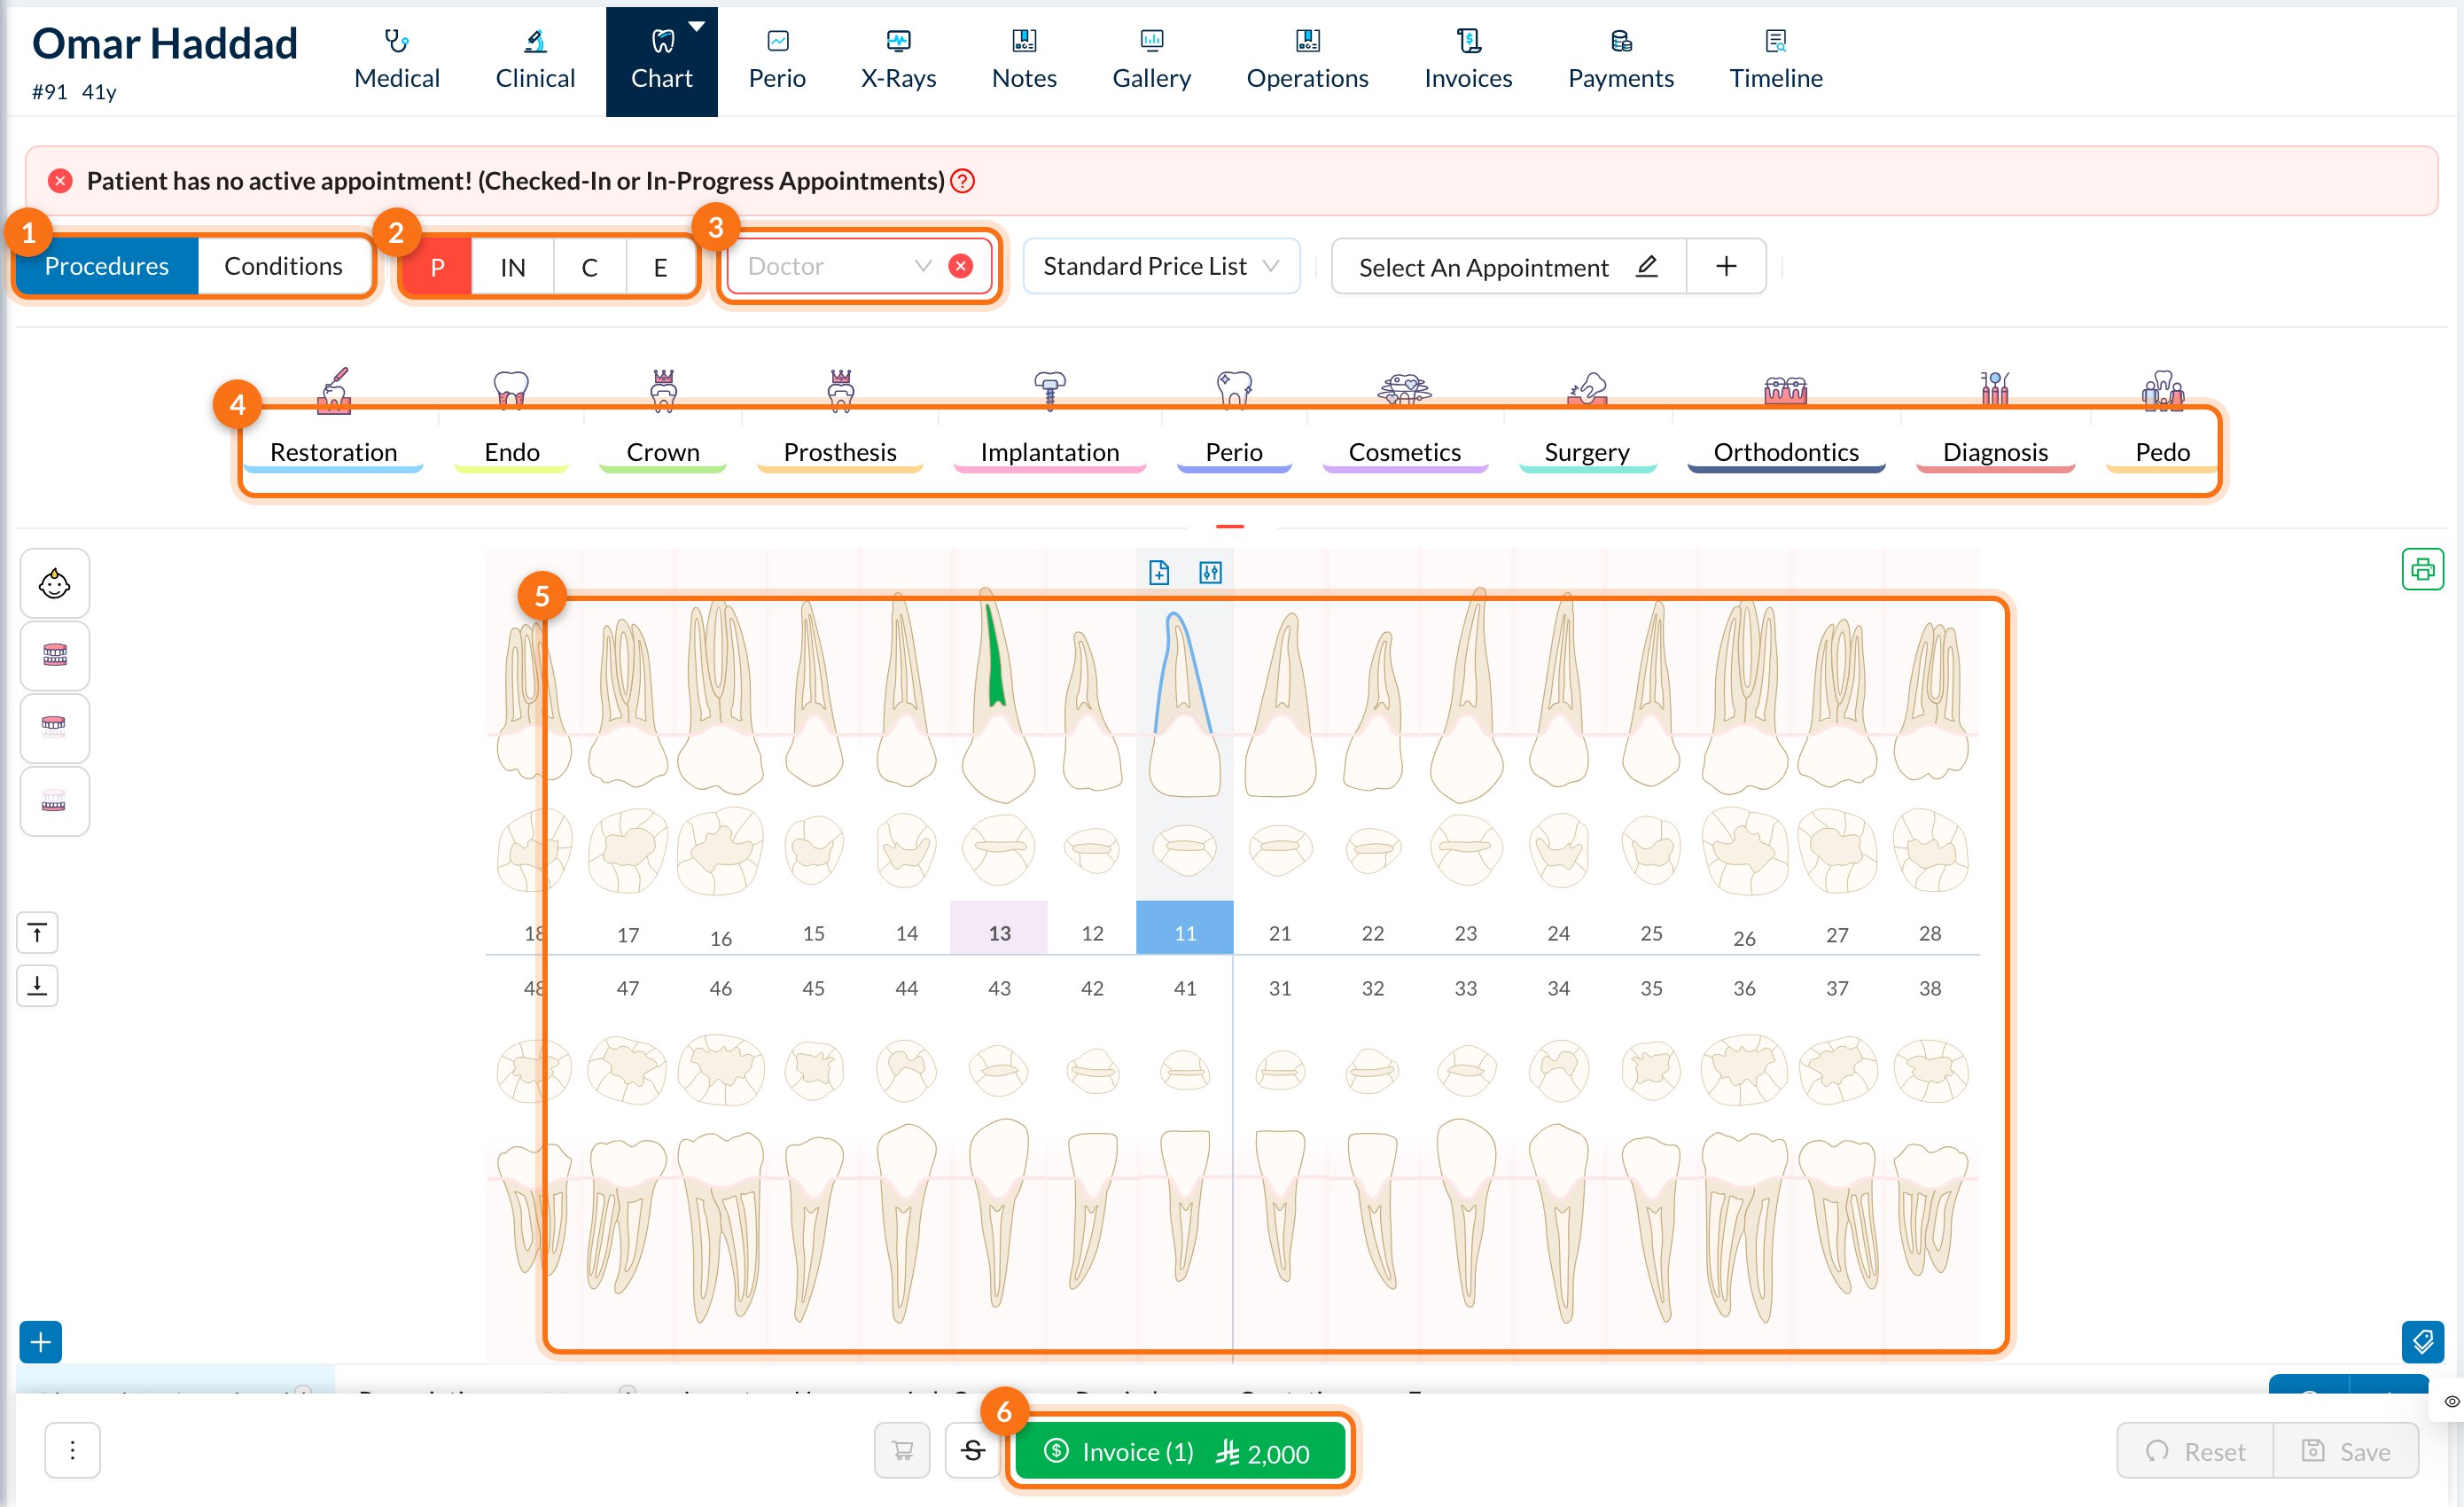
4. Encounters, notes and prescriptions
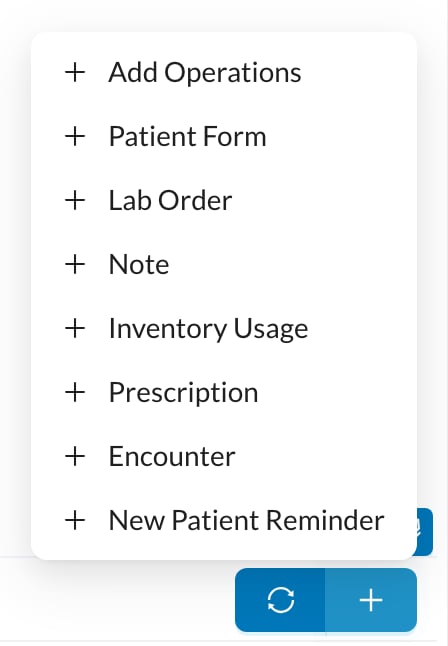
Click + under the chart to add an Encounter (complaint, diagnosis, measurements such as blood pressure and weight), a Note, a Prescription, a Lab Order or a Patient Form. Each one is linked to the active appointment. For a prescription:- Check the Doctor, enter the Medication Name, Dosage / Day and Duration (Days), then click Add Medication for each medicine.
- Click Create, or Print.
5. Quotations and lab orders
For a price estimate, tick the planned treatments (1), click the quotation button (2) at the bottom of the chart, then Create Quotation. The patient can Sign it, and you click Invoice on it when they agree. For lab work, select the treatment, click + → Lab Order, choose the Lab, Lab Item and Due Date, then Create.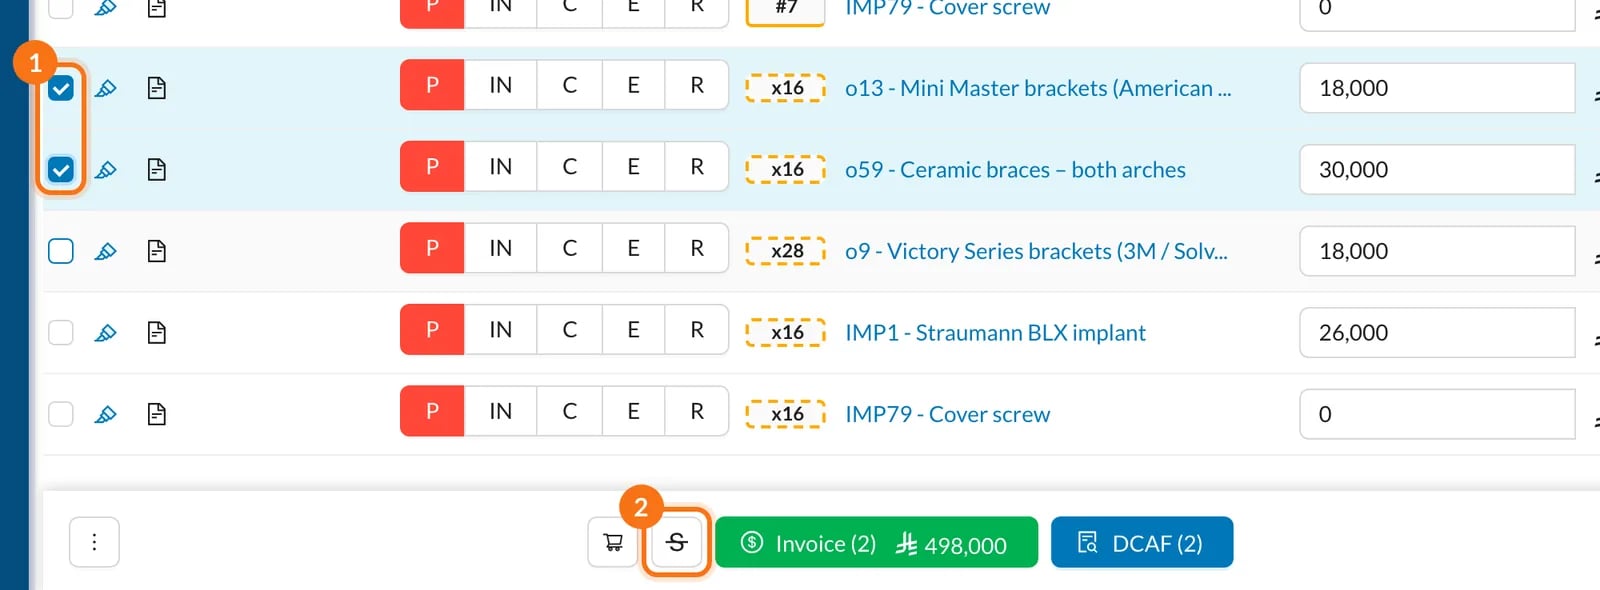
6. Upload files and X-rays
Open the X-Rays tab (1), click New X-Ray (2) and choose a layout or Free Form (3). Drag in the images and click Save. Photos and scans go in the Gallery tab.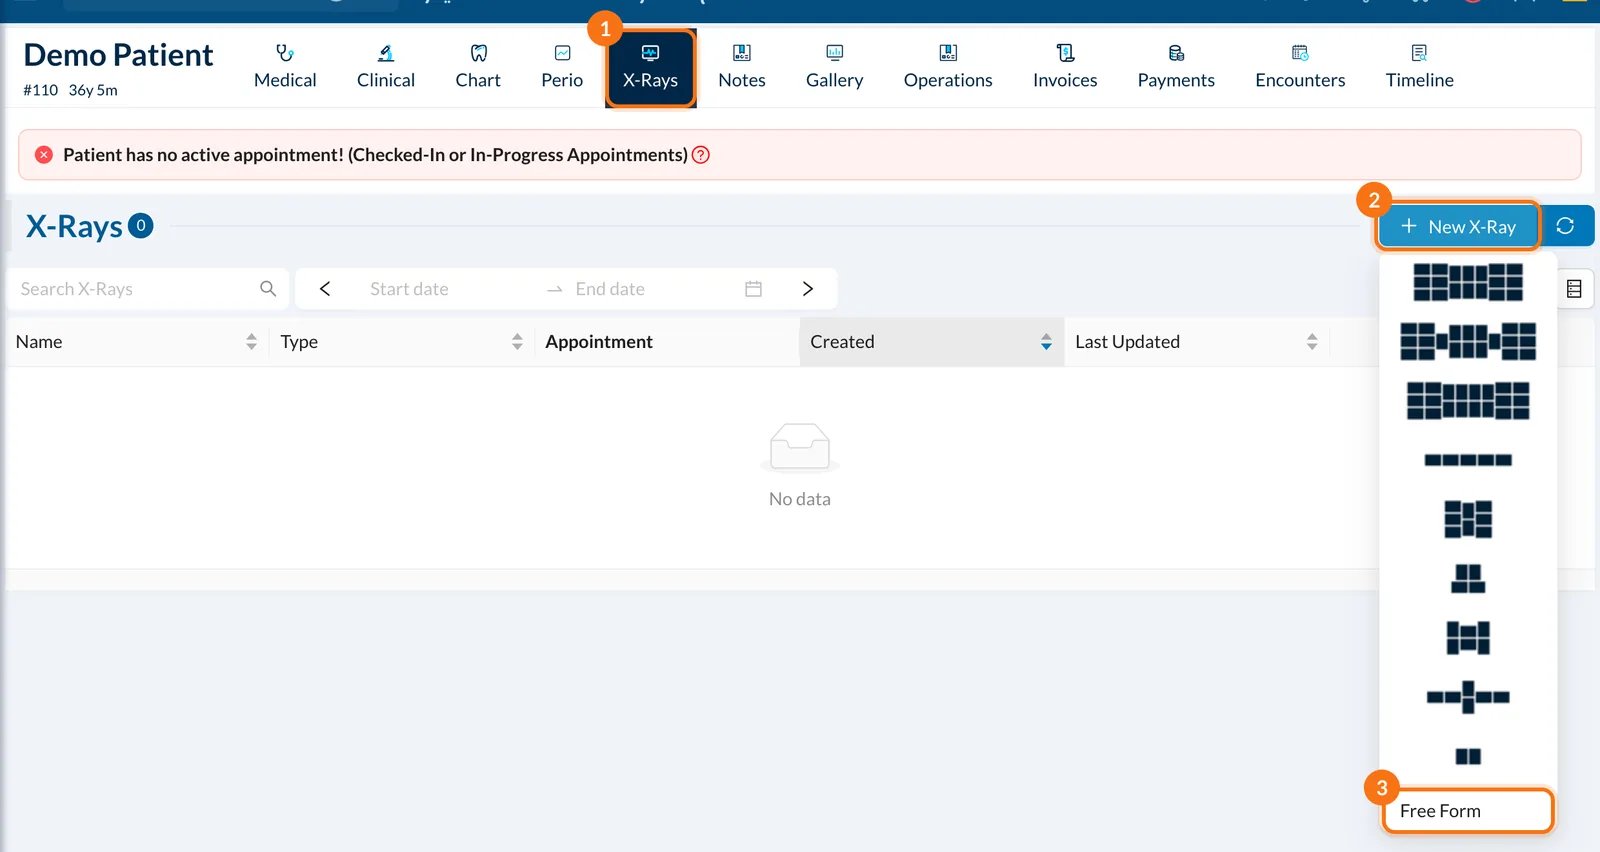
7. Your earnings
Go to Analytics → Salaries and choose one full month (1). For Operator (2) is your share of what patients paid for your treatments. Salary (3) adds fee shares, base salary and bonuses, and takes off lab costs, refunds and deductions. No Analytics? Ask the owner for the Doctors permission on the Analytics tab.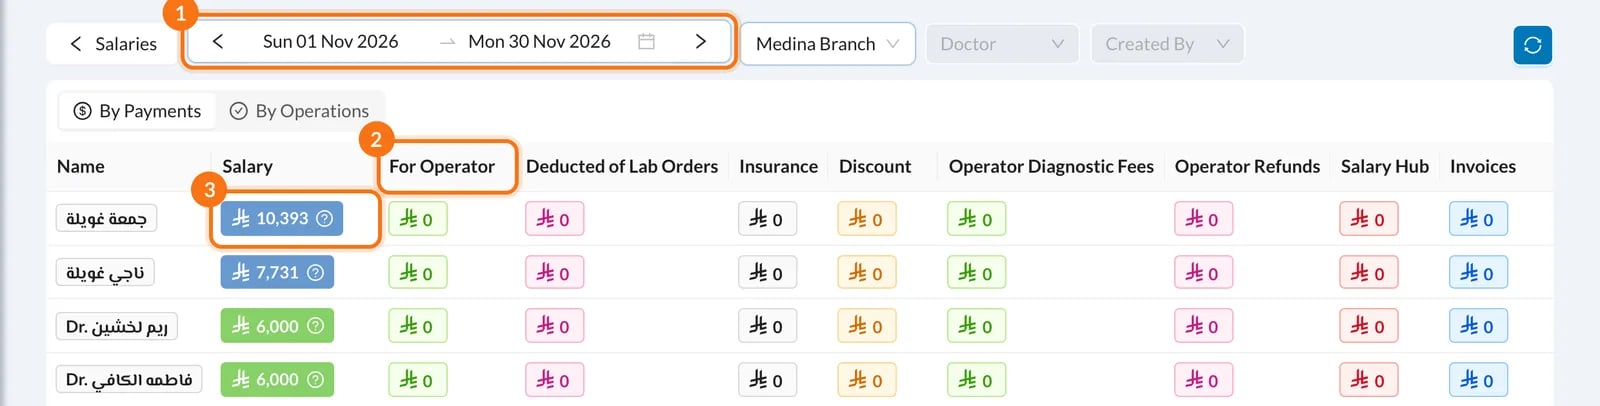
Your first-week checklist
- ☐ Log in and set your language and password
- ☐ Install the app and turn on the daily appointments summary
- ☐ Start and end a session from the Dashboard
- ☐ Add a treatment and mark it Completed
- ☐ Write and print a prescription
- ☐ Upload an X-ray or file
On your phone
- Daily Appointments Summary: your completed visits and tomorrow’s first appointment (turn it on in Settings → Account → Main → Show Notifications For).
- Clock in and out for attendance from your phone.
- Get the notifications you choose, such as due Lab Orders and Patient Reminders.