

Download the PDF guide
The same guide in 3 pages, to print or keep.
Log in and get the app
- Log in: Open my.dentolize.com (dental) or my.medicolize.com (medical). Log in with your email, or click Or login with username and enter the Clinic Login Name, your username and password.
- Forgot password: Email login: click Forgot your password? and use the link we email you. Username login: ask your clinic owner or admin to reset it in Settings → Users.
- Mobile app: Install it from the links below. One app works for both Dentolize and Medicolize accounts.
my.dentolize.com
Dental clinics
my.medicolize.com
Medical clinics
App Store
iPhone app
Google Play
Android app
1. Clinic, branches and opening hours
In Settings → Clinic → Main, check the Clinic Name, Clinic Login Name, Currency, Tax, Default Language for Patients and Company Logo. In Settings → Branches, set each branch’s address, phone numbers and Diagnostic Fees. Then set the hours: in Calendar, click the gear and change the Opening Time (1) and Closing Time (2) for each day. Apply to All (3) copies the first day to the others, and Break (4) adds a break between two shifts. Click Update.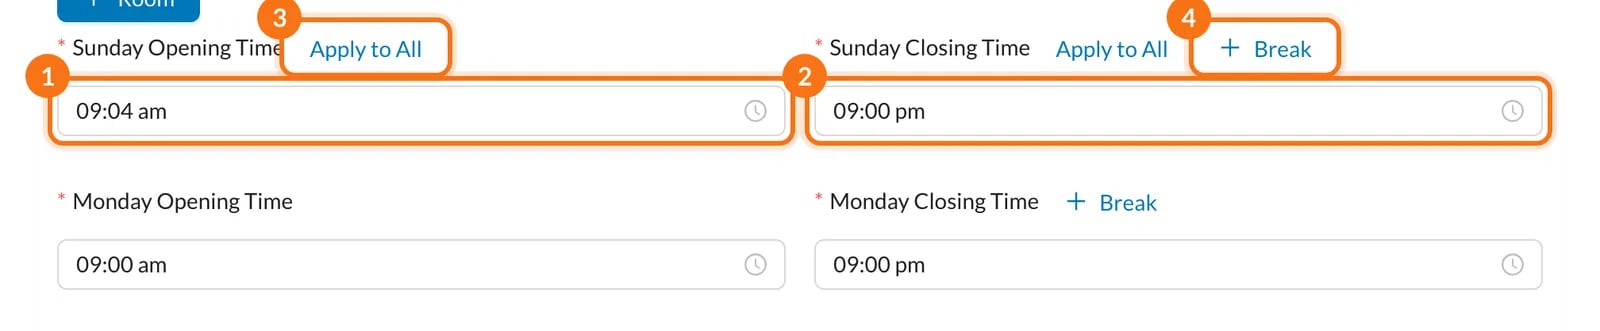
2. Add your team and their permissions
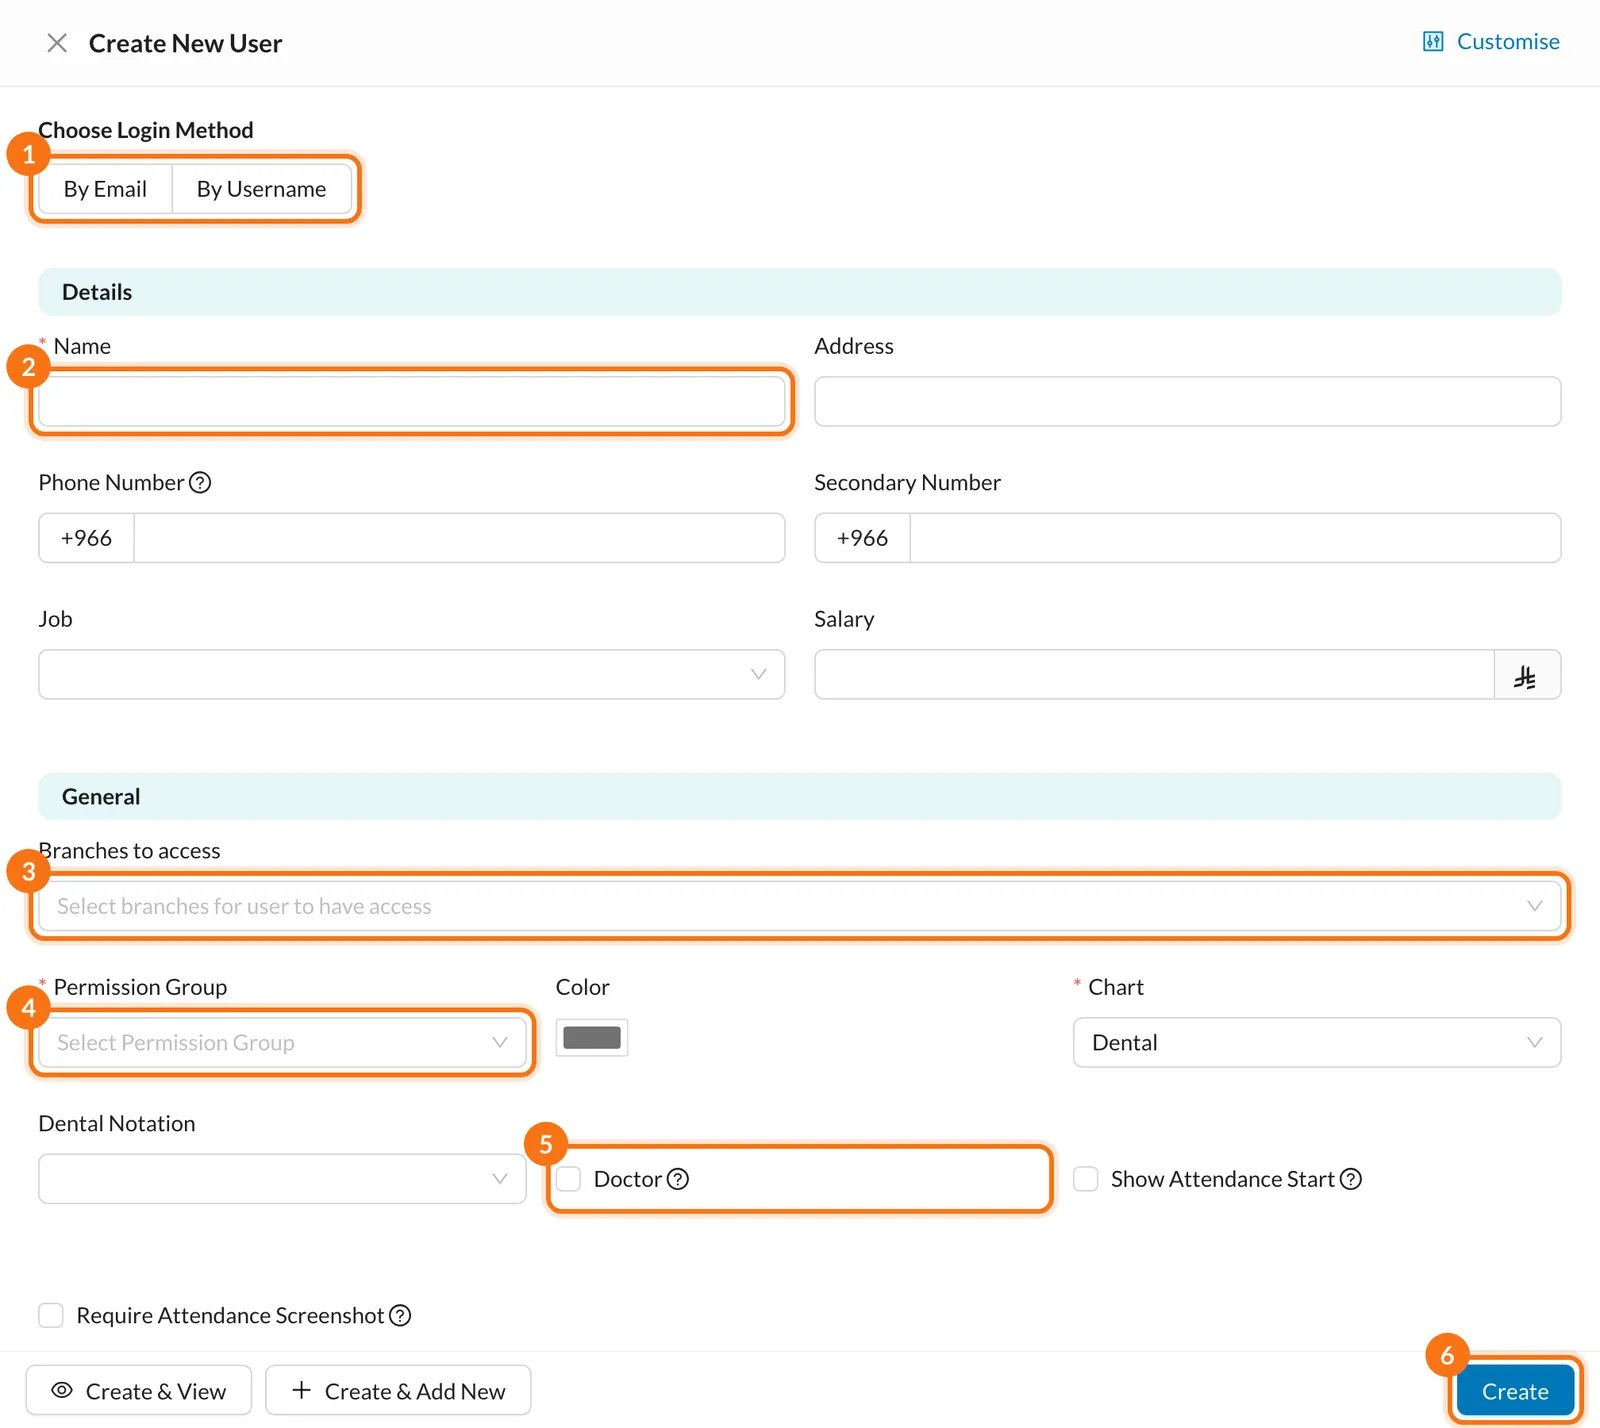
Go to Settings → Users and click New User.- Choose the login method (1): By Email or By Username.
- Enter the Name (2) and pick the Branches to access (3).
- Choose a Permission Group (4), such as Doctors or Reception.
- For a doctor, tick Doctor (5) and set Doctor percentage: it starts at 100%.
- Click Create (6).
3. Procedures and prices
Go to Settings → Procedures and Prices. Procedures are grouped in tabs (1); click + (2) to add a group. Click New Field (3) at the bottom of a group to add a procedure with its Price, or edit prices directly in the table and click Save. Price lists hold different prices, for example for an insurance company.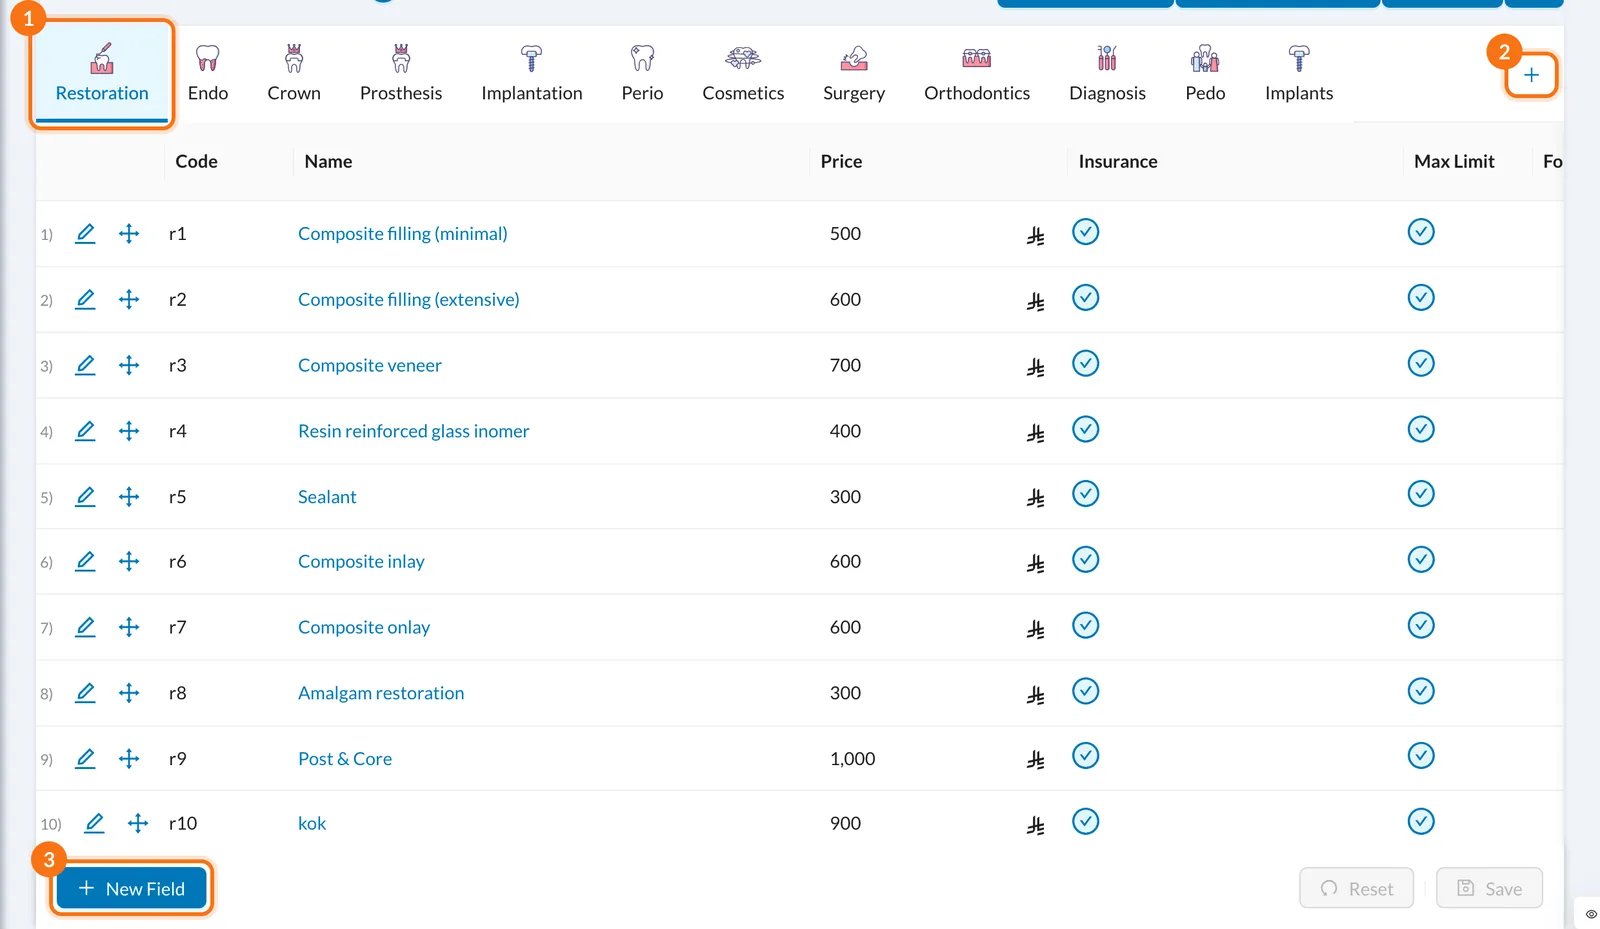
4. Messages, WhatsApp bot and SMS
Automatic messages are templates in Settings → Templates → SMS. Click New SMS, choose Send When (1), for example a reminder before appointments, and the Message Channels (2): SMS or WhatsApp Bot. Your SMS balance is under Available Messages in Settings → Clinic → Main. To link the WhatsApp bot, use the owner account: Settings → Integrations → WhatsApp Bot → Login with Facebook.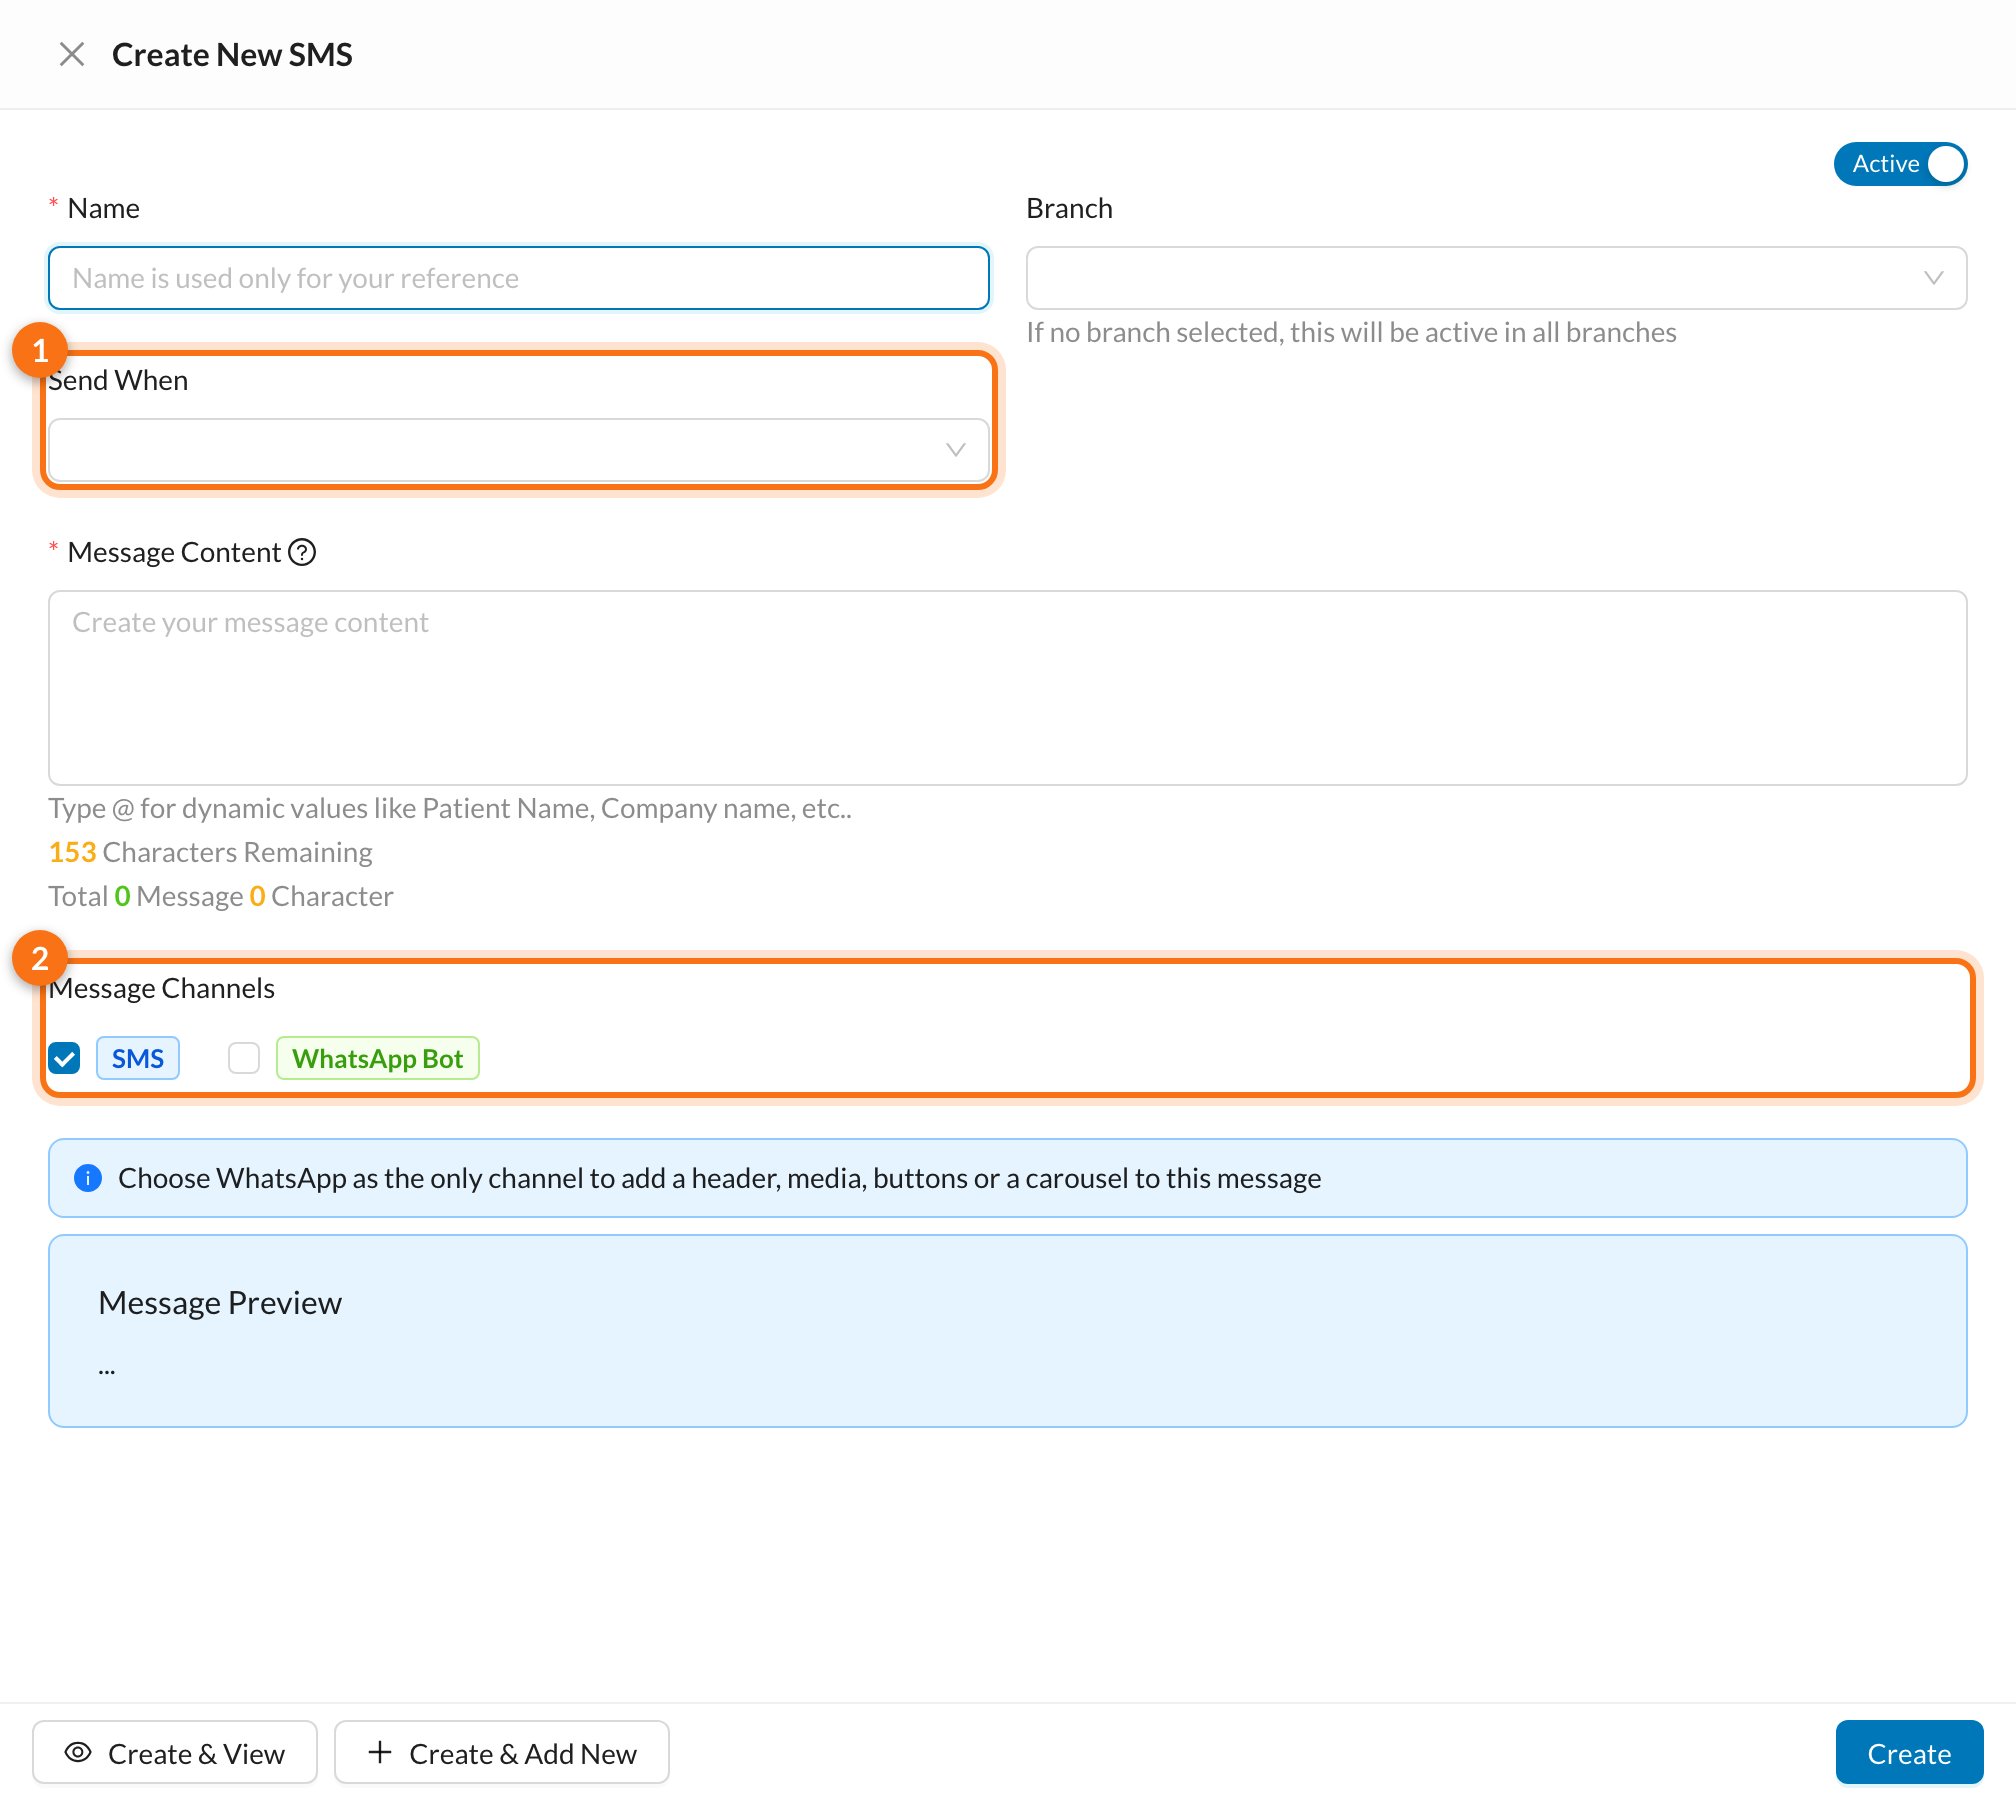
5. Online payments
Let patients pay an invoice by card from a link: go to Settings → Integrations → Online Payments, turn on Active, click New Item, and enter the Name, Payment Provider, its credentials and the Received Treasury. Choose the Default Payment Provider and click Update. Staff then click Generate Payment Link on an invoice. Feature Disabled? Ask support to enable it. Read more: Online payments6. Follow the clinic every day
Open Dashboard → Summary to see one day in numbers. Pick the Date (1) and Branch (2); Finance Flow (3) is the money received minus the money paid out. For a month, use Analytics → Reports or Income Statement.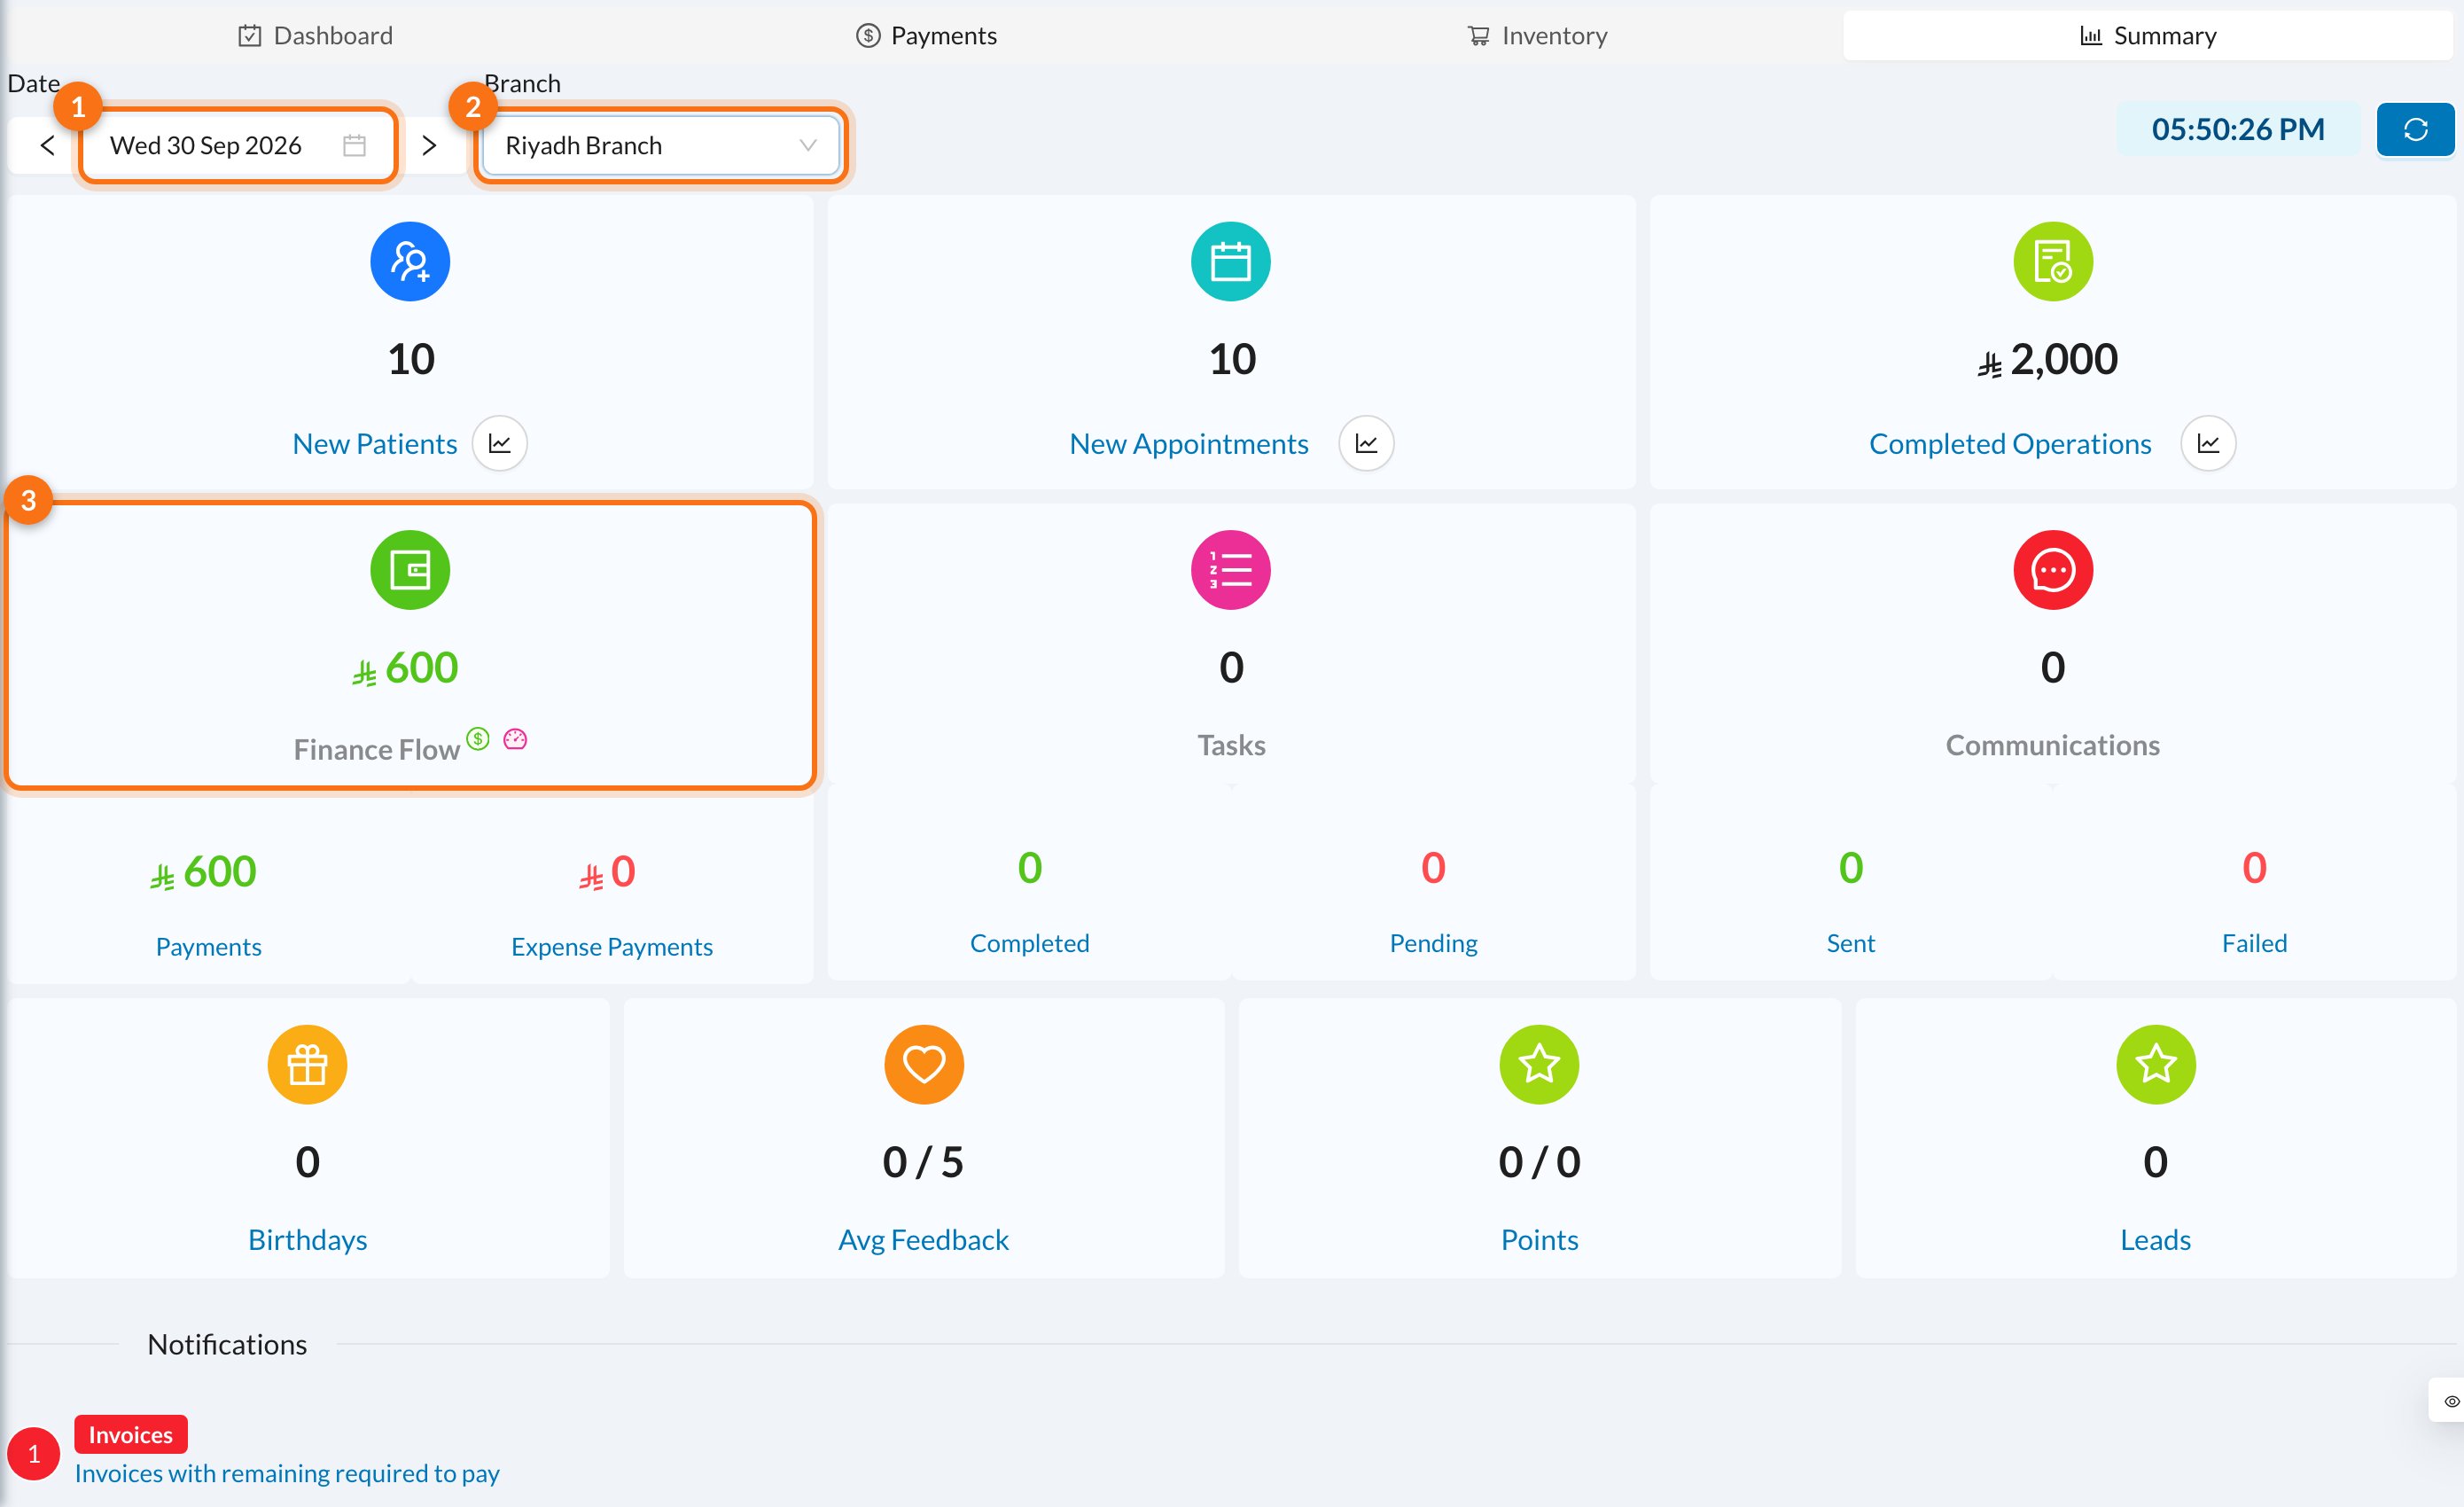
Your first-week checklist
- ☐ Check the clinic details, currency and tax
- ☐ Set each branch’s opening hours and holidays
- ☐ Add every user with the right group
- ☐ Set doctors’ percentages and hours
- ☐ Review your procedures and prices
- ☐ Turn on reminders, check SMS balance
- ☐ Set up online payments (and ZATCA)
- ☐ Turn on the Daily Summary in Settings → Account
On your phone
- Get the Daily Summary of the clinic every night at 11:30 PM.
- See the day’s appointments and patient files on the go.
- Clock in and out for attendance, and get notifications.